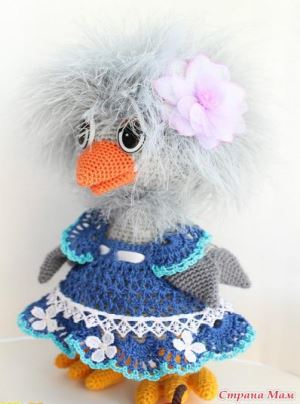
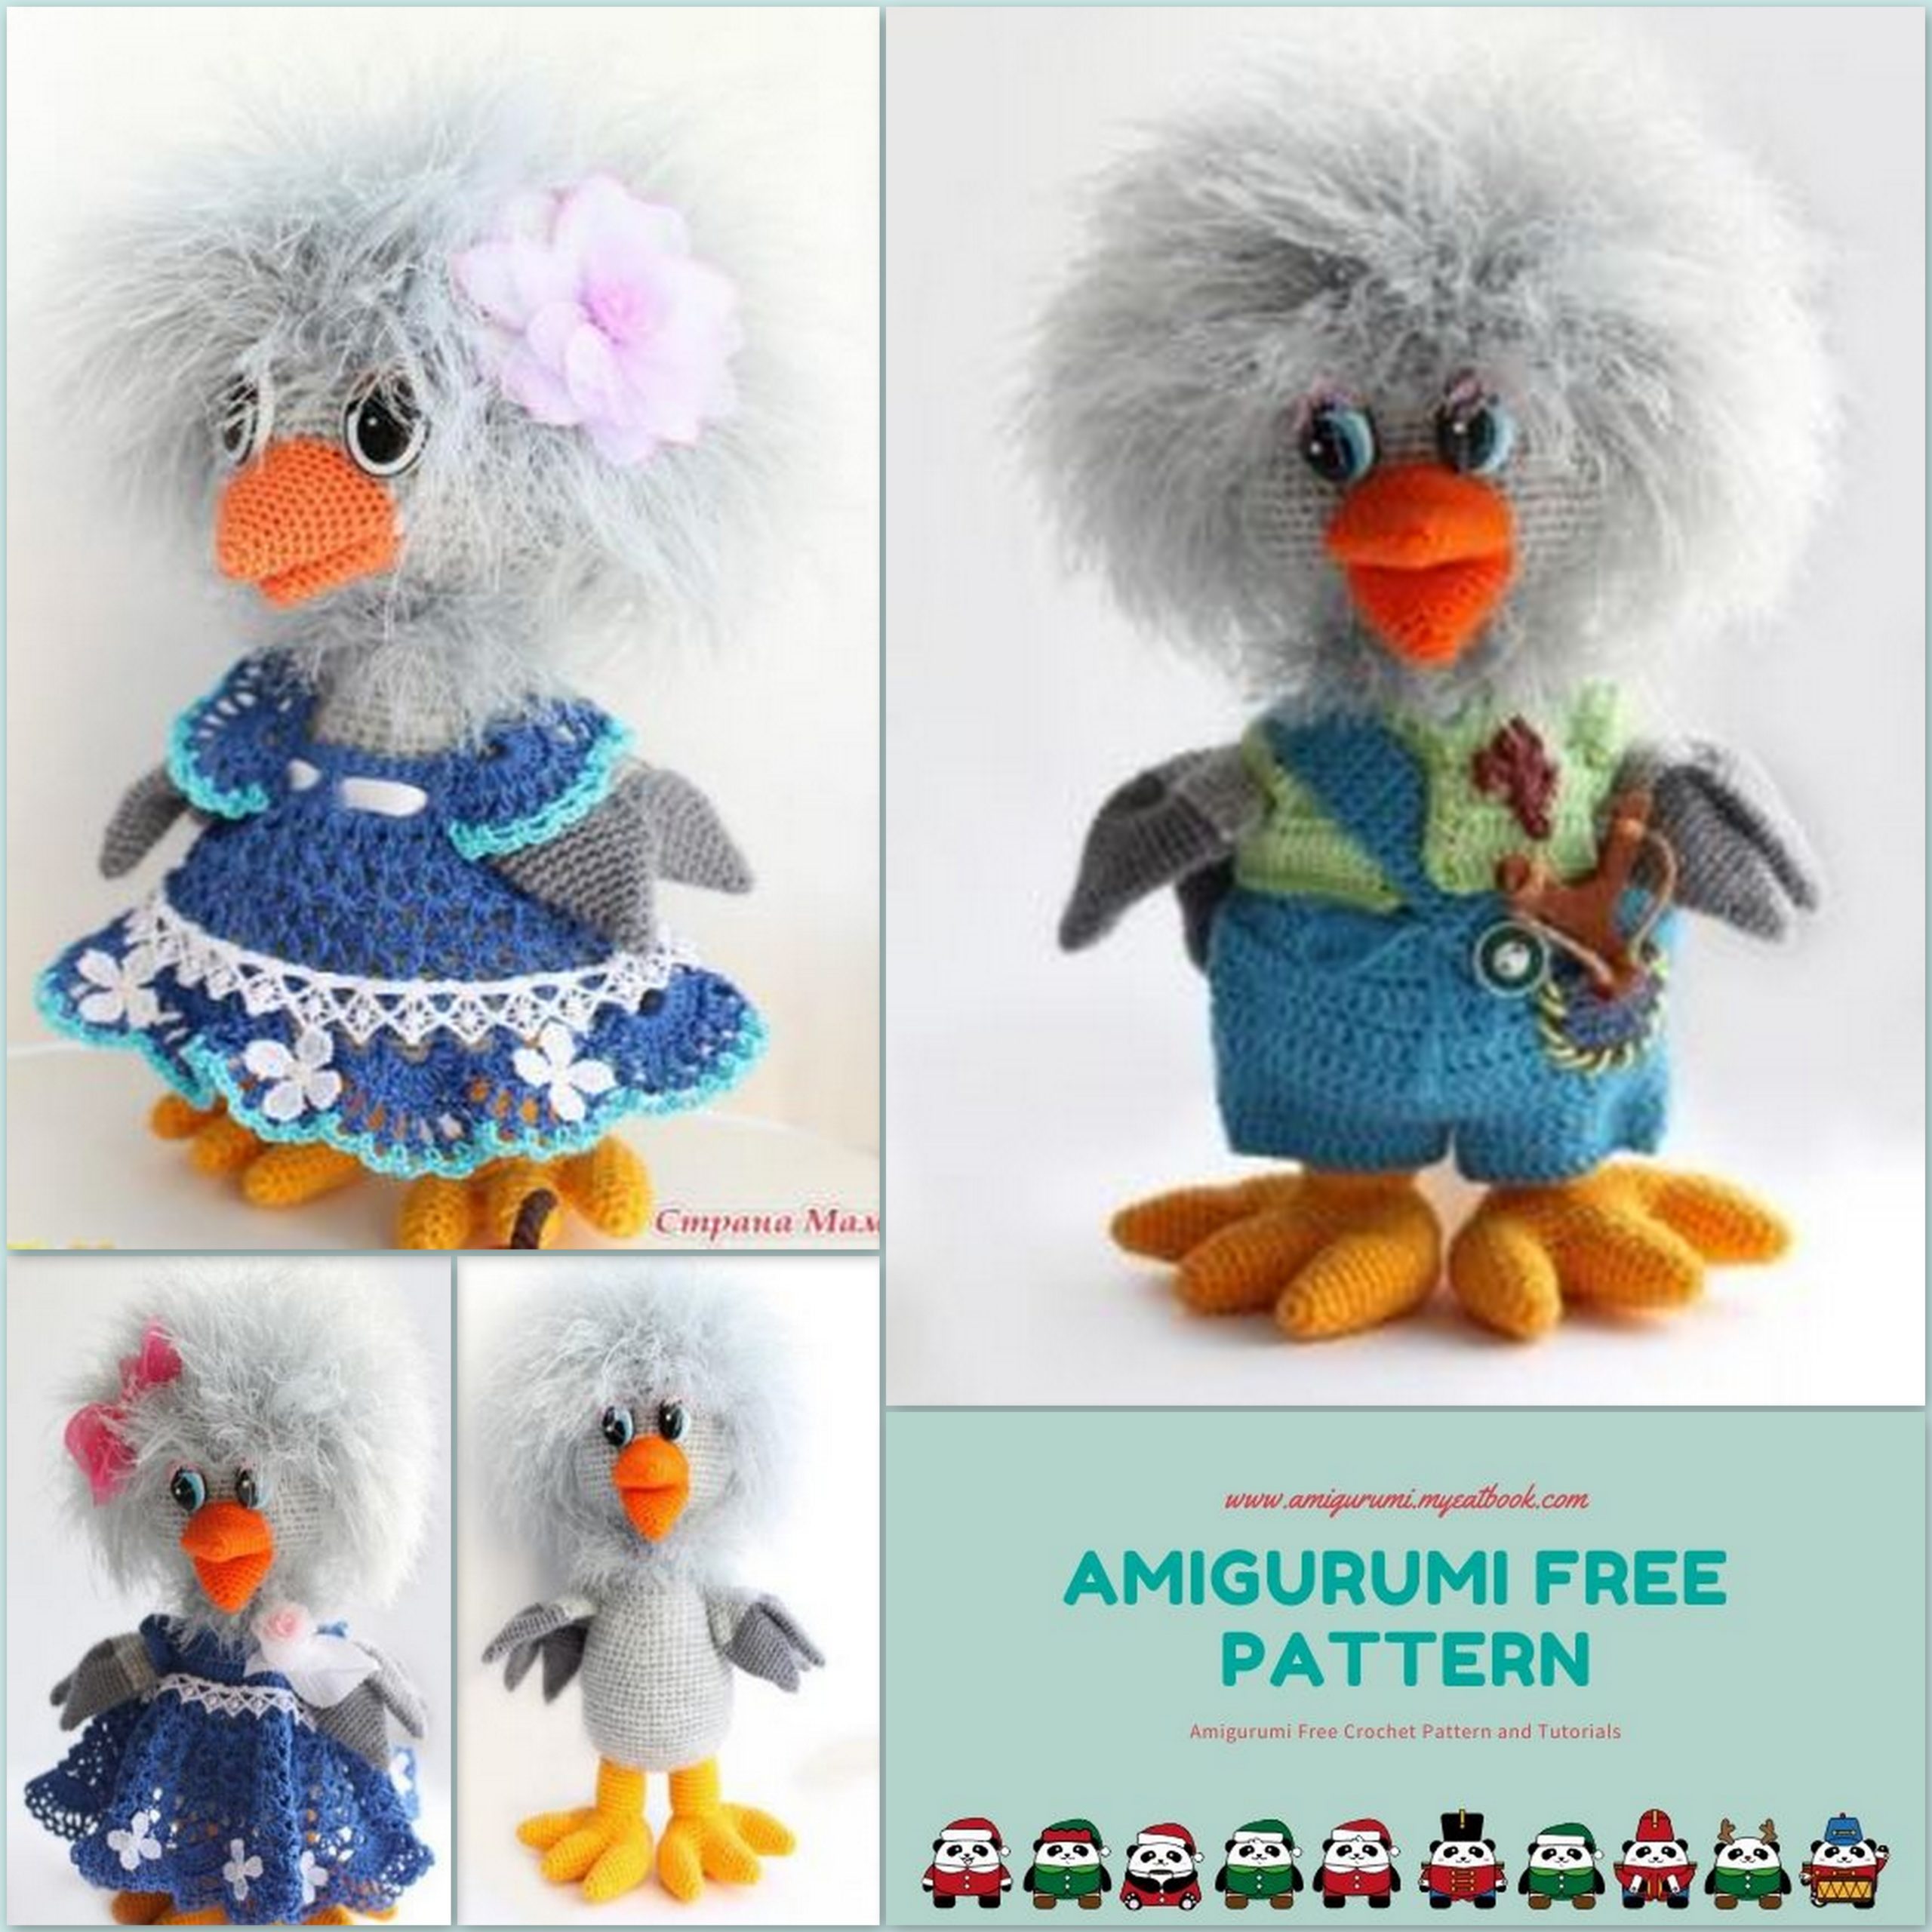
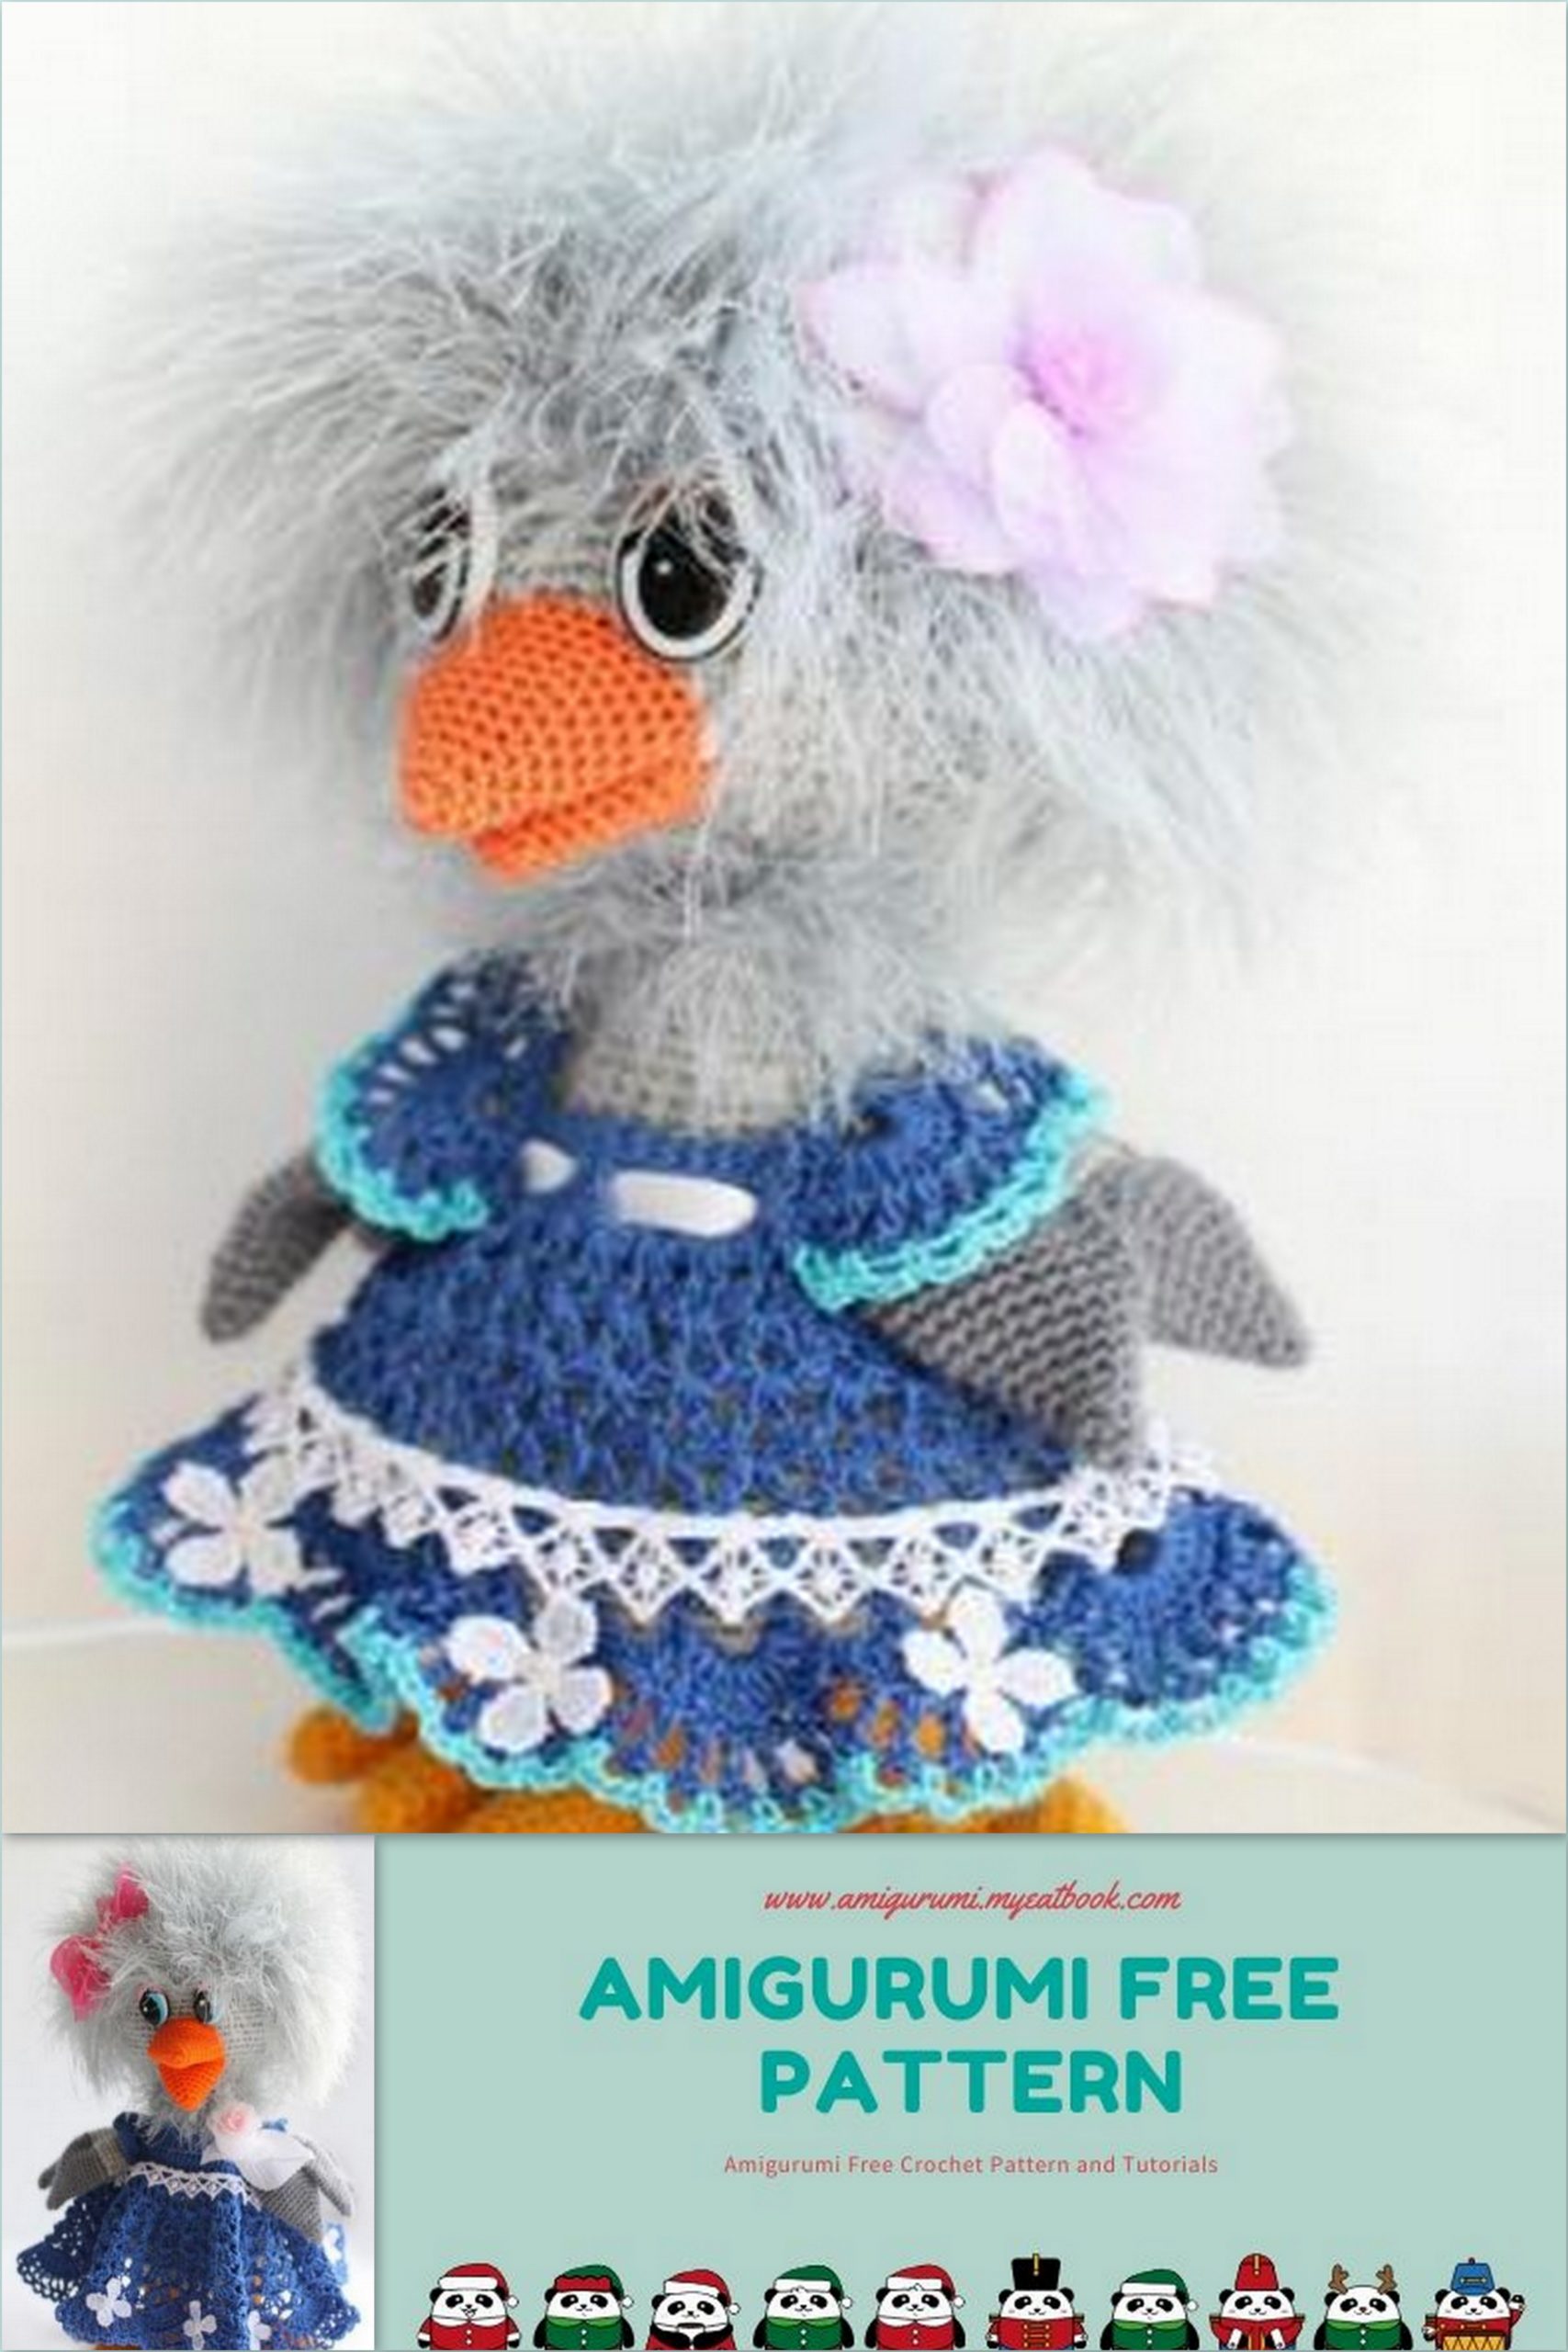
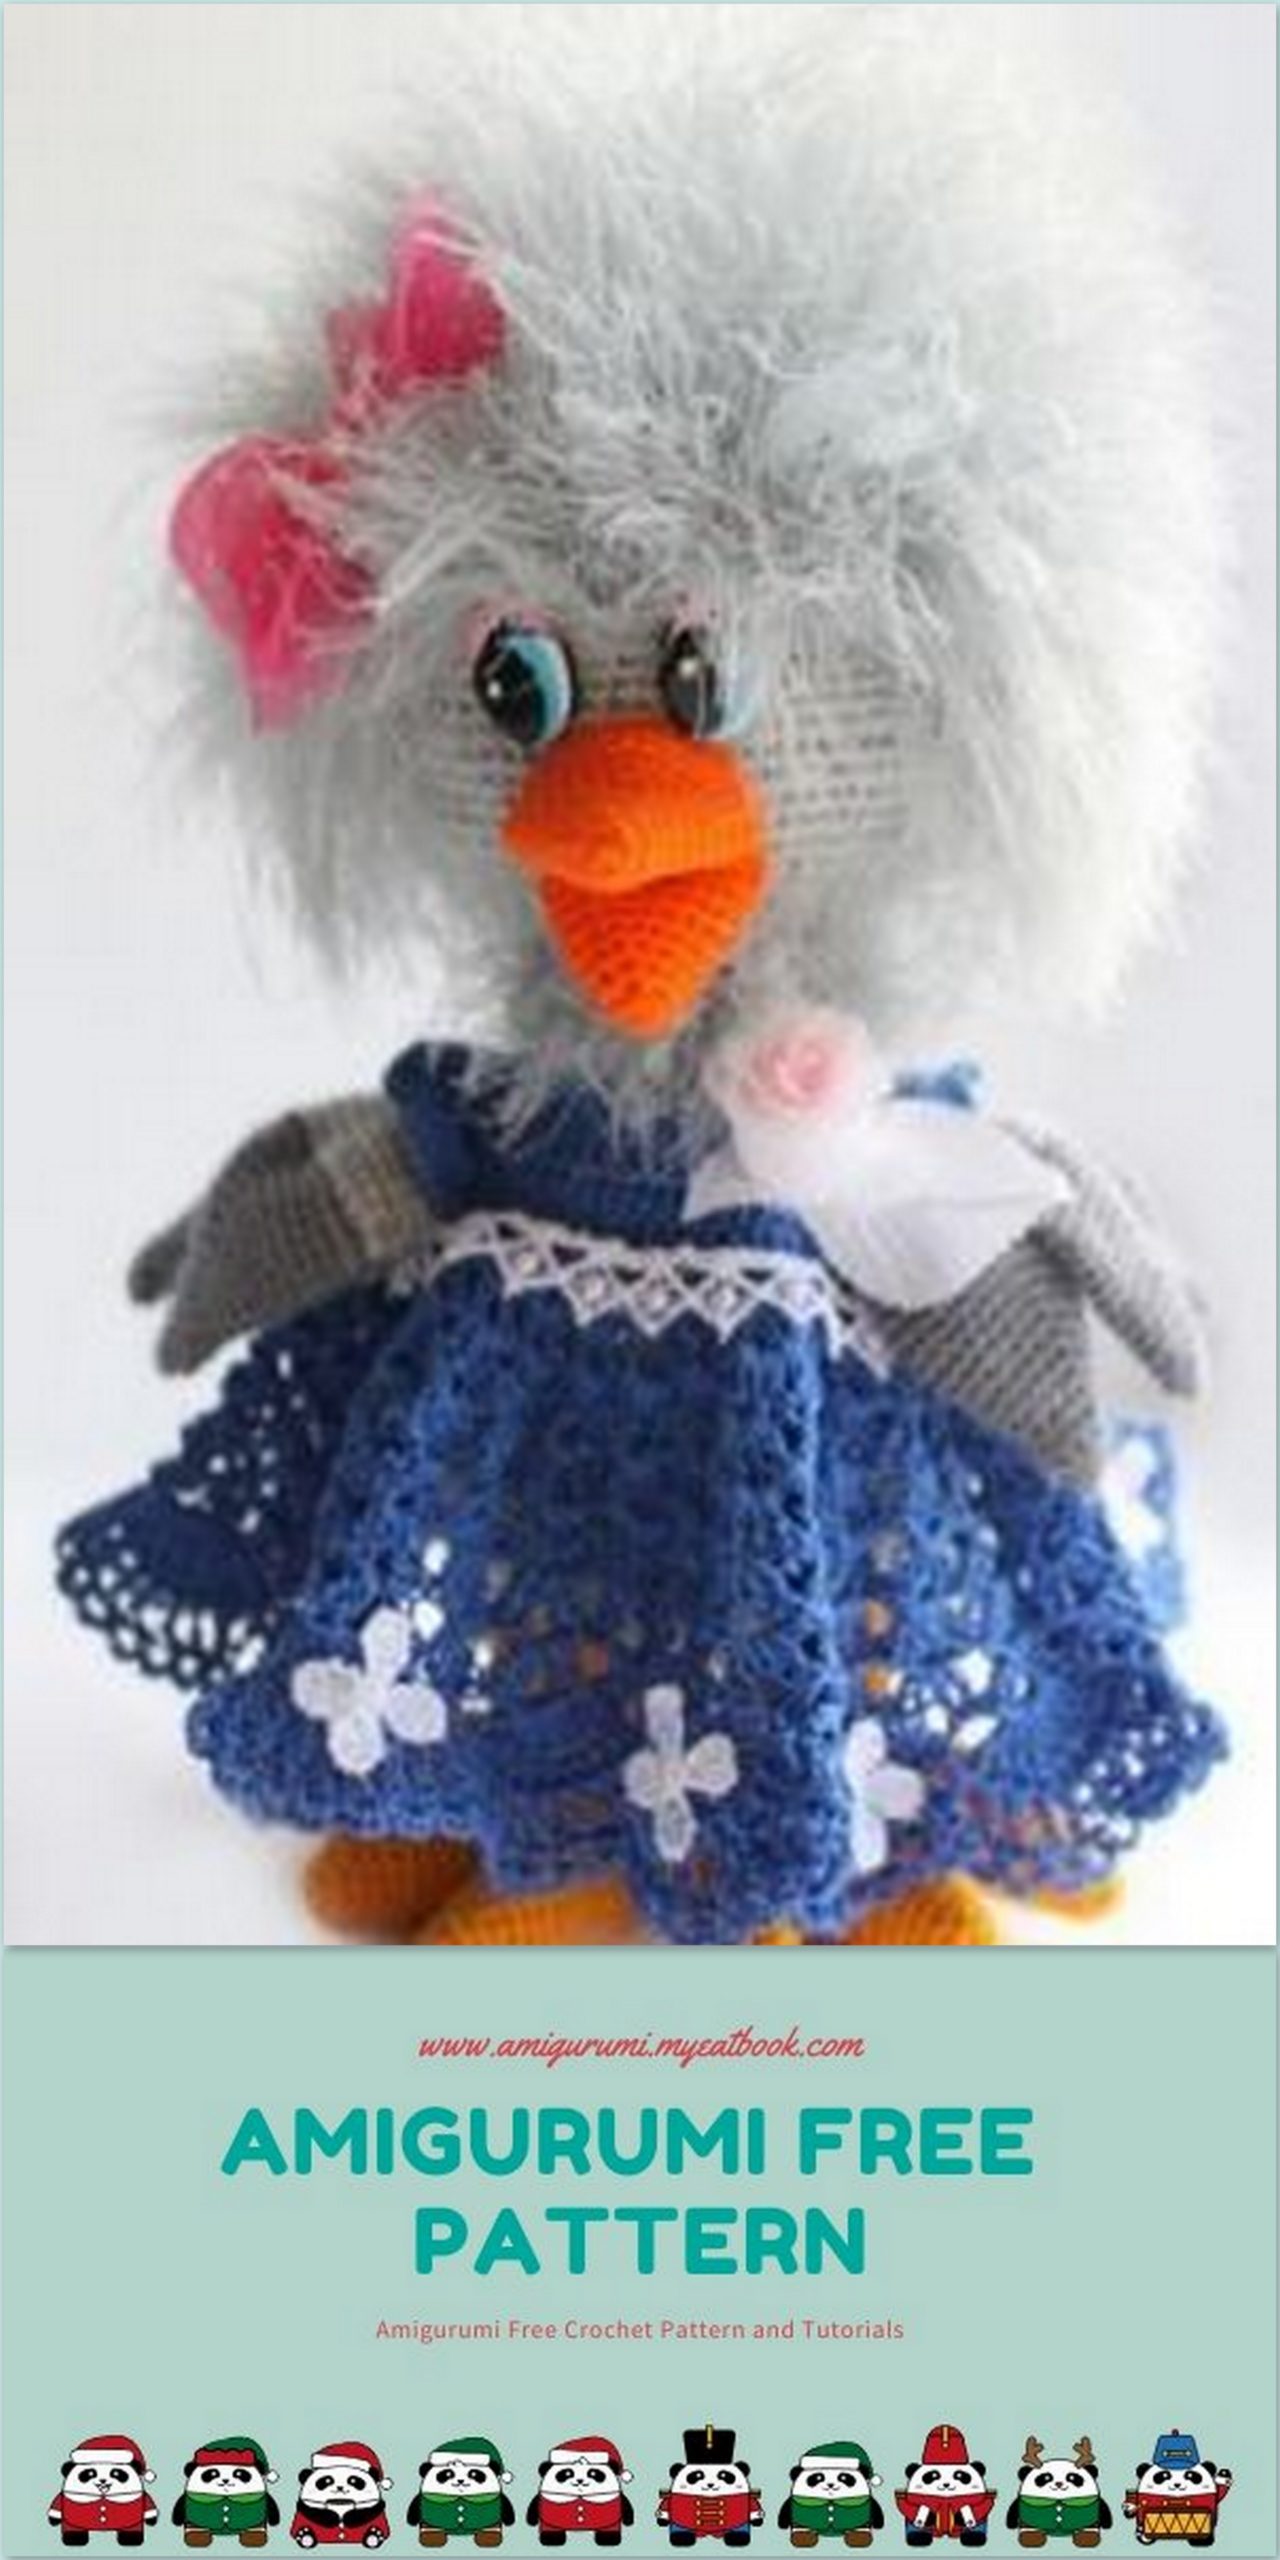
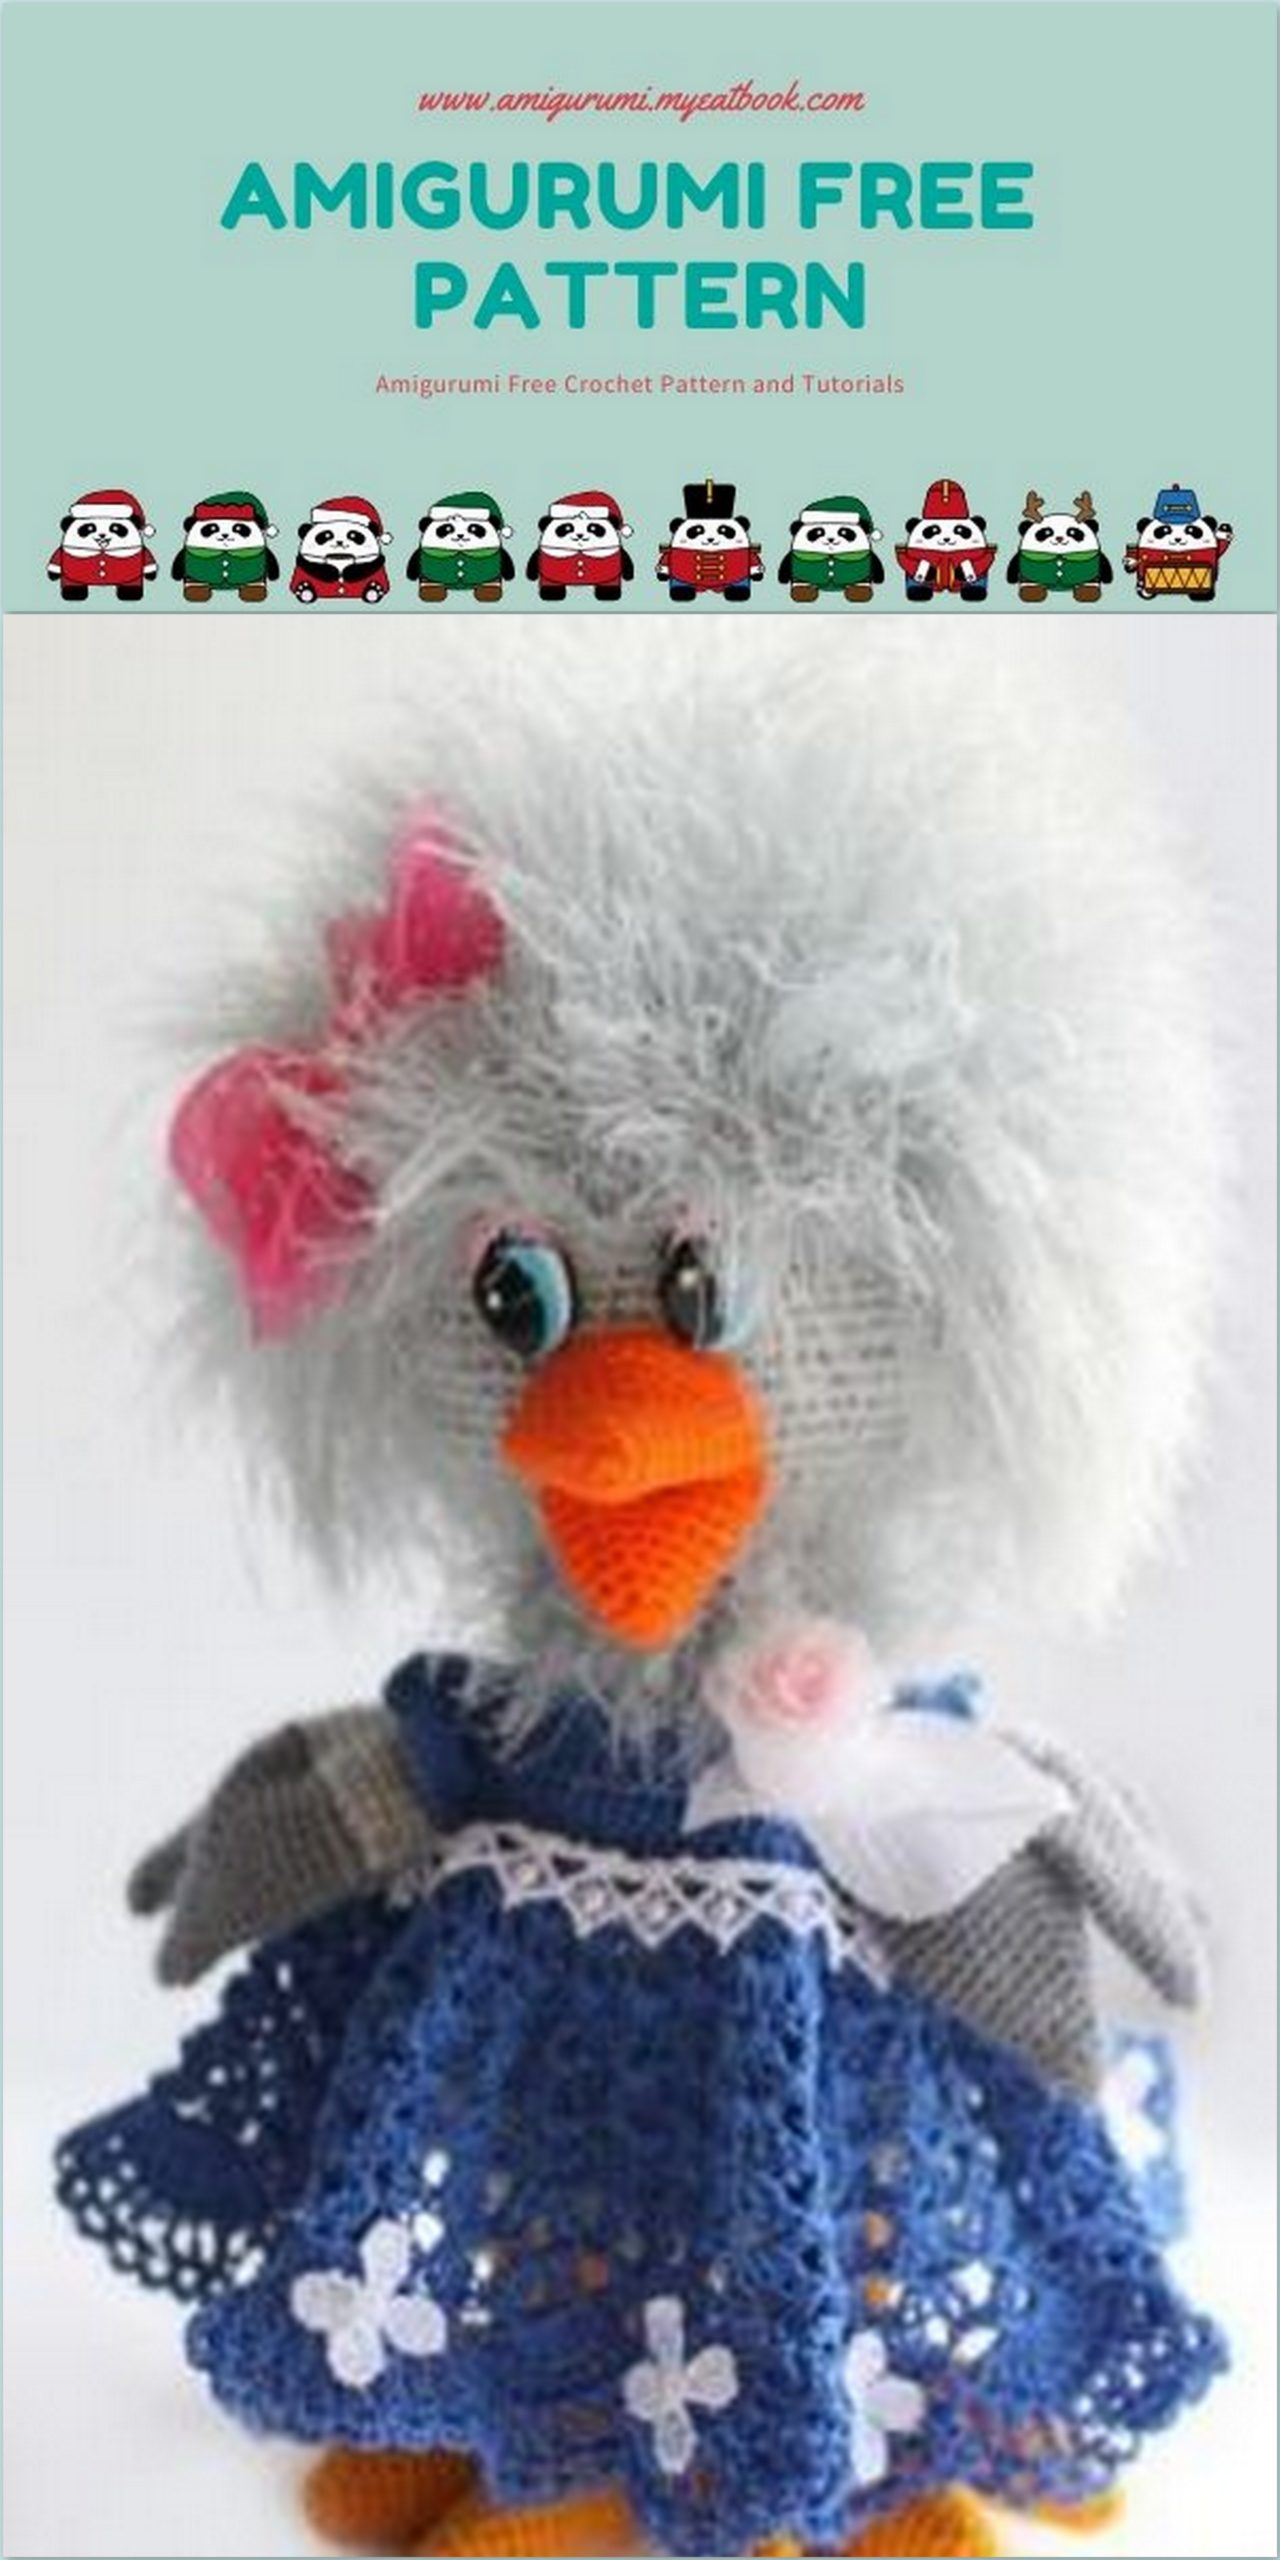
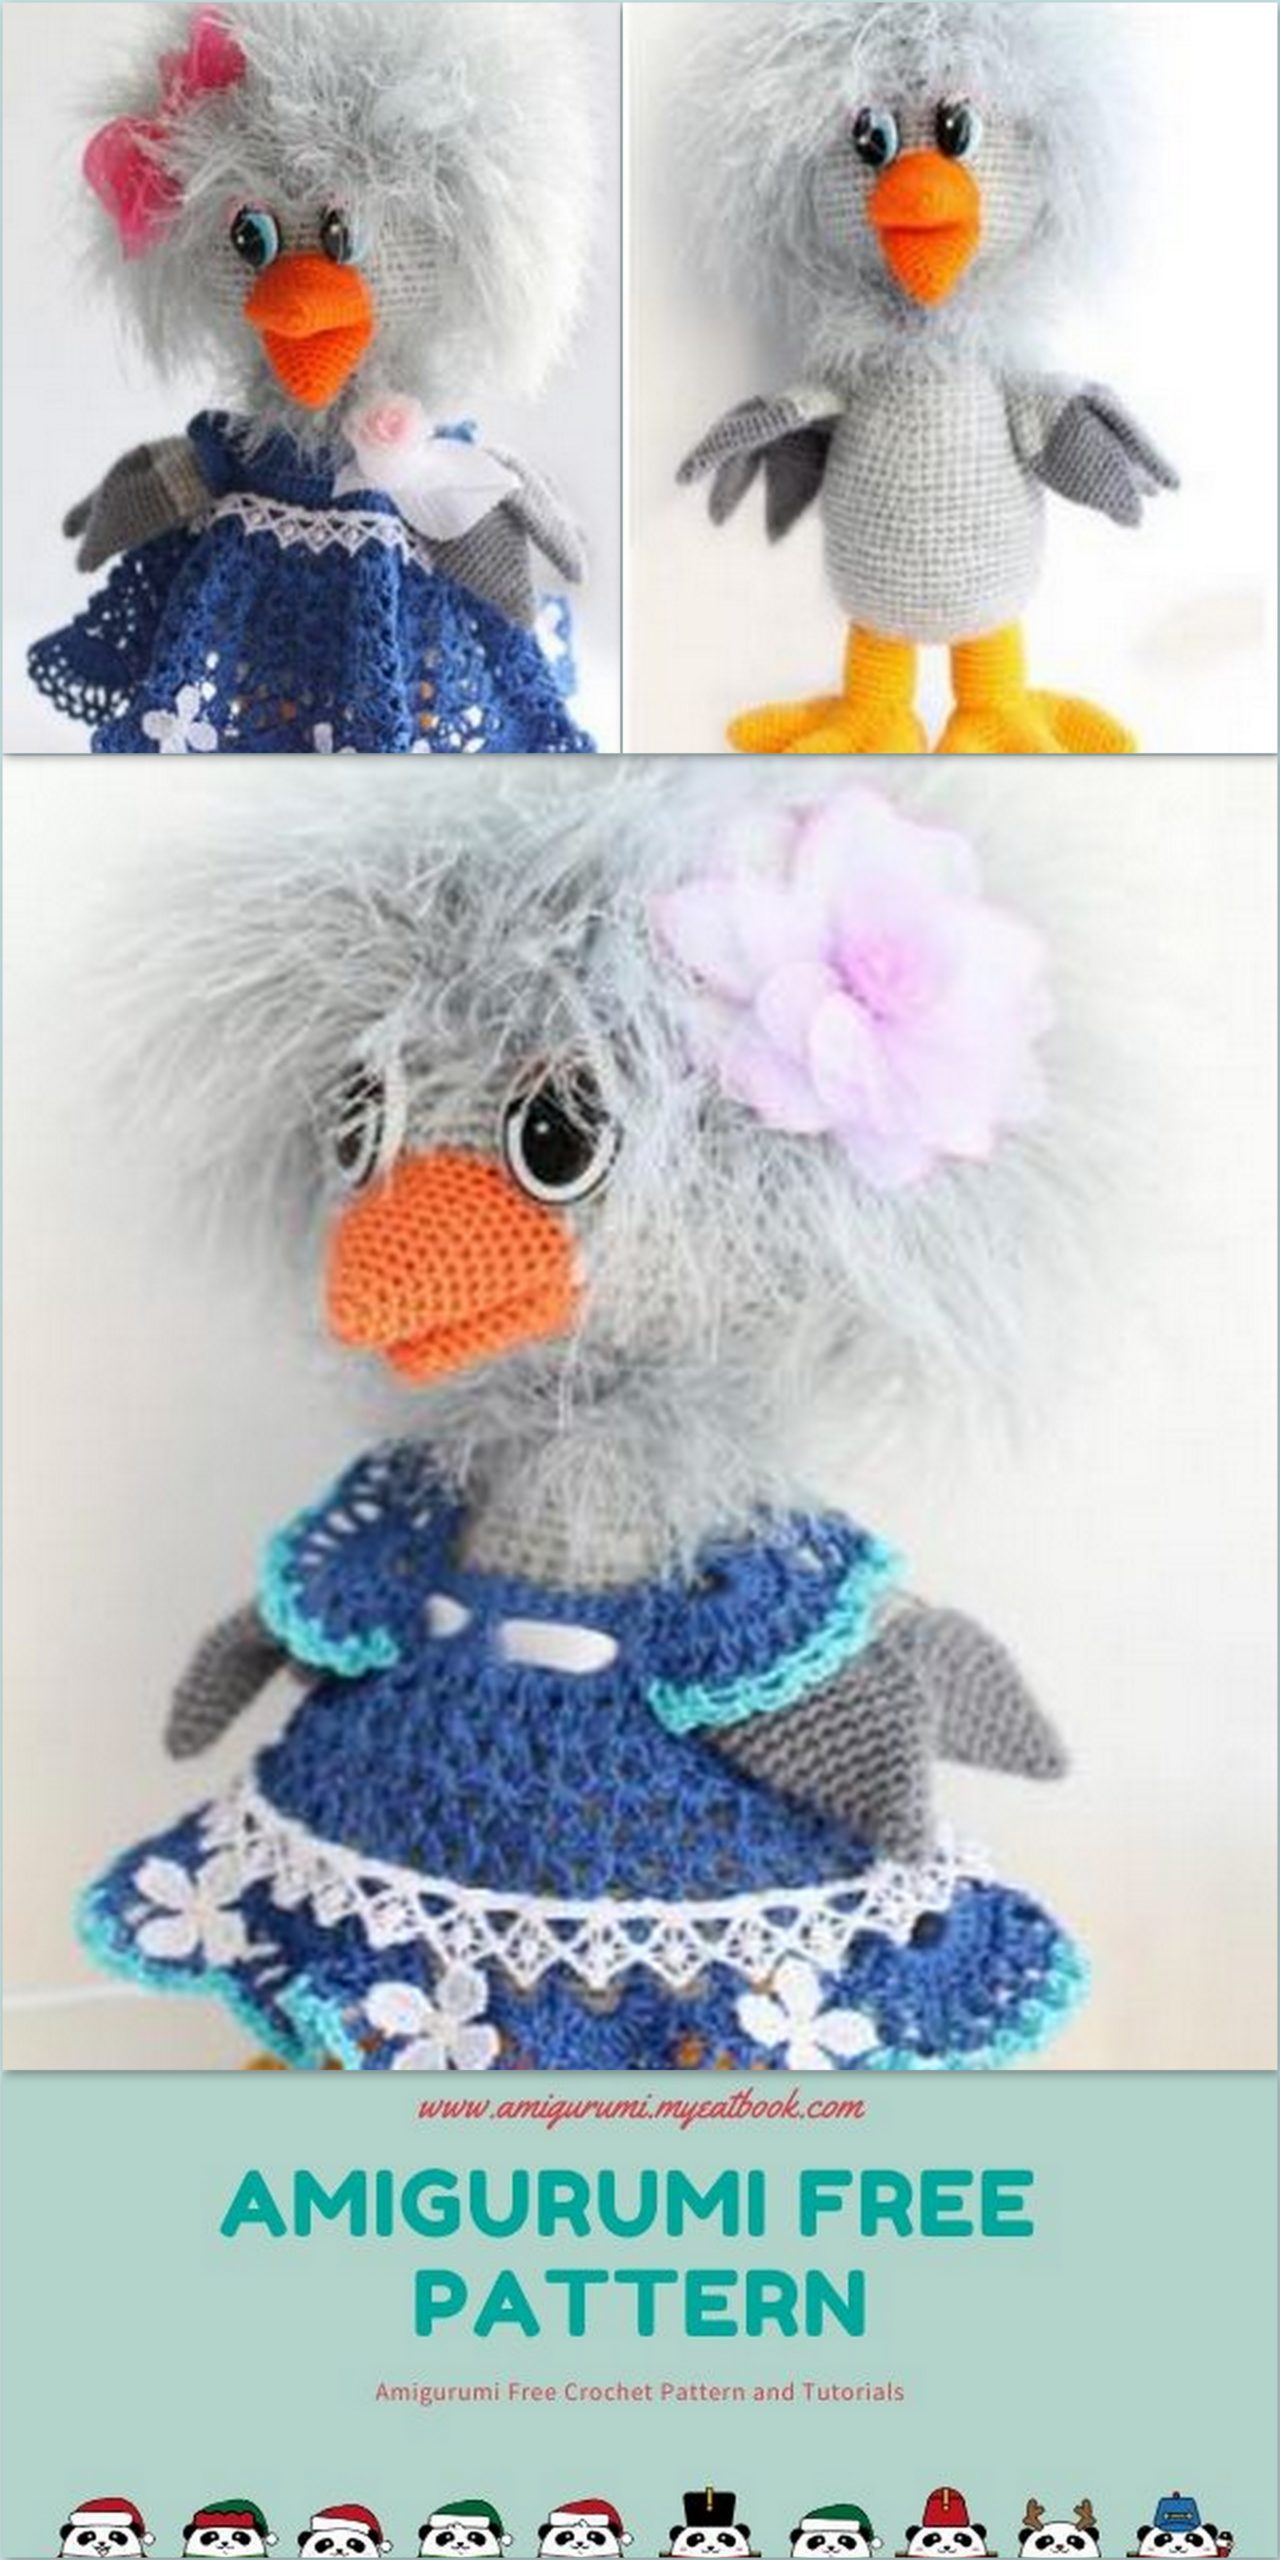
We are taken for our bird.
It will take even a gray thicker shade for the wings and tail, grass for
neck hair))))
We start knitting from the head. Everything is simple here.
We look at this one, which was invented before us and very intelligible, and we get down to it.
I knit with a single crochet, so I work on the first shemka. Dialing six
stitches in the amigurumi ring and in each row evenly add six stitches.
I add until these same loops in a circle I have 66.
Next, I knit without additions 14 rows. That is 14 rows of 66 loops. ))))
So far so simple, right? I said that you should not be afraid … I’m afraid myself))))
Tied up? We begin to reduce. We decrease evenly in each row six loops.
We knit so until the circle narrows to 12 loops. Here’s what you should get in
the result
Slightly elongated detail.
Girls, take our time, knit carefully and very tightly. We’ll fill it tight, bird
should at least pretend it’s worth))))
Girls, there was a proposal to insert a wire into the neck so that the BIRD could
bend your head and look cunningly. So, I offer two options for knitting
torso to choose from.
We knit here according to this pattern
1p: 6Sc in amigurumi ring, tighten
2p: 6İnc (12)
3p: (1Sc, İnc) x6 (18)
4p: (2Sc, İnc) x6 (24)
5p: 24Sc behind the back arches of loops (the place of sewing to the head)
6 – 11 pp: 24Sc
12p: (7Sc, İnc) x3 (27)
13-14rr: 27Sc
15p: (8Sc, İnc) x3 (30)
16p: 30Sc
17p: (9Sc, İnc) x3 (33)
18p: 33Sc
19p: (10Sc, İnc) x3 (36)
20p: (5Sc, İnc) x6 (42)
21p: 42Sc
22p: (6Sc, İnc) x6 (48)
23-24rr: 48Sc
25p: (7Sc, İnc) x6 (54)
26 – 27 pp: 54Sc
28p: (8Sc, İnc) X6 (60)
29-31rr: 60Sc
32 p: 6 Sc, (2Sc, İnc) x6, 36Sc (66)
33 – 38 pp: 66Sc
39p: (9Sc, Dec) x6 (60)
40p: (8Sc, Dec) x6 (54)
41p: (7Sc, Dec) x6 (48)
42p: (6Sc, Dec) x6 (42)
43p: (5Sc, Dec) x6 (36)
44p: (4Sc, Dec) x6 (30)
45p: (3Sc, Dec) x6 (24)
46p: (2Sc, Dec) x6 (18)
47p: (1Sc, 1b) X6 (12)
48p: 6 Dec
Fasten, trim and hide the thread inside the part.
Girls who will knit without wire do not change anything directly according to the scheme and knit.
Well, or we change the sizes for ourselves, if something does not suit (increasing or
reducing the number of rows). When the torso is tied up and is tightly stuffed with pins
we pin it to the head and sew it with the same thread as the parts knitted. Sew on
neatly and firmly.
If you chose the option with wire, we also knit according to the scheme, but we will start right away from the 6th
row. For this, we’ll open our heads a little (until the moment when we have in a circle
24 Sc) and start knitting straight from the head with a single piece. Having knitted several rows,
insert the wire (if very thin, bend in half). My wire is passing
through the whole head and the whole body.
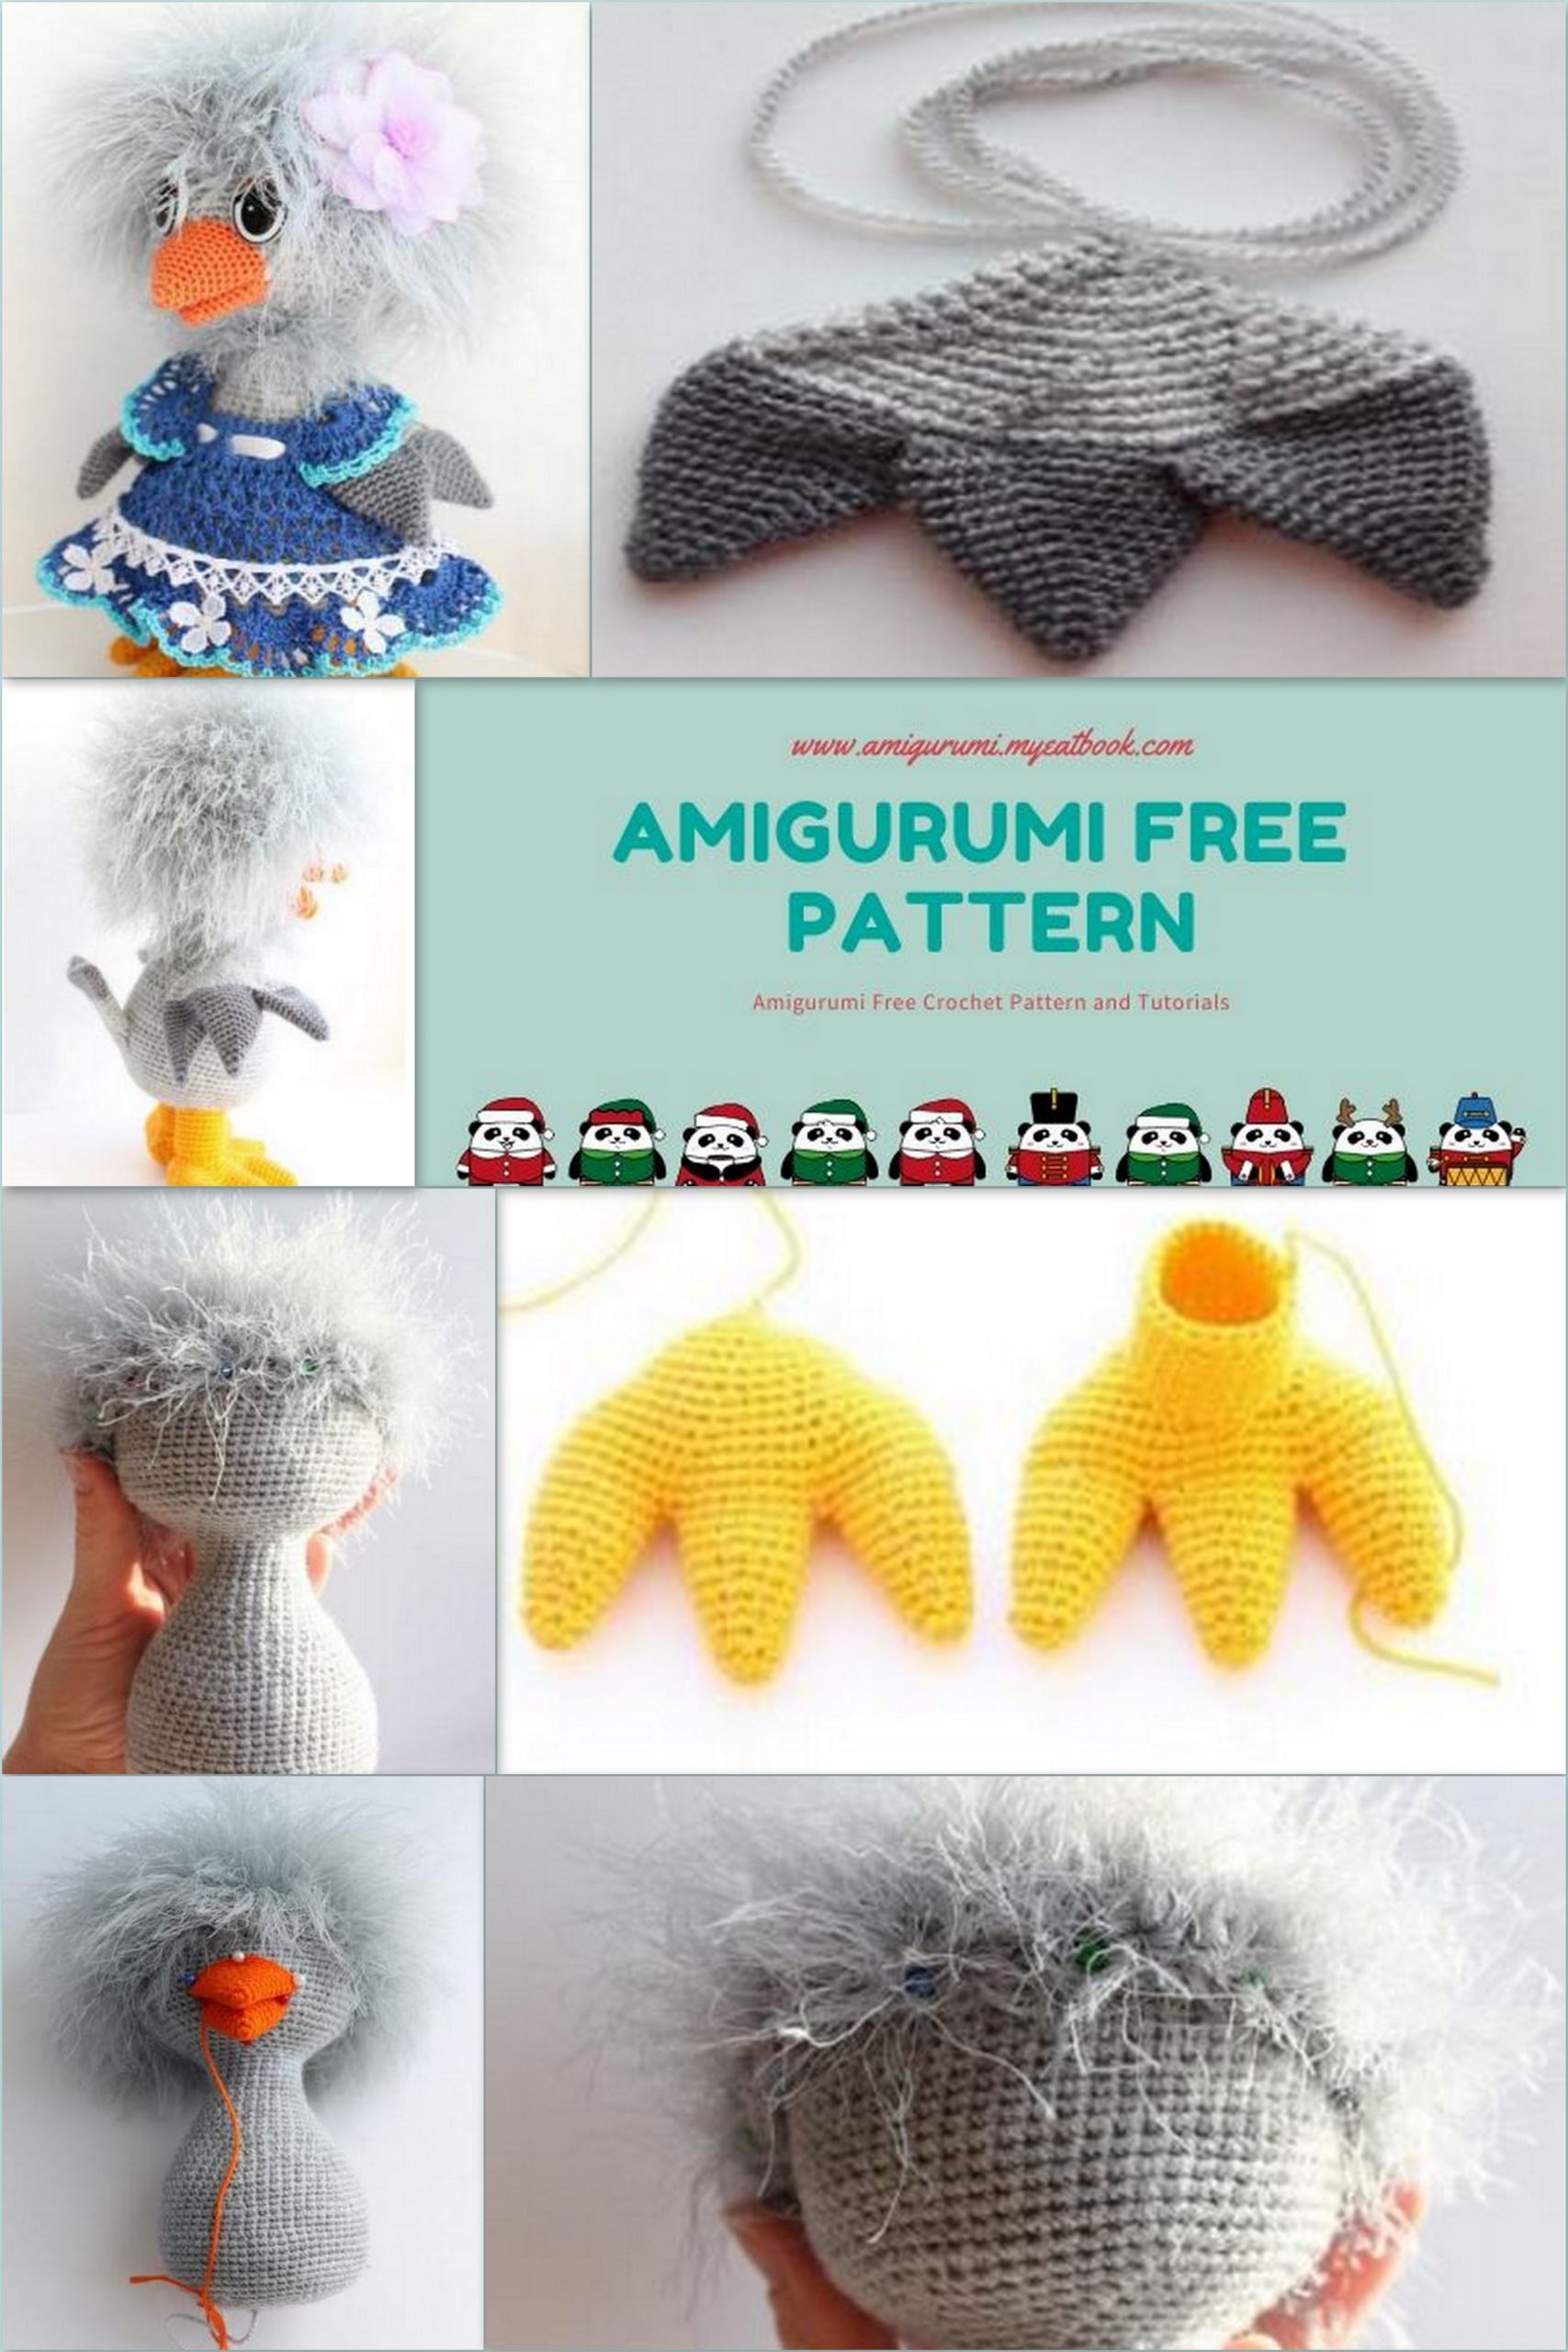
Like this
A completely tied and stuffed part should look like this:
For those who will sew the body to the head, it should look the same, only it will
visible seam. This is fearless; it will be closed with a boa.
Girls, I remind you, we stuff TIGHT !!!
Then we knit “hair”. To do this, we take our grass and a suitable size hook
(I have a C grade) and knit a “hat”. Since the yarn is different for everyone, the pattern
I see no reason to paint. We knit the same way as the head, always putting our
product to thereof. The cap should be slightly wider than the head and cover about
third of it. Here is what should happen
Not very hairy, right? Turning our beauty inside out
Here she is.
Girls who are in a hurry, sew hair without me. Be sure to show me
interesting)))) I’ll tell the rest a little later how I do it (you need to work,
yeah))))
Girls, not in a hurry. I knit slowly. Time is running out. Ran away
Oh yes, I hate numbers in all their manifestations, never write descriptions and never
doing circuits. This is the first time. So if you see errors in the description, say.
So, we sew the hair.
To do this, I pin the hat with pins, slightly shifting it back to open
face. The “backside” is where we knitted this beauty (32 p: 6 Sc, (2Sc, İnc) x6,
36Sc (66)
33 – 38rr: 66Sc) – this is the priest. Then we will sew the tail to it.
It should be like this
Girls, the toy is big. I am in a hurry to reassure those who are worried – this is her
us size turns
Did you sew your hair? Then we proceed to the design of the muzzle.
Beak
We collect six loops in the amigurumi ring, tighten.
1p: (1 Sc, İnc) x 3 (9)
2p: (2Sc, İnc) x 3 (12)
3p: (3 Sc, İnc) x 3 (15) …
We add in this way until we get 30 Sc. Then we knit three rows
without additions.
However, I advise you to try the beak on the face. You might want him to
realities a little more or a little less. Then just add or reduce the number
rows.
The lower part of the beak is knitted similarly to the upper, but it should be slightly
smaller. Therefore, we stop adding 24 Sc and knit without rows two rows.
Then both halves need to be sewn like this
Cut two triangles from plastic, one of which should be perimeter
equal to the top of the beak, the other bottom of the beak.
We insert our frame into the beak. We are stuffing.
Stuffing is not very tight, we need to form a beak of the desired shape.
Neatly pinned
with pins to my Our beauty. Like this
Girls, pay attention, I overdid it a little with hair, making a “hat”
too big – I have almost no room for my eyes. Do not repeat mine
mistakes. Still, this is a crow, not a chinchilla))))
Beak sewn? Let’s go further.
Wings
We collect 4 loops in the amigurumi ring, tighten.
1p: (1 Sc, İnc) x2 (6Sc)
2p: (2Sc, İnc) x2 (8Sc)
3p: (3Sc, İnc) x2 (10Sc)
4p: (4Sc, İnc) x2 (12 Sc) …
We add in this way until we get 26 Sc.
We knit two more rows without additions.
Such parts must be connected to six pieces.
Next, you have to show imagination. Parts must be connected in such a way
so that when you tie them all together in a circle, you get the number of loops multiple
six. In this case, the part should not be too wide.
I do it this way: I put one part on another so that it turns out
I need (purely visual) the width of the future wing. Like this
And I tie all together the details in a circle. At the same time I connect, making sure that
the number of loops in the end was a multiple of six.
I got exactly 60 Sc.
Next, we change the yarn to contrast and begin to knit the base of the wing.
1p: (8Sc, Dec) x6 (54)
2p: (7Sc, Dec) x6 (48)
3p: (6Sc, Dec) x6 (42)
4p: (5Sc, Dec) x6 (36)
5p: (4Sc, Dec) x6 (30)
6p: (3Sc, Dec) x6 (24)
7p: 24 Sc
8p: (2Sc, Dec) x6 (18)
9p: 18 Sc
10p: (1Sc, Dec) x6 (12)
11p: 6 Dec
Tighten. Cut a thread of sufficient length (it is useful to us for sewing
wings to the body)
Girls, recall, this is online. You can offer your own options for knitting those
or other details. Perhaps yours will be easier and more interesting.
Paws
Collect six single crochet into the amigurumi ring, tighten.
1p: (1 Sc, İnc) x3 (9)
2p: 9 Sc
3p: (2 Sc, İnc) x3 (12)
4p: 12 Sc
5p: (3 Sc, İnc) x3 (15)
6p: 15 Sc
7p: (4 Sc, İnc) x3 (18)
8-9 pp: 18 Sc
Fasten the thread, cut.
There are six such details to be connected.
Next, we knit the three parts together in a circle. It should turn out 54 Sc.
Tied up? Then we begin to work from this scheme.
1-2r: 54 Sc
3p: (7 Sc, Dec) x6 (48)
4p: (6 Sc, Dec) x6 (42)
5p: (5 Sc, Dec) x6 (36)
6p: 36 Sc
7p: (4 Sc, Dec) x6 (30)
8-9 pp: 30 Sc
10p: (3 Sc, Dec) x6 (24)
11p: (2Sc) x6 (18)
12p: (1Sc, Dec) x6 (12)
13: 6 decrease
Tighten, cut the thread, hide.
Put off the detail
We collect 6 loops in the amigurumi ring, tighten. We knit a circle (the first scheme in
text) until 24 Sc. Next, we knit 24 Sc for the rear walls
loops (the place to sew the part to the foot).
Then we knit without additions until the height of the foot seems to us sufficient –
me it is five rows.
Sew the detail to our foot. It should be like this
Girls, I remind you once again – I DO ALL DESCRIPTIONS FOR YOURSELF. If you see
that the part is large, reduce the number of rows with additions.
So it can be with the paws. You may need to stop at 15
Sc or even 12. Be sure to try on your birds. I no longer knit
first and still do it. Otherwise, how to understand whether it will turn out beautifully or not?
Good luck to all! Everyone turns out just fine !!!
Tail
Dial 17 Ch, knit around the chain, adding to the first and last loop
chains of three Sc.
In total, we should get 34 Sc.
We knit two rows without reductions.
In the third row “on the turns” we knit three loops together.
We knit two more rows without decreases (30 Sc).
We change the thread to contrast and knit two more rows without decreases.
In the next row, we again make reductions, knitting three Sc together from the edges.
We knit two more rows without decreases (26 Sc)
Again we do, as before, two decreases (22 Sc).
We knit another row without reductions.
In the next row, we again reduce (18 Sc).
And knit the last row. We fix the thread and cut it. The length of the thread should be
sufficient for sewing a ponytail to the body.
It should be such a tail
Sew, bending a little so that the tail sticks out beautifully))))
Next, we knit a necklace on our swan neck.
It’s simple. We take our weed, we collect a chain of Ch equal to the circumference of the neck and
we knit the number of half columns, or double crochet. Sew tightly
to the neck. If necessary, we cut to not look like a beard.
Sew paws and wings (do not forget that the parts must first be pinned
with pins, the only way they will look beautiful and symmetrical). Wings
we sew, slightly bending, as if by a house. Sewing surface should be
small, otherwise our fashionista is unlikely to be able to pull a sundress.
Girls, well, are we dressing up with yours?
Let’s start with the dress. Dial a chain of 50 Ch + 3Ch lift
We knit in rotary rows, each row begins a 3Ch lift.
1 p.: 8Dc, 2v, 9Dc, 2Ch, 16Dc, 2Ch, 9Dc, 2Ch, 8Dc
2 p.: 7Dc, İnc, into the arch 1Dc, 2Ch, 1Dc, İnc, 7Dc, İnc, into the arch 1Dc, 2Ch, 1Dc, İnc, 14Dc,
İnc, to the arch 1Dc, 2Ch, 1Dc, İnc, 7Dc, İnc, to the arch 1Dc, 2Ch, 1Dc, İnc, 7Dc
3 p: 8Dc, İnc, to the arch 1Dc, 2Ch, 1Dc, İnc, 9Dc, İnc, to the arch 1Dc, 2Ch, 1Dc, İnc, 16Dc, İnc,
into the arch 1Dc, 2Ch, 1Dc, İnc, 9Dc, İnc, into the arch 1Dc, 2Ch, 1Dc, İnc, 8Dc
4 11Dc, skip everything between the arches (this is the armhole)
(I’m not just
missed, and knitted 17 air loops. We have wings and they must
pass freely into the armholes of the sleeve. But I have thin Alizemiss yarn, maybe
If your yarn is thicker, the chain may be smaller, or it may not
be), then we knit 22Dc, skip all that between the arches (the second sleeve is an armhole)
– and again a chain of 17 air loops, 11Dc
5 row: in every second loop of the previous row we knit 1Dc, 2Ch, 1Dc
6 row: in each arch we knit 1Dc, 1Ch, 1Dc
7 row: in each arch knit 2Dc, 2Ch, 2Dc
We knit the 8th row similarly to the 7th row, and at the end of Sl-st – we connect with the beginning of the row (girls,
it may be necessary to join the ranks later, not in this row, but in the next
or a little further. After all, we have a tail, and it should stick out freely
dresses, not underneath. So we try on the dress and see where
make this same connecting row) and then we knit in circular interlocking
in rows, where each row begins with 3 Ch rise and ends with Sl-st.
9 – 12рр: in each arch we knit 2Dc, 2Ch, 2Dc.
13 row – harness –
In each arch of the previous row we knit 6Dc.
Tie the neck of Sc in a circle, simultaneously forming loops for two buttons (I have
one).
Here, in fact, the whole description.)))) It is intelligible and understandable. Thanks to Ioannina.
Now to the panties.
Dial a chain of 70 Ch, close in a circle.
Knit in close rows. Each row starts from Ch rise and ends Sl-st at
1 row column.
1 p.: 1Ch, 70Sc, Sl-st
2p .: 4Ch, 1 Dc, then we collect a chain of 10 Ch, skip 10 loops of the base,
we insert the hook into the 11th loop and knit Dc, then we knit to the ends of the row Dc (this
there will be a hole for hvotika).
3 – 7 pp: 3Ch, 70Dc, Sl-st
Next, we knit each leg separately
7 row – dial 5 Ch, skip 35 loops of the previous row, Sl-st into 36 loops
previous row. 3Ch lift and then we knit 35 Dc in the previous row, 5Dc in
chain of 5Ch, Sl-st (40)
8 pp.: 4- Dc
Second panty:
Attach the thread to the beginning of the chain of 5Ch, 3Ch lift and knit 5Dc along the chain
and 35 Dc loop 6 rows (40)
Tie another row of 40 Dc.
All our pants are ready. Next, we decorate in our own discretion. Pockets
ties, buttons, buttons … Everything is in your hands.
Girls, a shirt (if someone needs it) fits in the description of the sundress, but instead
we knit openwork rows of rows Dc, when tying the edges we form a loop, sew
button.