
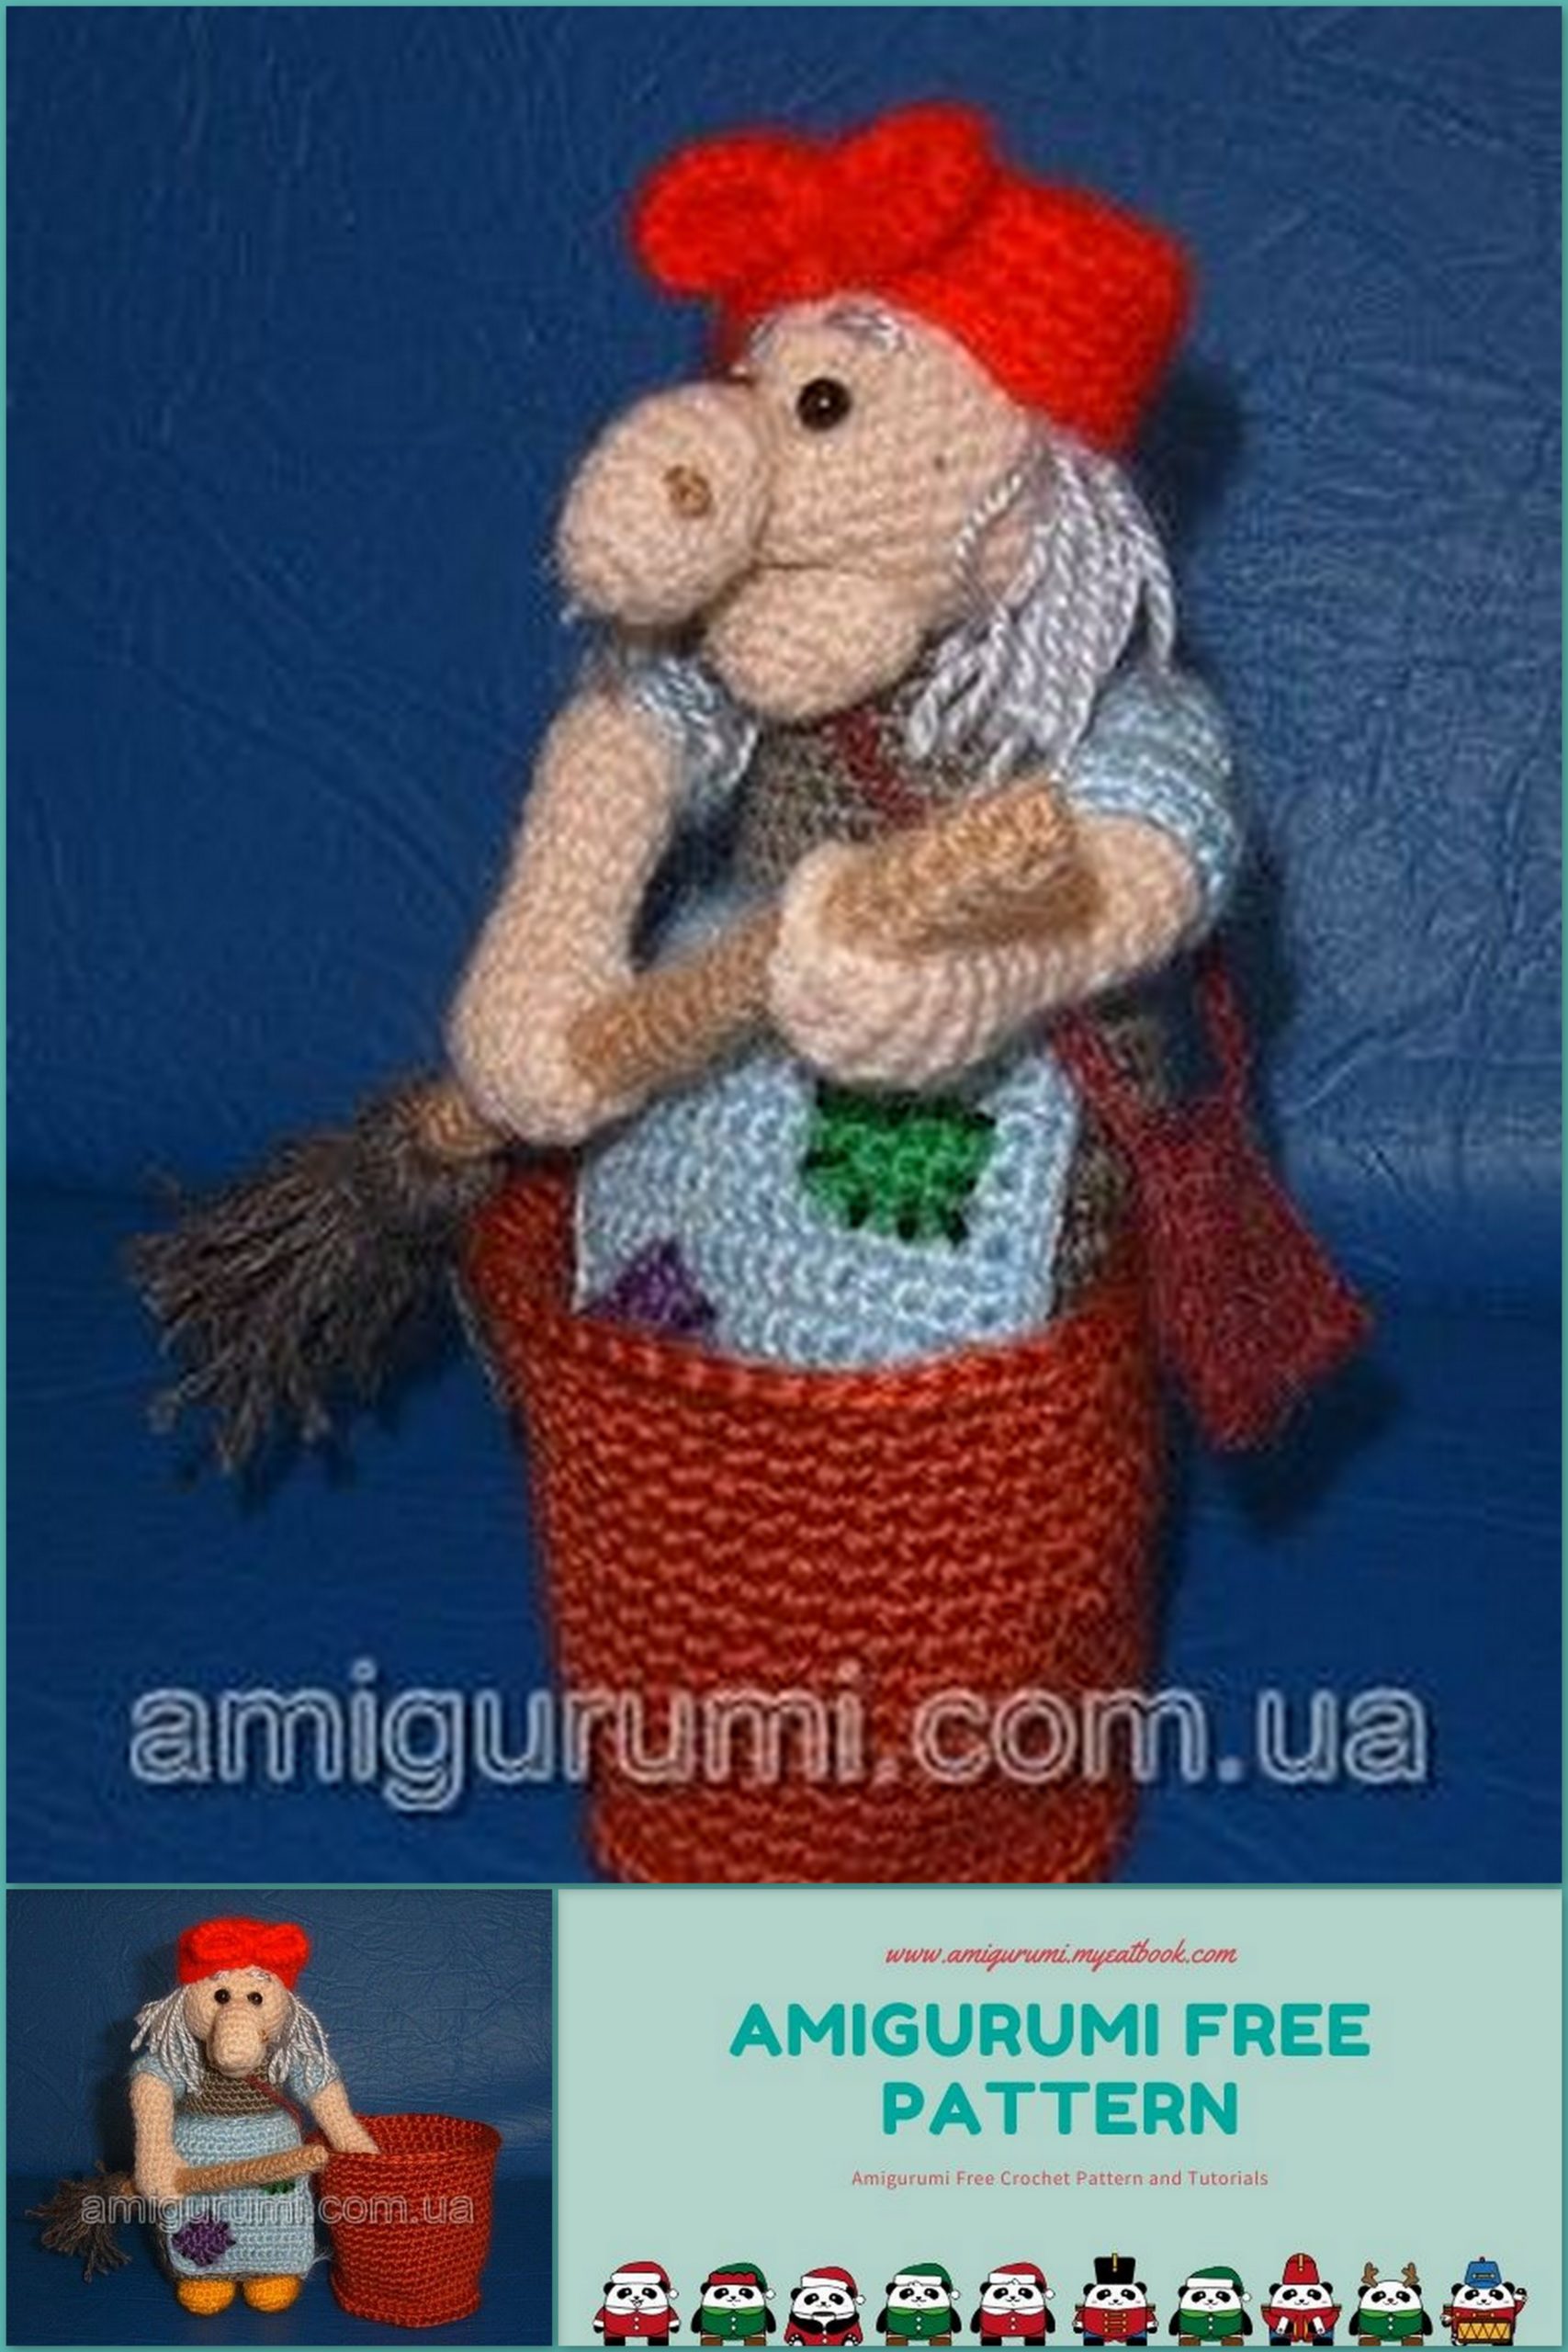
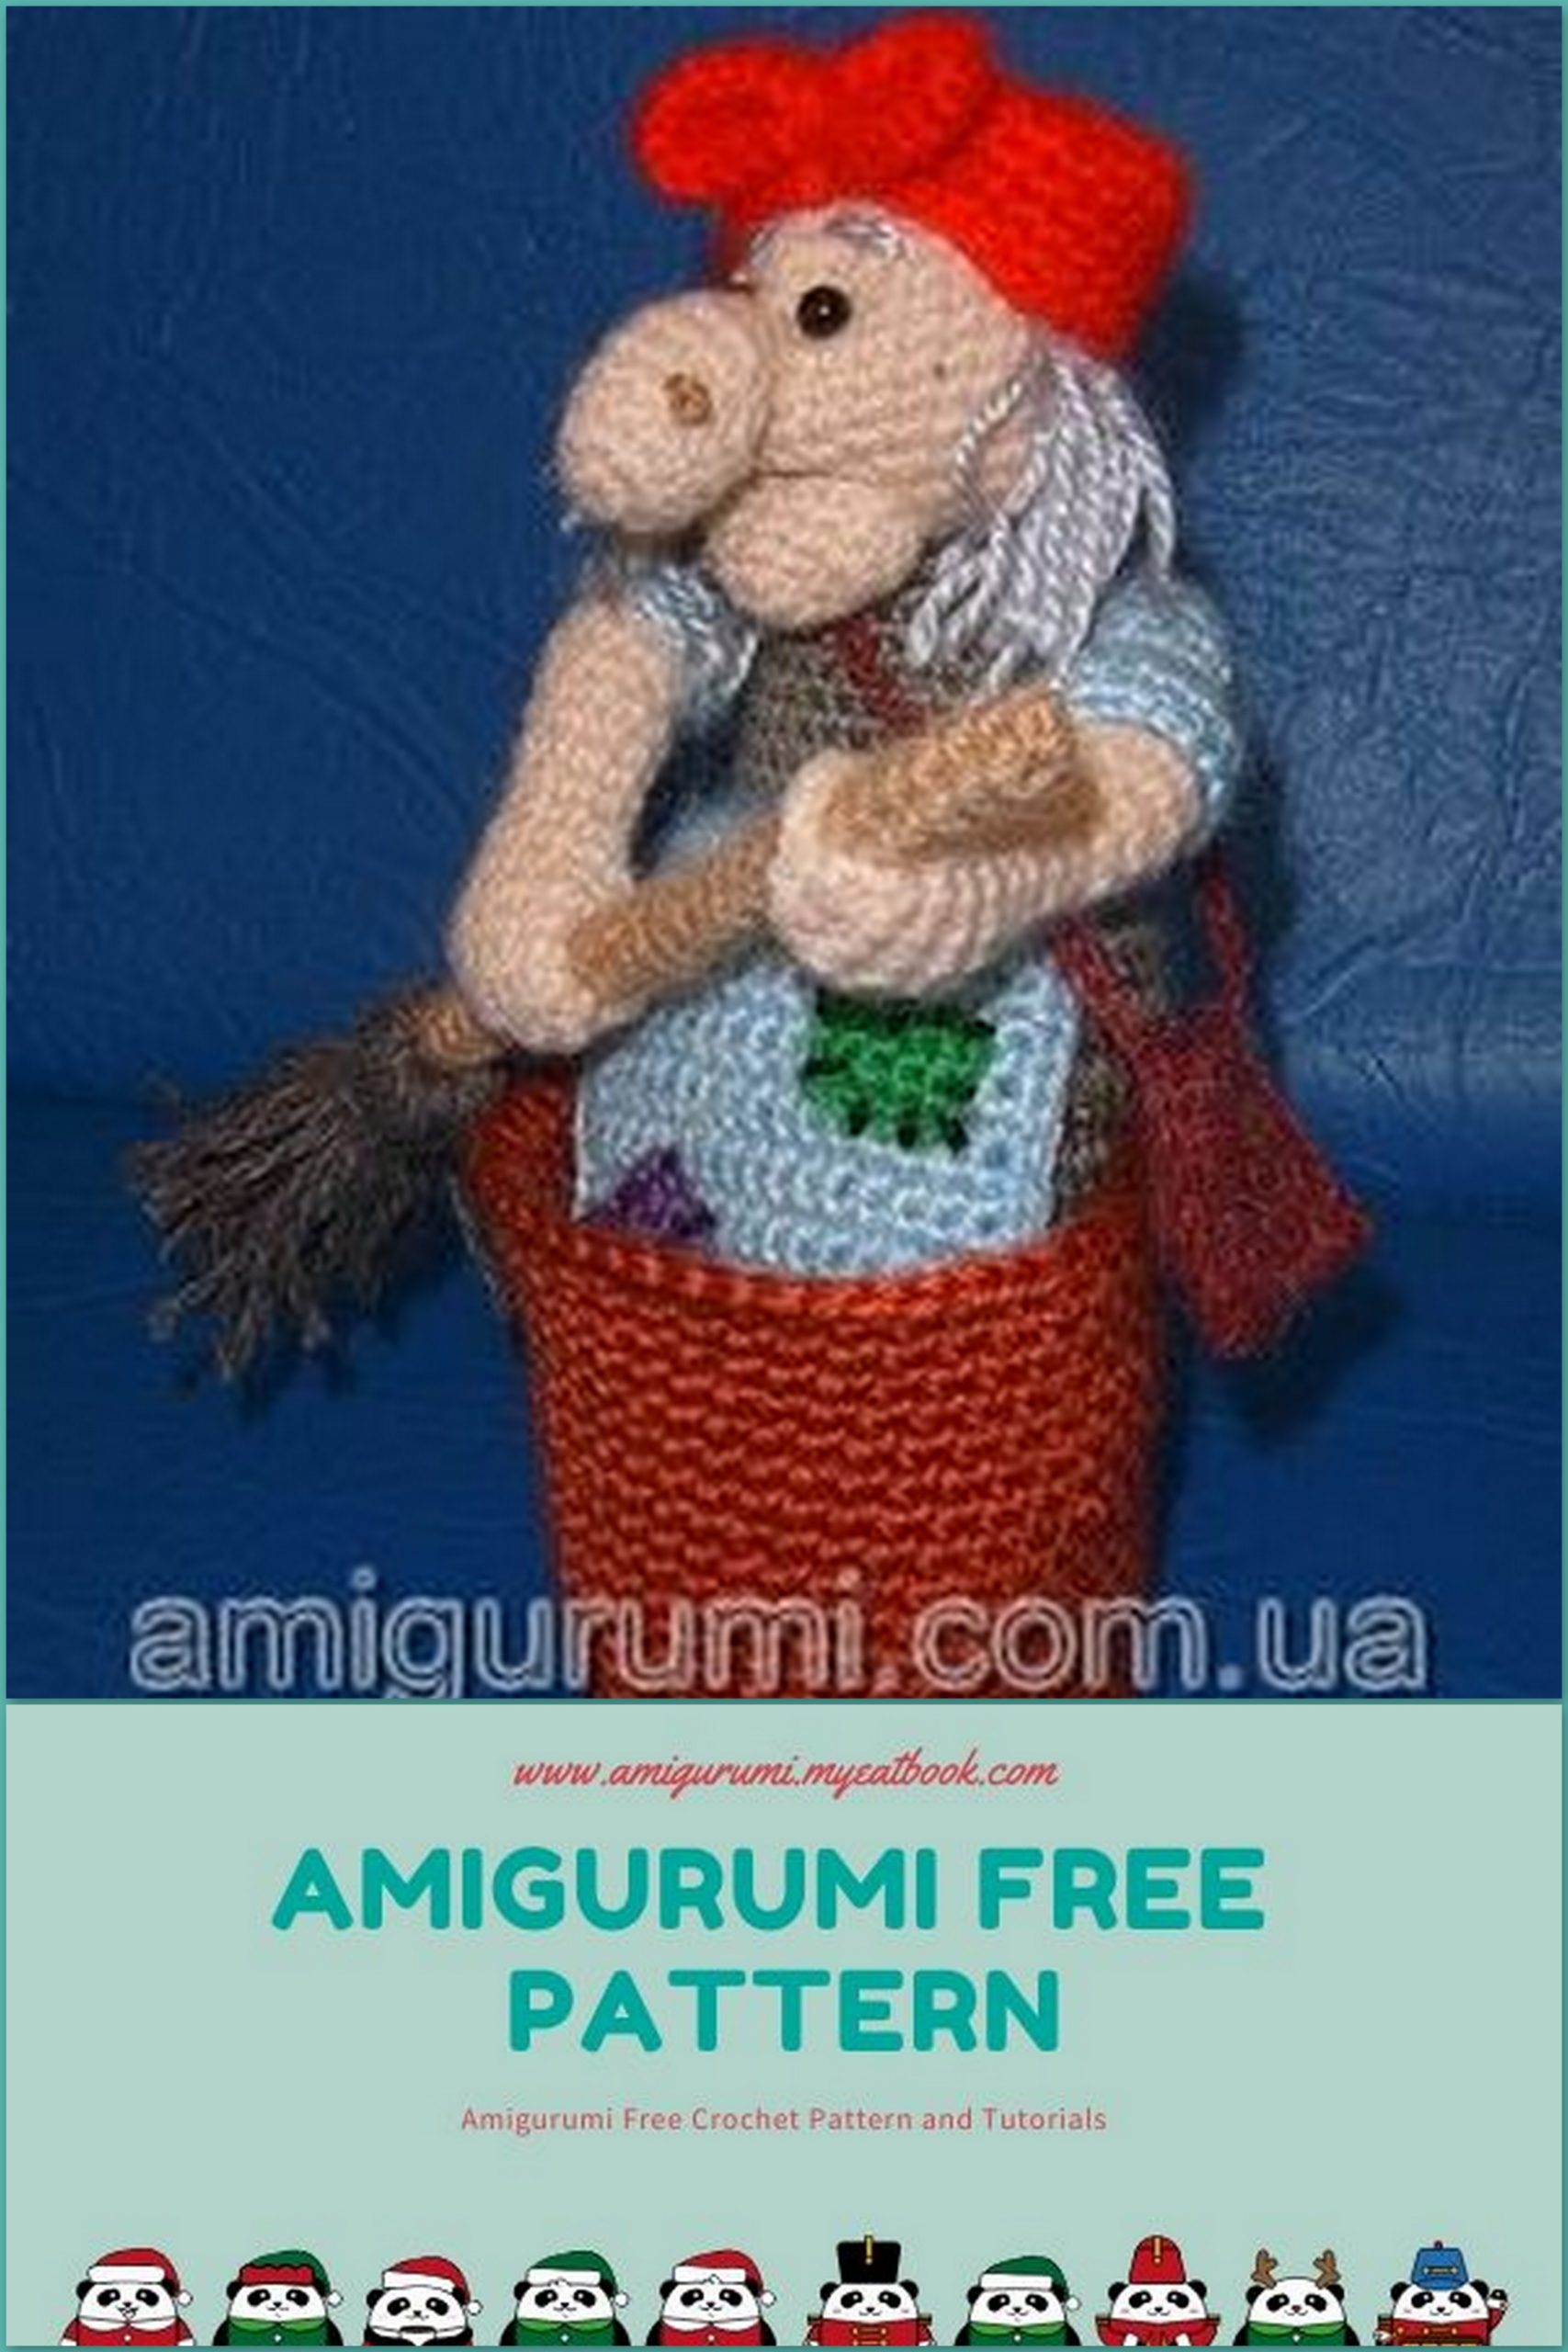
Baba Yaga is undoubtedly the most striking character in Slavic tales. She is colorful, funny, unpredictable – sometimes kind, sometimes evil, and sometimes very insidious! But what could be more magical and fabulous, unusual and amazing than flying on a broomstick, in a mortar or chatting with a manual hut on chicken legs? Kids will certainly be delighted if you tie the real Baba Yaga for them, and a stupa and a broomstick to it! The main thing is to choose a yarn of suitable colors, be patient and inspiration! Although Yagusia doesn’t hurt adults, he will protect the house from evil spirits and all kinds of incidents. Have a nice knitting!
Materials:
Yarn – “Pehorka” acrylic.
Colors of yarn in a small amount: red, flesh, blue, light gray, light brown, yellow, black, purple, green, orange, blue, dark gray, burgundy.
Swamp – about 20 gr.
Dark brown – about 30-40 gr.
Used rod from a ballpoint pen or whatever is at hand for a broom handle.
2 black beads for eyes with a diameter of 0.5 cm.
Crochet hook number 1.
Legend:
Sl-St – connecting column
Ch – air loop
Sc– single crochet
Hdc – half crochet
Dc – Double crochet
increase – 2 Sc in one loop
decrease – 2 Sc together
Head (bodily)
Knit in a spiral.
1 row: 6 Sc in amigurumi ring (6)
2 row: increase 6 times (12)
3 row: (1 Sc, increase) – 6 times (18)
4 row: (2 Sc, increase) – 6 times (24)
5 row: (3 Sc, increase) – 6 times (30)
6-12 rows: 30 Sc
13 row: (3Sc, decrease) – 6 times (24)
14 row: (2 Sc, decrease) – 6 times (18)
15 row: (1 Sc, decrease) – 6 times (12). Fill with filler
16 row: 6 decreases (6)
Nose (flesh)
Knit in a spiral.
1 row: 6 Sc in amigurumi ring (6)
2 row: increase 6 times (12)
3-5 rows: 12 Sc
6 row: 4 Sl-St, 8 Sc (12)
7 row: 4 Sl-St, 3 Sc, decrease, 3 Sc (11)
8 row: 4 Sl-St, 2 Sc, decrease, 2 Sc, 1 Sl-St (10)
Fasten the thread, cut, leaving the end for sewing.
Fill with filler.
Chin (corporal) Baba Yaga
Oval knit in a spiral.
1 row: 3 Ch, from the 2nd from the hook we knit – 1 Sc, 3 Sc in one loop, 2 Sc in one loop (6)
2 row: 2 Sc, 3 Sc in one loop, 2 Sc, 3 Sc in one loop (10)
3 row: 4 Sc, 3 Sc in one loop, 4 Sc, 3 Sc in one loop (14)
4-5 rows: Sc in a circle (14)
Fasten the thread, cut, leaving the end for sewing.
Torso (swamp color)
Knit in a spiral.
1 row: 6 Sc in amigurumi ring (6)
2 row: 6 increases (12)
3 row: (1 Sc, increase) – 6 times (18)
4 row: (2 Sc, increase) – 6 times (24)
5 row: (3 Sc, increase) – 6 times (30)
6 row: (4 Sc, increase) – 6 times (36)
7-13 rows: Sc in a circle (36)
14 row: (4 Sc, decrease) – 6 times (30)
15 row: knit for the back half-loop (4 Sc, increase) – 6 times (36)
16-20 rows: Sc in a circle (36)
21 row: (4 Sc, decrease) – 6 times (30)
22 row: (3 Sc, decrease) – 6 times (24)
23 row: (2 Sc, decrease) – 6 times (18)
24 row: (1 Sc, decrease) – 6 times (12). Fill with filler.
25 row: 6 decreases (6)
Pull the hole, fasten the thread, cut and hide
The first rows of knitting are the top (the hump of the headstock).
Skirt (swamp color)
In closed rows in a circle.
We knit on the front half loops:
1 row: 1 Ch for lifting, (2 Sc, increase) – 10 times, 1 Sl-St in the first Sc (40)
2-8 rows: 2 Ch for lifting, 40 Dc, 1Sl-st in the first Dc.
9 row: 1 Ch for lifting, 40 Sc, 1Sl-st in the first Sc.
Fasten, cut and hide the thread.
Legs (colors: yellow and flesh)
2 details knit in a spiral.
In yellow.
1 row: 8 Ch, with the 2nd from the hook we knit – 6 Sc, 3 Sc in one loop, 5 Sc, 2 Sc in one loop (16)
2 row: increase, 5 Sc, 3 increases, 5 Sc, 2 increase (22)
3 row: 2 Sc, increase, 4 Sc, increase, 5 Sc, increase, 4 Sc, increase, 3 Sc (26)
4 row: knit for the back of the loop (26)
5 row: Sc in a circle (26)
6 row: 7 Sc, decrease, 1 Sc, decrease, 1 Sc, decrease, 1 Sc, decrease, 8 Sc (22). You can insert ovals from thick cardboard or plastic for stability.
7 row: 7 Sc, 4 decreases, 8 Sc (18)
8 row: change the color to flesh – 5 Sc, 3 decrease, 7 Sc (15)
9-17 rows: Sc in a circle (15)
Fasten the thread, leave the end for sewing, cut.
Details to fill.

Hands (colors: blue and flesh)
2 details knit in a spiral.
The right one is blue.
1 row: 6 Sc in amigurumi ring (6)
2 row: 6 increases (12)
3-6 rows: Sc in a circle (12)
Change the color to flesh. Stuff detail as you work.
7 row: behind the back half-loop (12)
8 row: we knit for 2 half loops (12) and continue this way to the end.
9 row: 4 Sl-st, 8 Sc (12)
10 row: 4 Sl-st, 8 Sc (12)
11 row: 4 Sl-st, 3 Sc, decrease, 3 Sc (11)
12 row: 6 Sc, decrease, 3 Sc (10)
13 row: 6 Sc, decrease, 2 Sc (9)
14-15 rows: Sc in a circle (9)
16 row: increase, 3 Sc, increase, 4 Sc (11)
17 row: 2 Sc, knit a finger (4 Ch, the second from the hook 1 Sc, then 1 Hdc,
1 Dc), then we knit 9 Sc (11)
18-19 rows: 11 Sc – make sure that the finger remains outside.
20 row: decrease, 4 Sc, decrease, 3 Sc (9). Decreases should be on the edges of the palm
21 row: Sc in a circle (9)
22 row: (1 Sc, decrease) – 3 times (6)
Fasten the thread, and leave the end to engage the tip of the finger and the edge of the palm.
Left hand.
Knit like a right hand, 1-16 row.
17 row: 6 Sc, finger (as on the right hand
ke), 5 Sc (11)
18-19 rows: Sc in a circle (11)
20 row: 1 Sc, decrease, 4 Sc, decrease, 2 Sc (9)
21-22 rows knit, as on the right hand, and just leave the thread.
On the front half loops in blue knit:
1 row: (1 Sc, increase) – 6 times (18)
2-3 rows: Sc in a circle (18)
Fasten, cut, hide the thread.
Scarf (red)
Knit in a spiral.
1 row: 6 Sc in amigurumi ring (6)
2 row: 6 increases (12)
3 row: (1 Sc, increase) – 6 times (18)
4 row: (2 Sc, increase) – 6 times (24)
5 row: (3 Sc, increase) – 6 times (30)
6-11 rows: Sc in a circle (30)
Fasten the thread, leave the end for sewing, cut.
Bowknot for scarves (red)
Oval.
1 row: 10 Ch, from the second from the hook we knit – 8 Sc, 3 Sc in one loop, 7 Sc, 2 Sc in one loop.
2 row: 1 increase, 7 Sc, (increase) – 3 times, 7 Sc, (increase) 2 times, Sl-st.
Fasten, cut and hide the thread.
Apron (blue)
Direct and reverse rows, i.e. back and forth.
Dial 17 Ch and knit from the 2nd loop from the hook:
1 row: 16 Sc, knit turn.
2-17 rows: Ch for lifting, 16 Sc, knitting to turn.
18 row: Ch for lifting, 1 Sc, 1 decrease, 4 Sc, 1 decrease, 4 Sc, 1 decrease, 1 Sc (13)
Fasten the thread, leave the end for sewing and cut.
Addition: tie the chain of 100 Ch in the same color.
Sew an apron to a chain of 100 loops, combining their middle loops. Tie the edges of the apron in one row Sc, knitting at the corners of 3 Sc in one loop, so that the corners fit exactly. The apron can be ironed.
Patches
4 parts of different colors (purple, orange, green, blue).
Knit in straight back rows.
6 Ch, knit from the 2nd loop from the hook:
1 row: 5 Sc, knit turn.
2-4 rows: Ch for lifting, 5 Sc, knitting to turn.
Fasten the thread, cut.
2 patches optionally sew to the apron with a black thread with a seam “over the edge”.
And sew 2 patches on the woman’s yagi dress: on the hump and hem of the skirt on the back.
Bag (burgundy color)
Direct and reverse rows.
Dial 11 Ch and knit from the 2nd loop from the hook.
1 row: 10 Sc, knit turn.
2-17 rows: Ch for lifting, 10 Sc, knitting to turn.
Fasten thread, cut
Fold the rectangle in half and stitch the side edges. Next, tie a chain of 45 loops and sew the ends to the bag.
Shank of a broom (light brown)
Dial 31 Ch and knit from the 2nd loop from the hook.
1 row: 30 Sc, knit turn.
2-4 rows: Ch for lifting, 30 Sc, turn knitting.
Fasten the thread, cut, leaving the end for assembly.
Stupa (dark brown)
Knit in a thread in 2 additions in a spiral!
1 row: 6 Sc in amigurumi ring (6)
2 row: 6 increases (12)
3 row: (1 Sc, increase) – 6 times (18)
4 row: (2Sc, increase) – 6 times (24)
5 row: (3 Sc, increase) – 6 times (30)
6 row: (4 Sc, increase) – 6 times (36)
7 row: (5 Sc, increase) – 6 times (42)
8 row: knit for the back wall 42Sc
9-23 rows: Sc in a circle (42)
24 row: (6 Sc, increase) – 6 times (48)
1 Sl-st, fasten, cut and hide the thread.
Sew rows 7 and 9 through so that a fold is obtained outward.
Assembly and design of toys
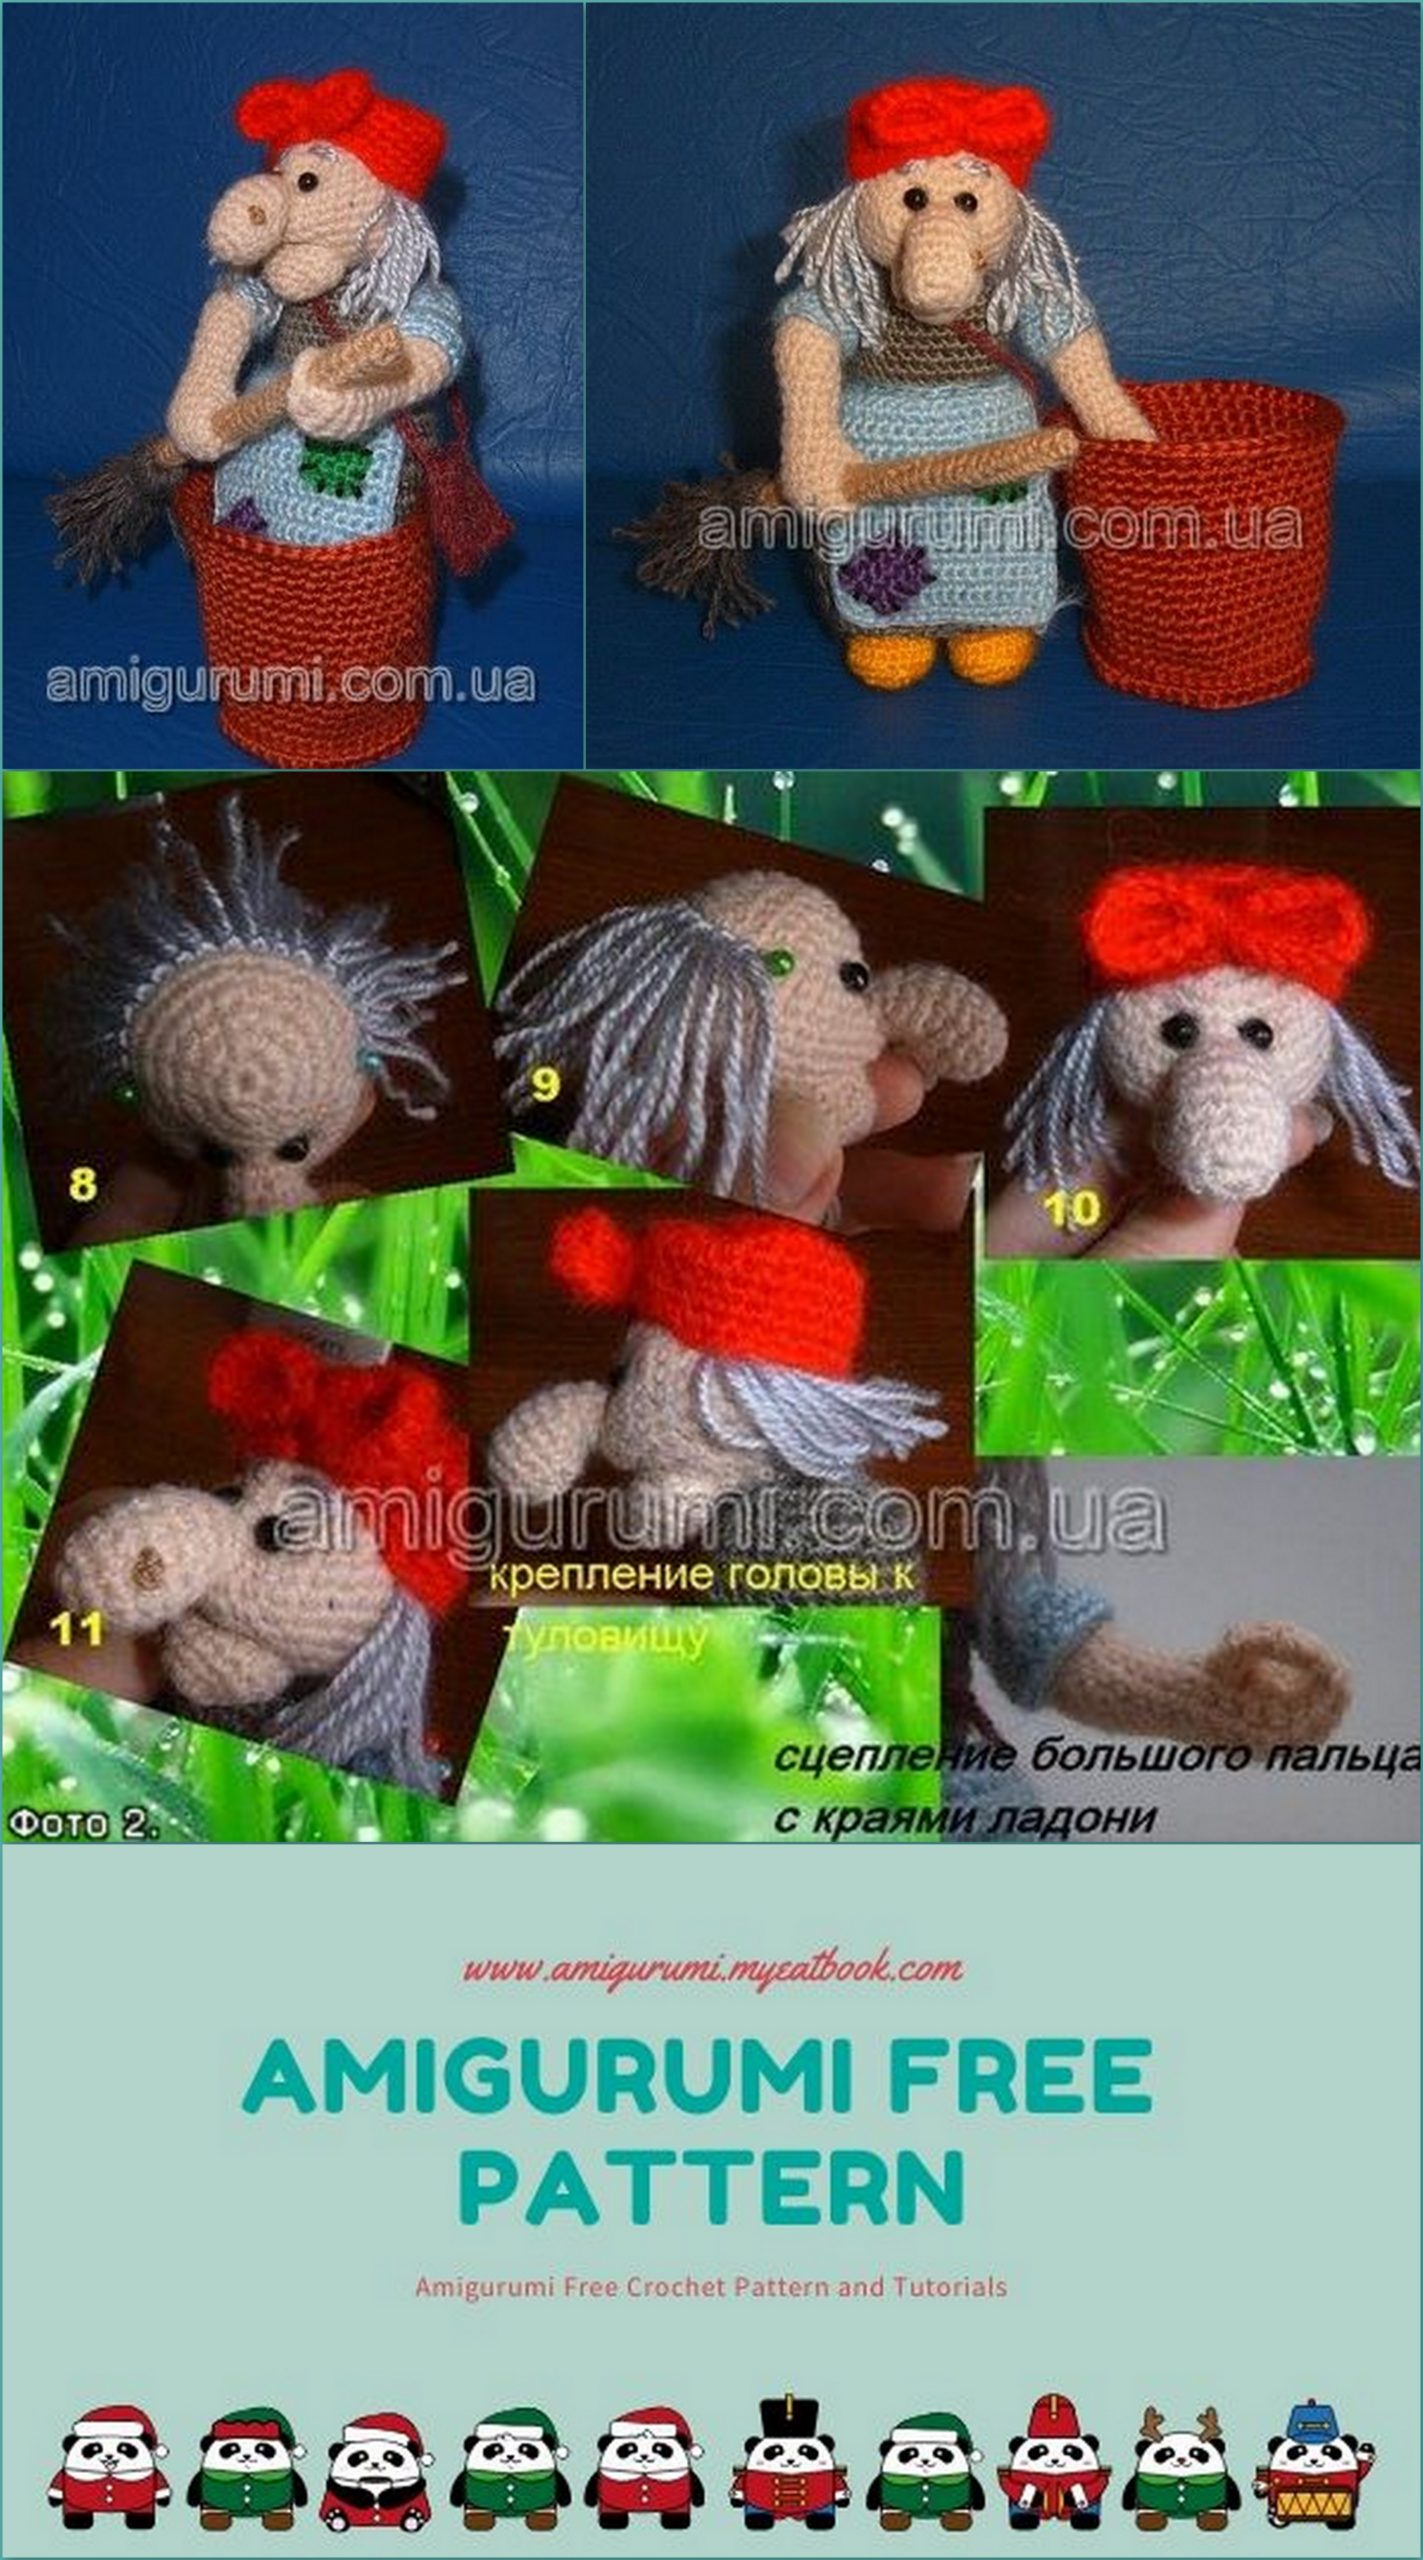
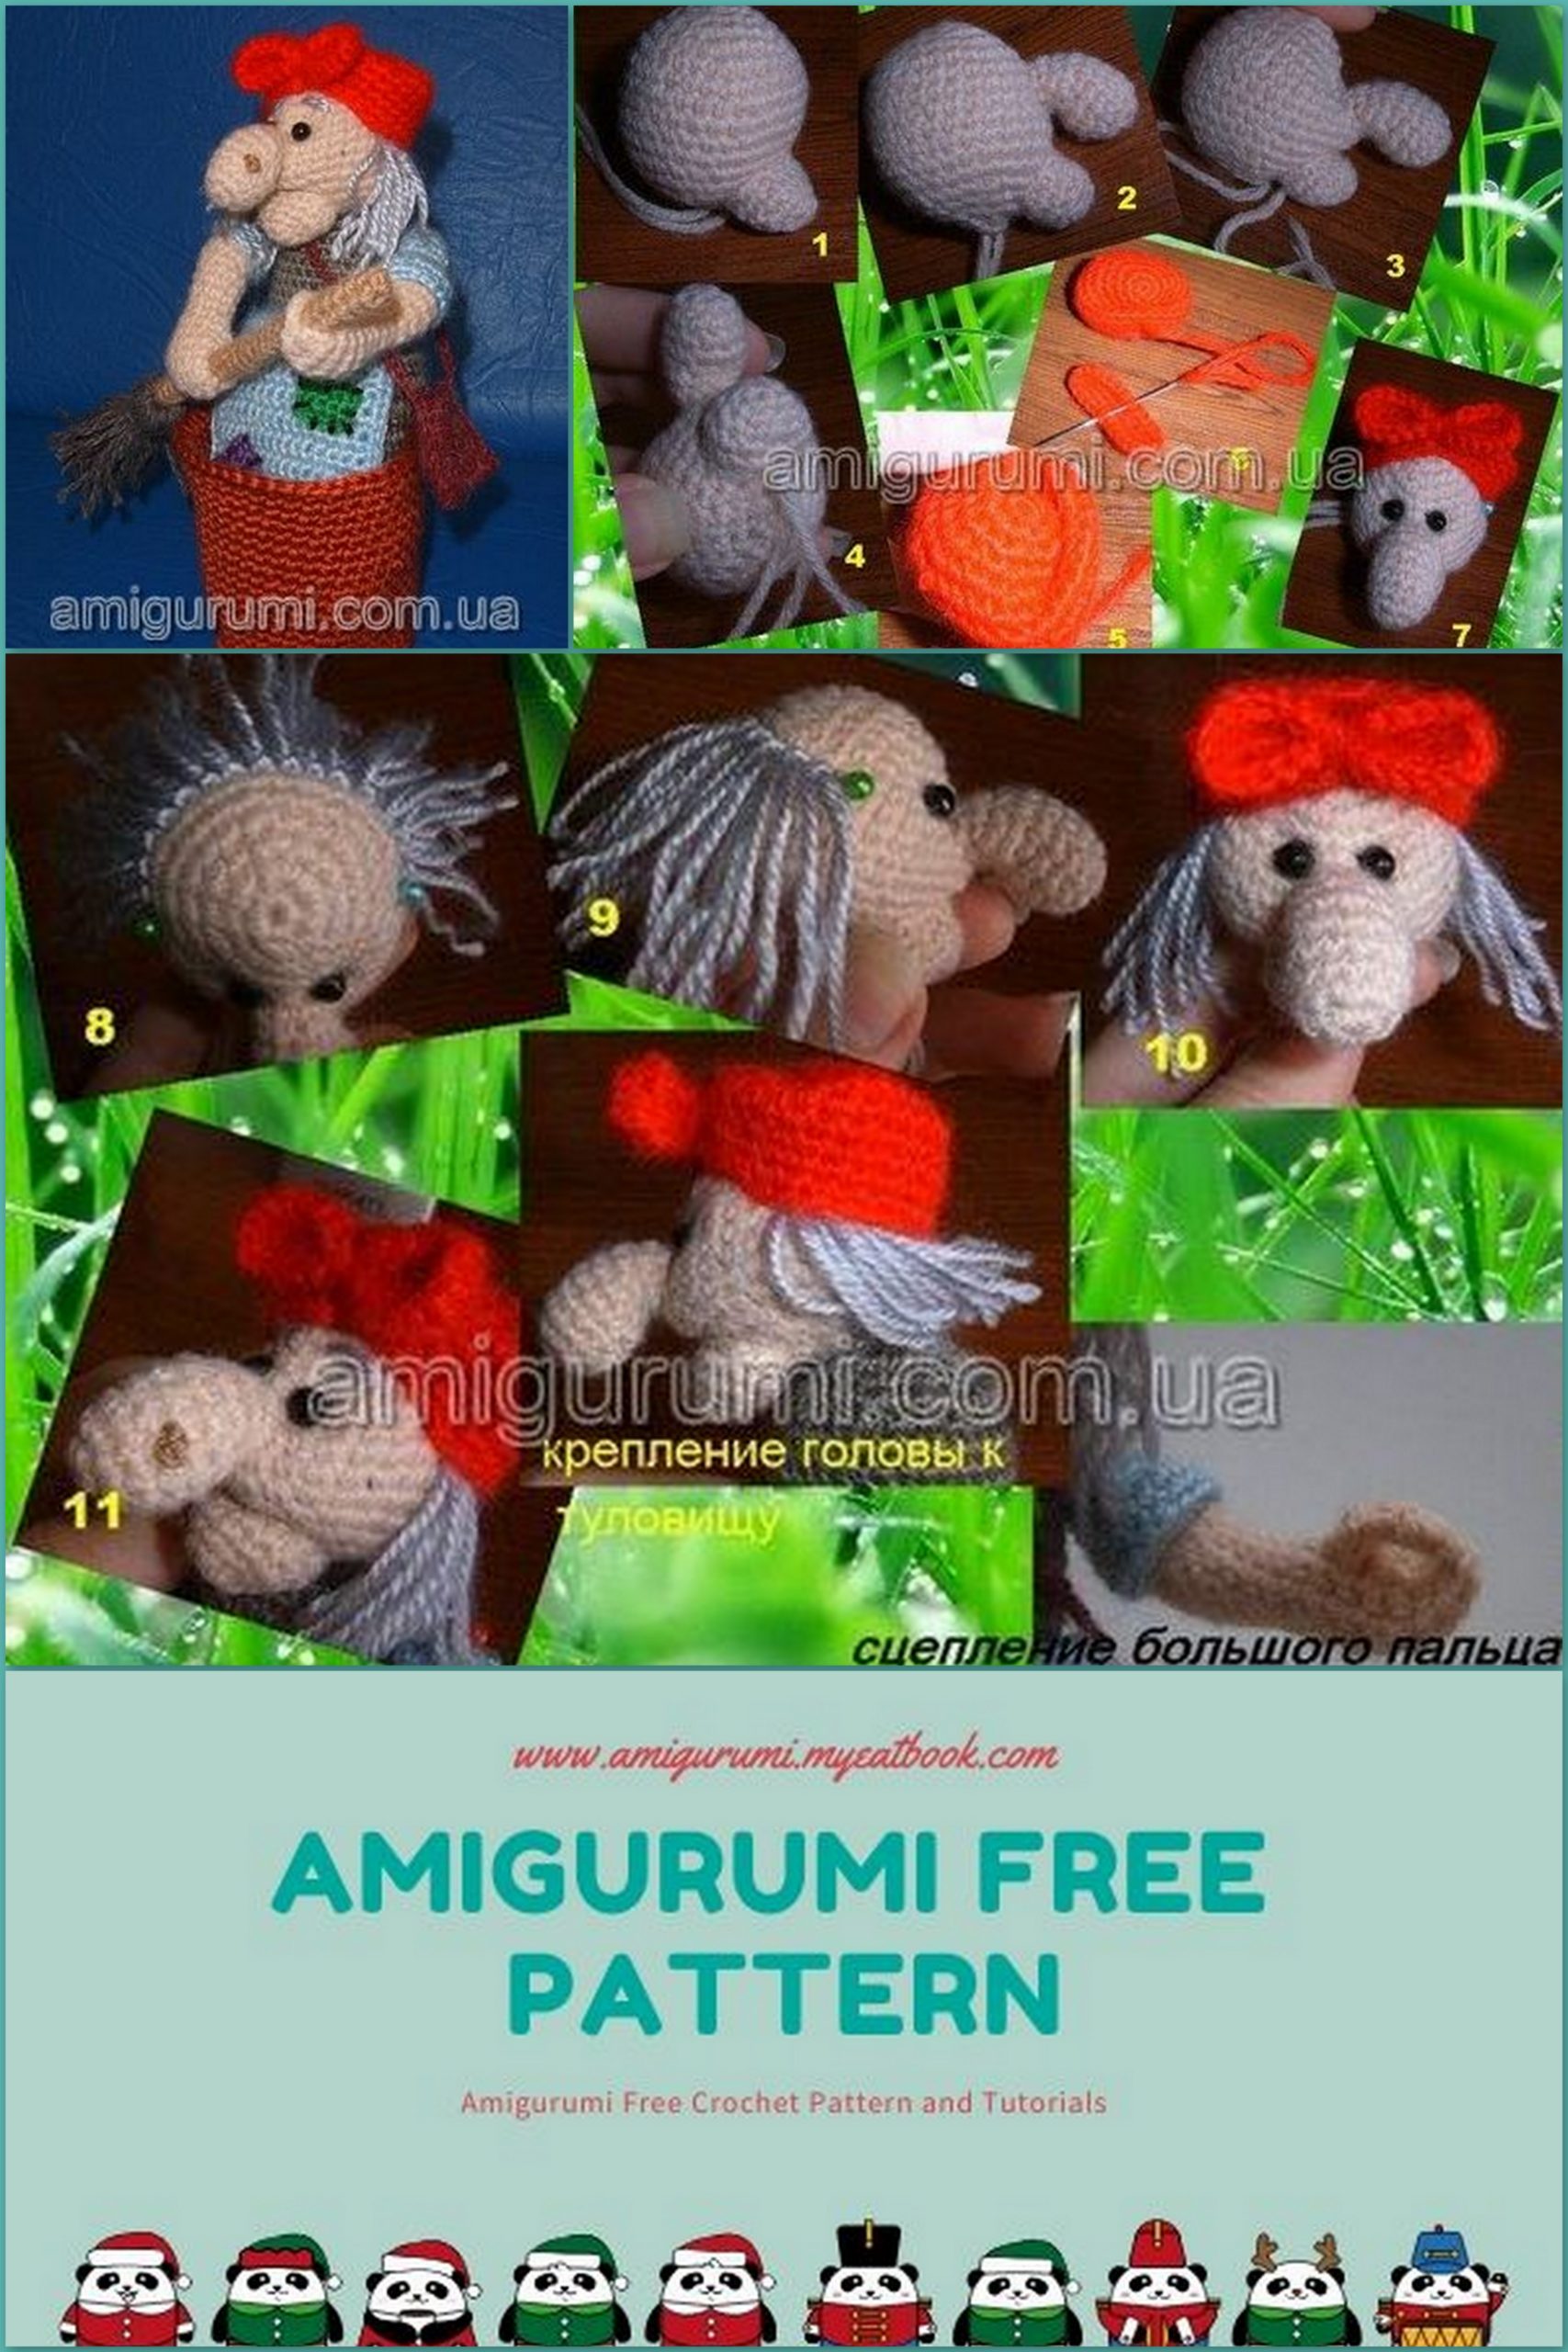
Facial assembly: sew the chin and nose detail to the head, make eye tightenings (the needle should go out in the area of the chin – so we get an aging facial expression),
Sew on beads, embroider warts, eyebrows and mouth in one stroke.
Assembly of the scarf: we make a fold on the scarf, fasten it with several stitches – this is the front of the scarf. Draw the oval in several turns of the thread of the same color and sew to the front of the scarf.
Hair: put on a headscarf and pins mark the border of the hair. Remove the kerchief, and begin to fix the pre-cut hair in light gray in 2 rows. Hair length at your discretion. After that, put on the headscarf and sew on.
See photo No. 1 and No. 2.
Grandma assembly: sew the head to the body so that there is a small hump. Sew (interlock) the tip of the finger and the edge of the end of knitting (see photo No. 2) – a broom will be inserted into the hole. Then sew on your hands or attach them with a thread mount (I sewed). Pin your legs and check granny for stability. Now legs can be sewn.
Broom assembly: sew the long edges of the broom handle, insert the used ballpoint pen there, sew holes along the edges. You need to leave 2 ends of the thread on one of the ends of the broom handle and make a whisk (like a brush). See photo number 3.
Hang a bag on it, put on an apron, put a broom in your hands and put it in a mortar!