It’s always insanely interesting to create a pretty one from one loop
a doll.
Knit with pleasure, do not put off this fascinating process
for later))
Handmade doll is always a warm and sincere gift for the day
birth to friends or relatives.
But first of all, you yourself will enjoy the creative
process, give yourself a wonderful doll, which is always
will smile at you personally, create your good mood !!!
I wish you all success!
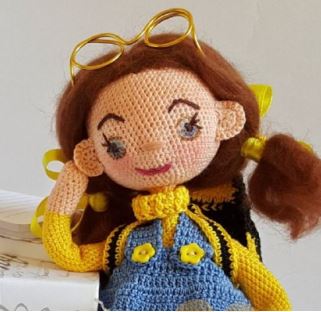
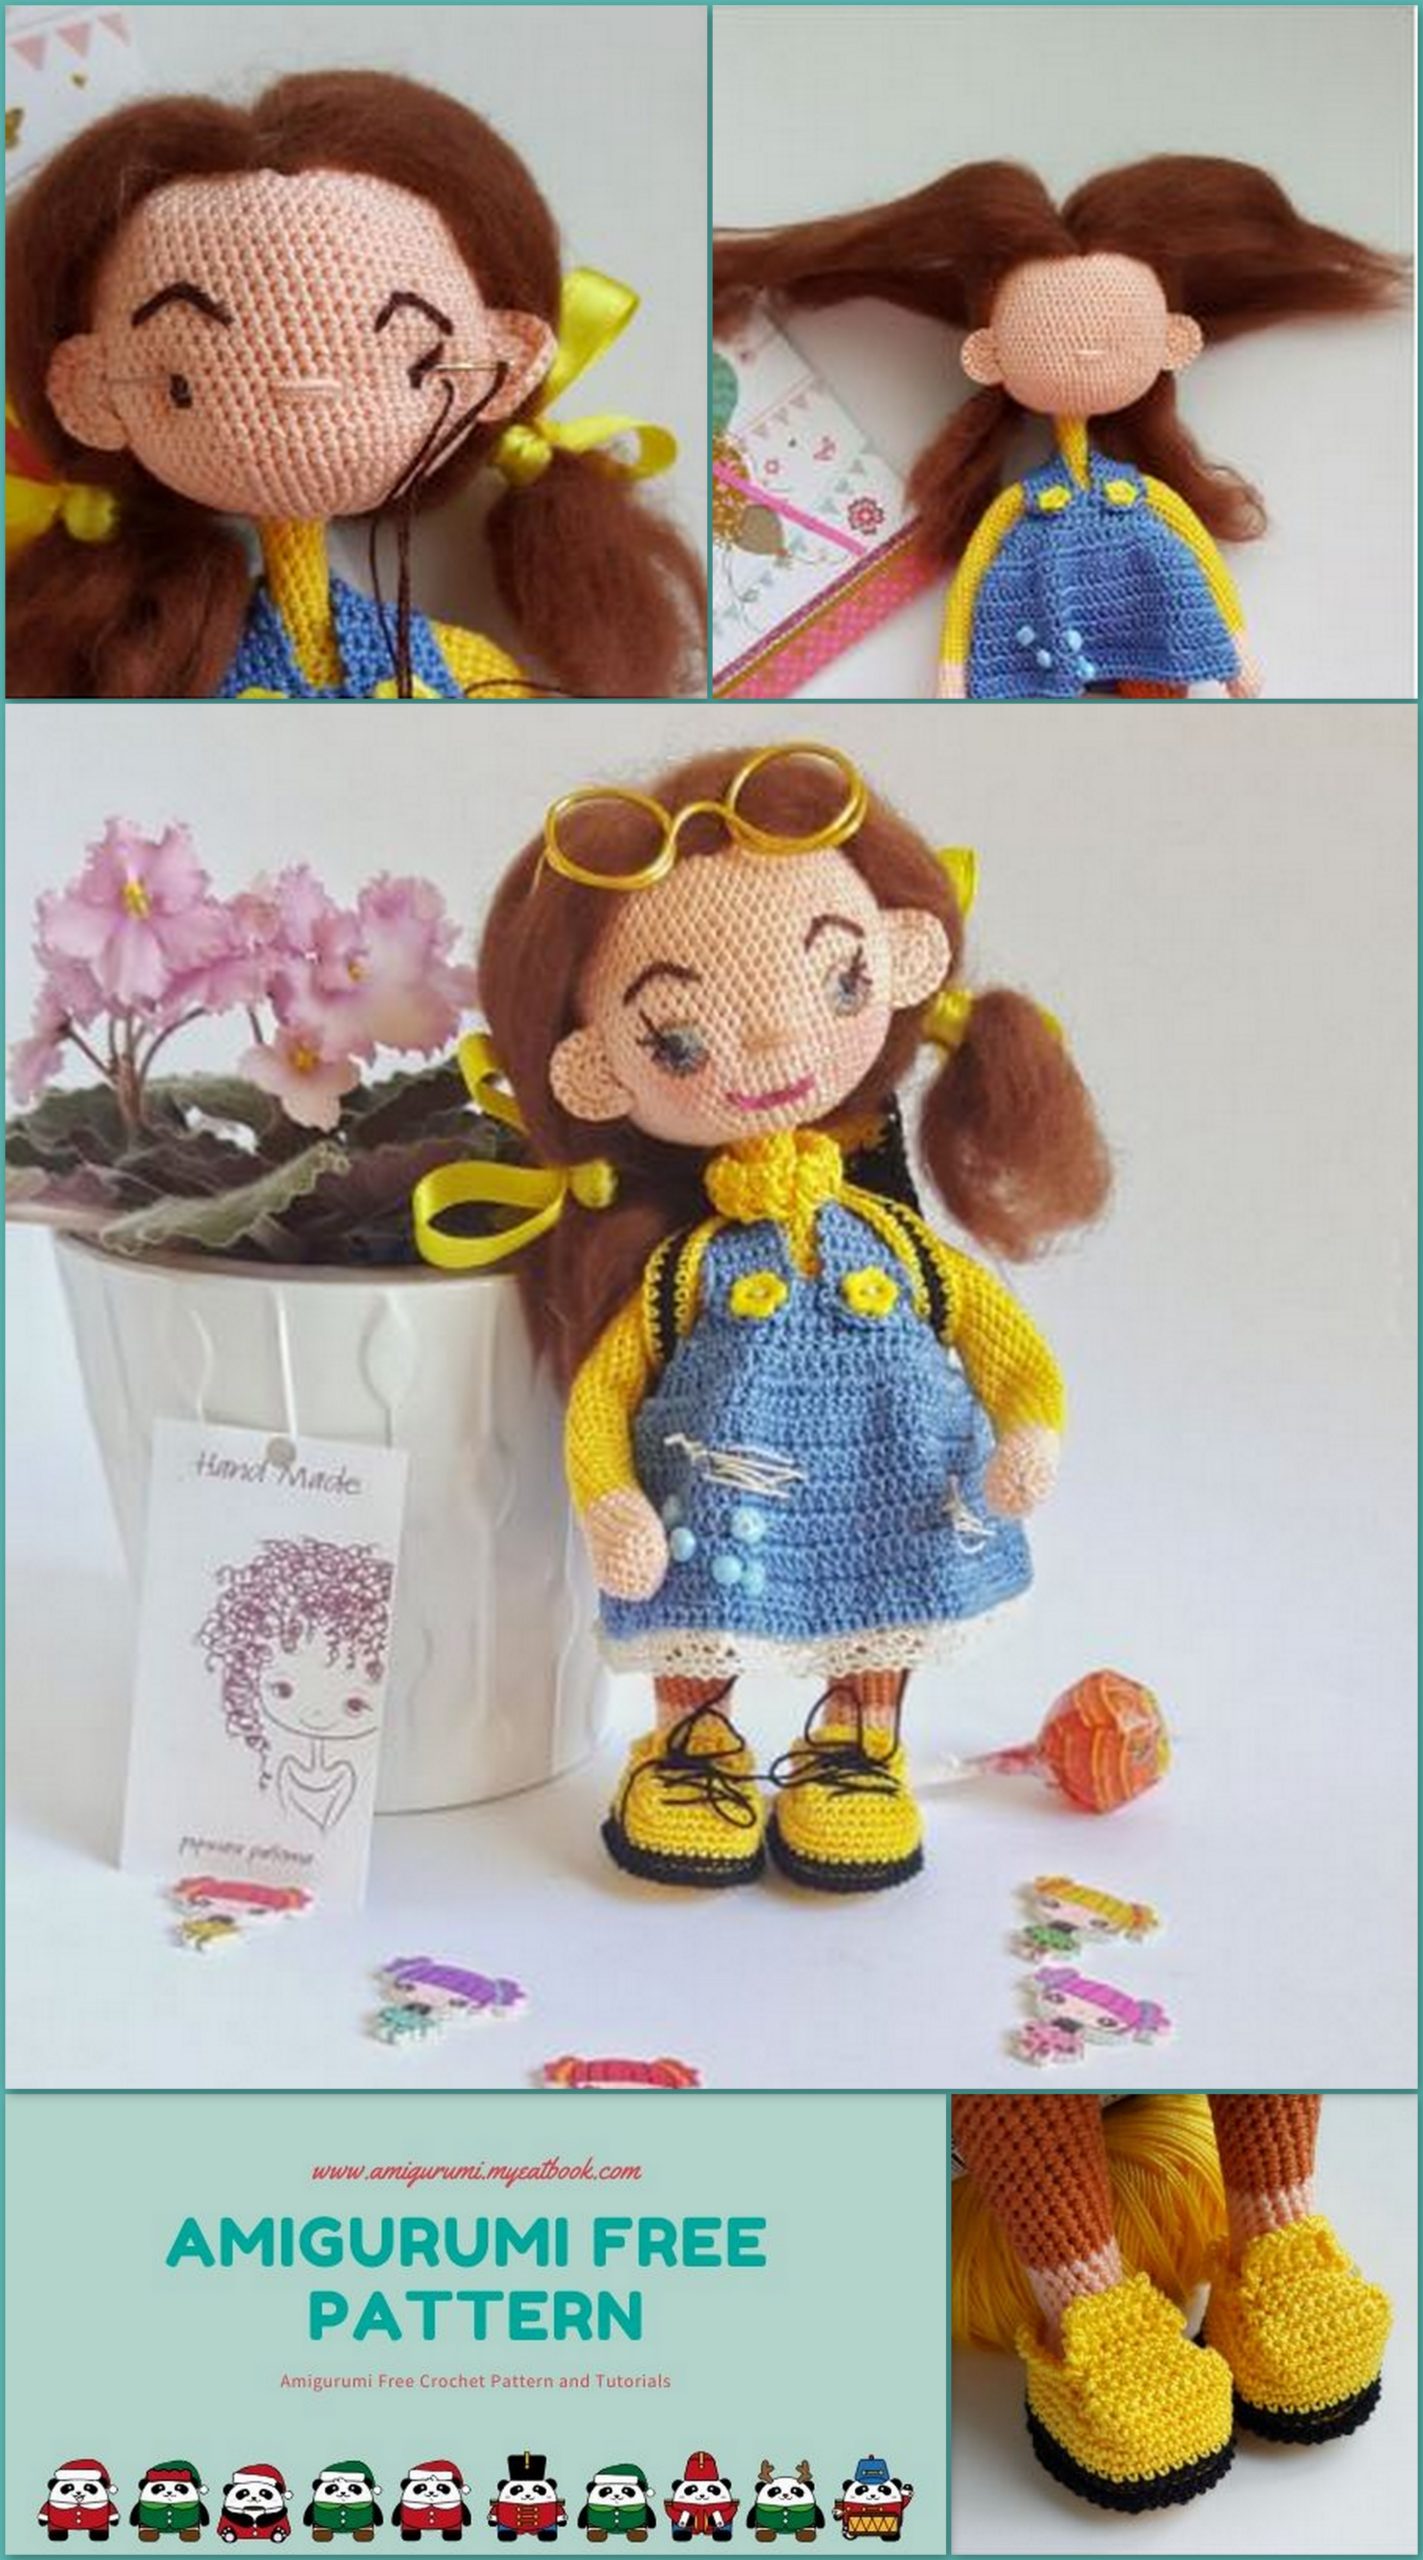
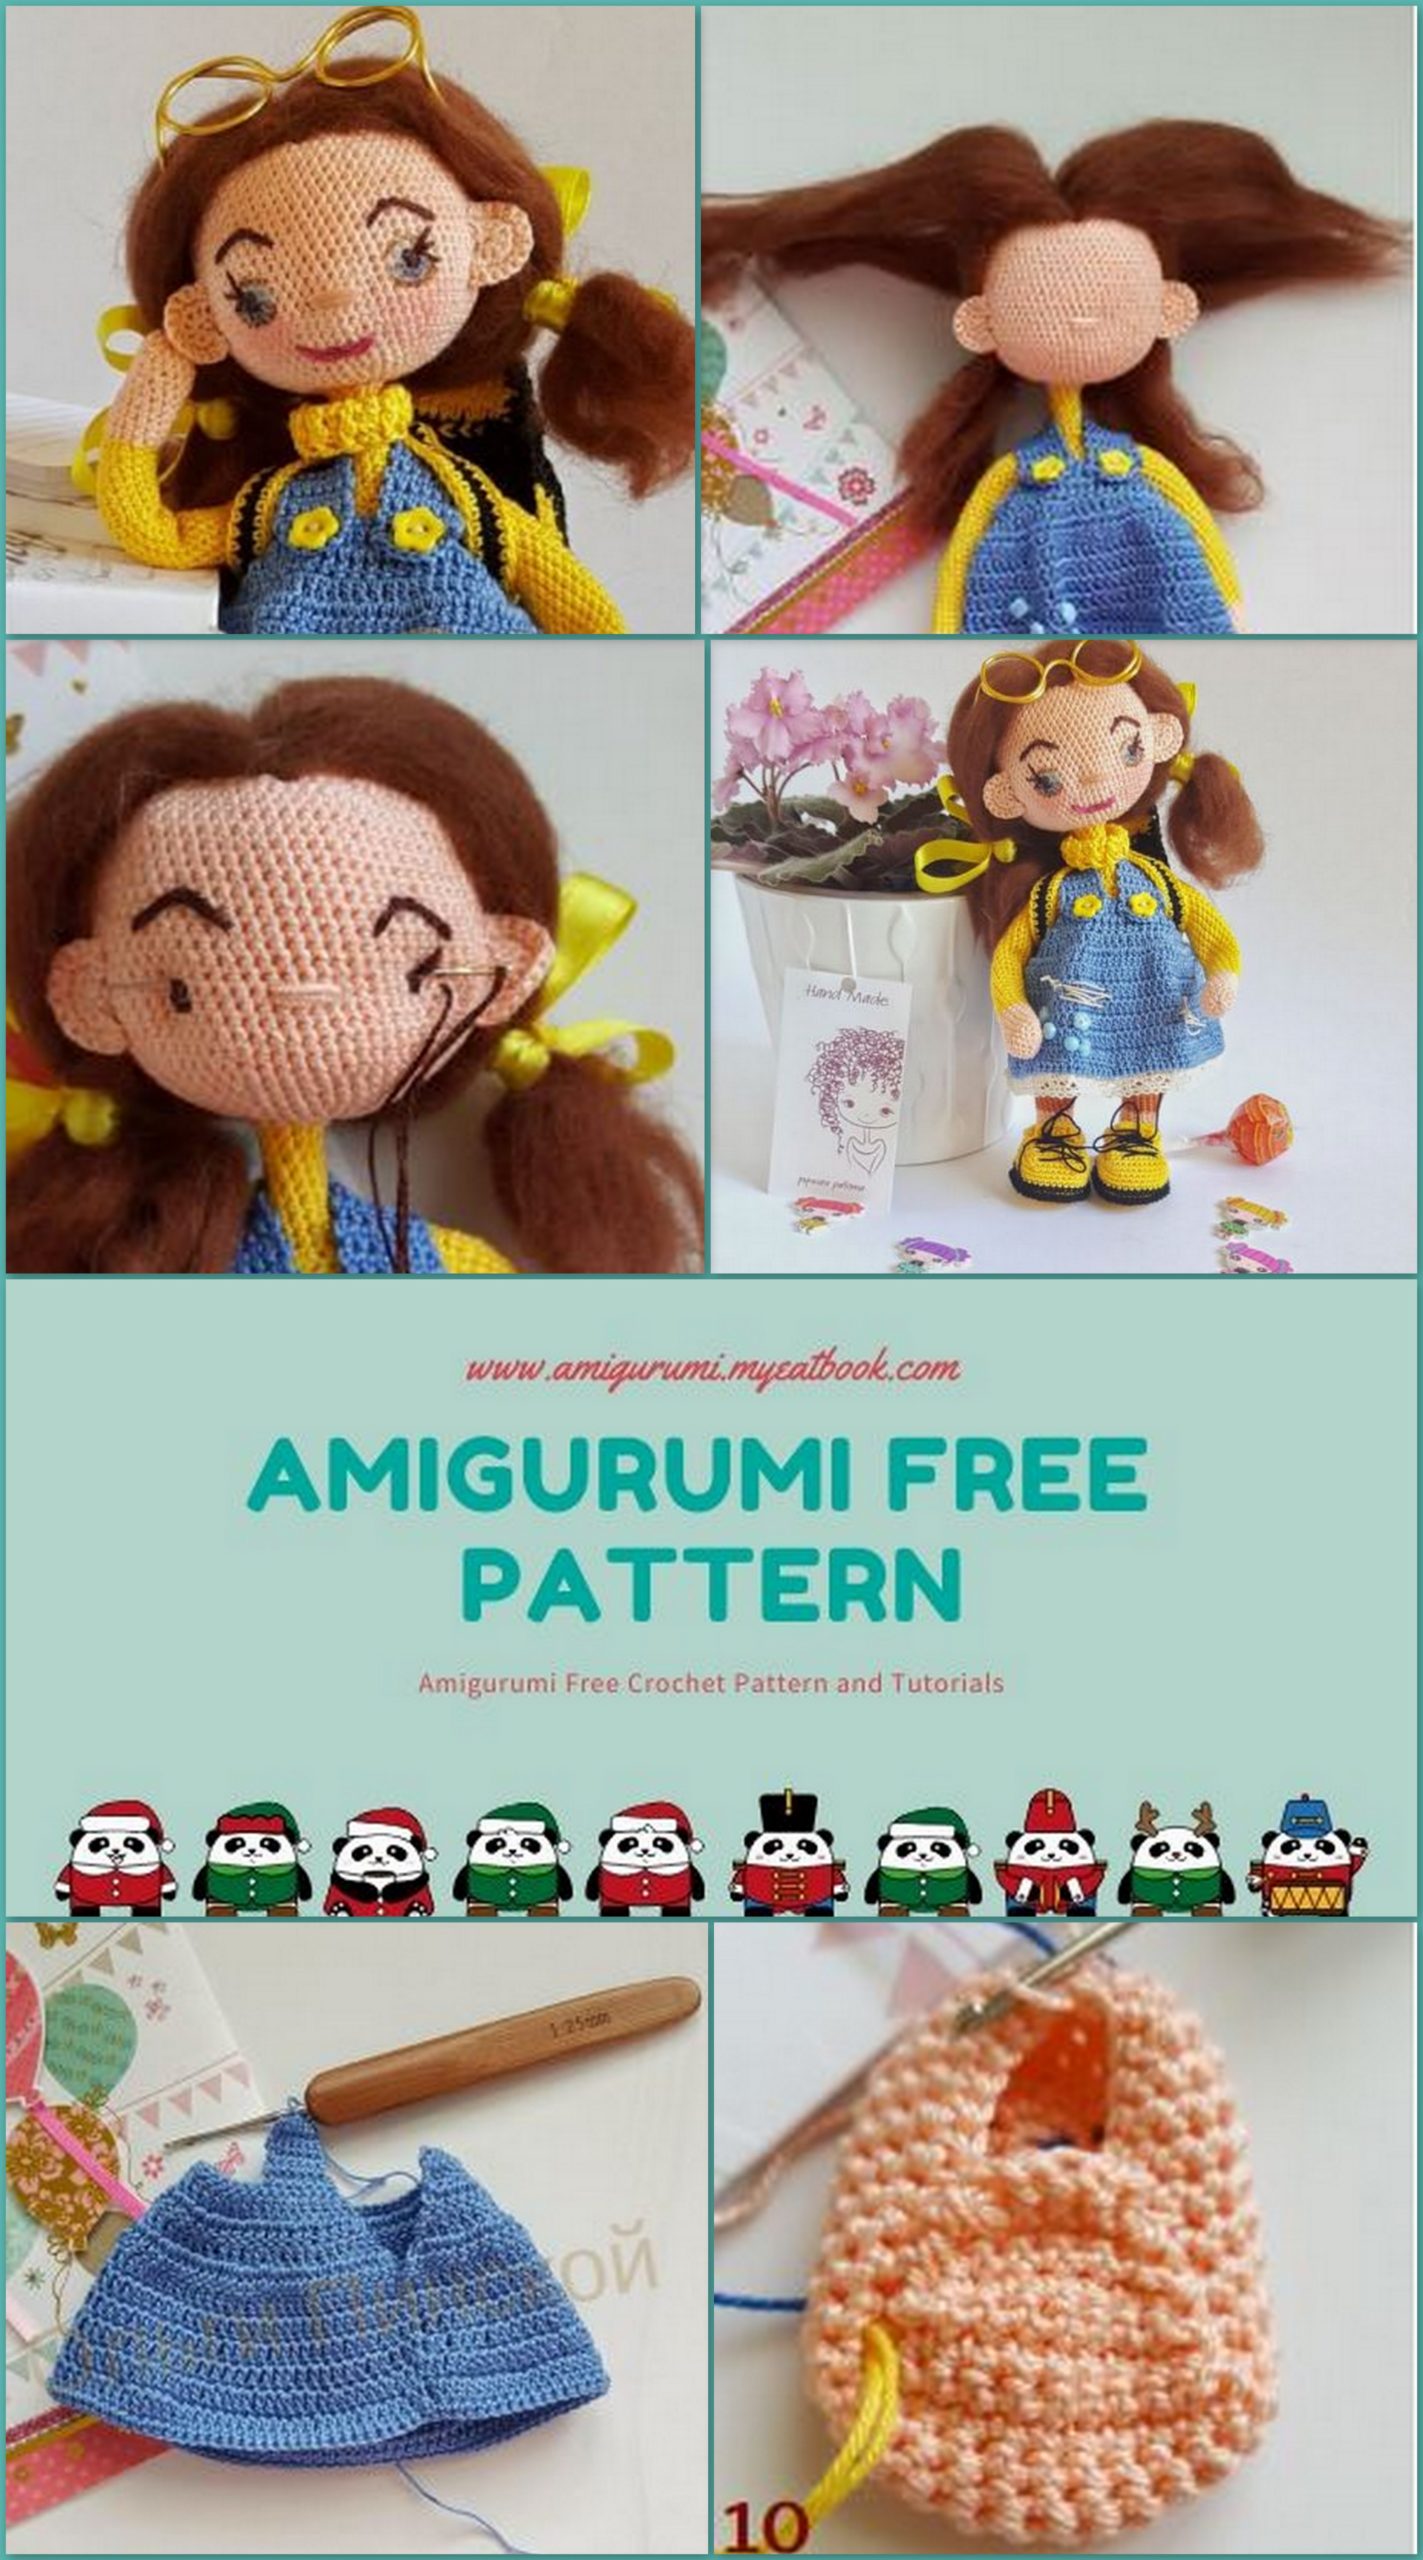
Bilania girl in the colors of the famous mobile operator! You
You can safely change the color scheme!
What the master class includes:
the whole process of knitting a doll is shown step by step with a photo
how to tie a doll’s body
how to tie a sundress
how to tie loafer loafers
how to make eyes
how to pile hair from wool
The method of knitting dolls I used on the wrong side, it’s more convenient. You
You can knit, as it is more convenient for you.
Master class of medium difficulty, does not include training
knitting techniques. If you can knit amigurumi toys, then it’s time
try to knit wire-frame dolls.
Cotton yarn (Pecherka fishnet or Alize miss)
280m / 50g colors of your choice
Hook number 1.0 for doll body, 1.25 hook for clothes
Felting wool (can be ordered at the Fair
masters or on Aliexpress), a needle for felting
Buttons for a choice for a sundress
Iris or floss thread for eye embroidery, sewing needle,
fabric markers (optional)
Copper wire for the frame diameter 2.0 or 2.5 (you can wire
in isolation) about 60 -70cm. Preferably chenille wire with
villi, but not necessarily 25cm and aluminum wire
diameter 1.5cm length about 25cm
UXU glue or gel or Crystal for textiles
Filling: holofiber or syntepuh
A little thin felt, plastic or cardboard for insoles
Legend:
Sc – single crochet,
Dc – single crochet,
Sl-st – connecting loop,
Blo – lifting loop, if at the end of a row
Flo – front half loop, if in the middle of a row
Ch: air loop
İnc – increase, knit from 1 loop 2,
Dec – decrease, knit 2 loops together
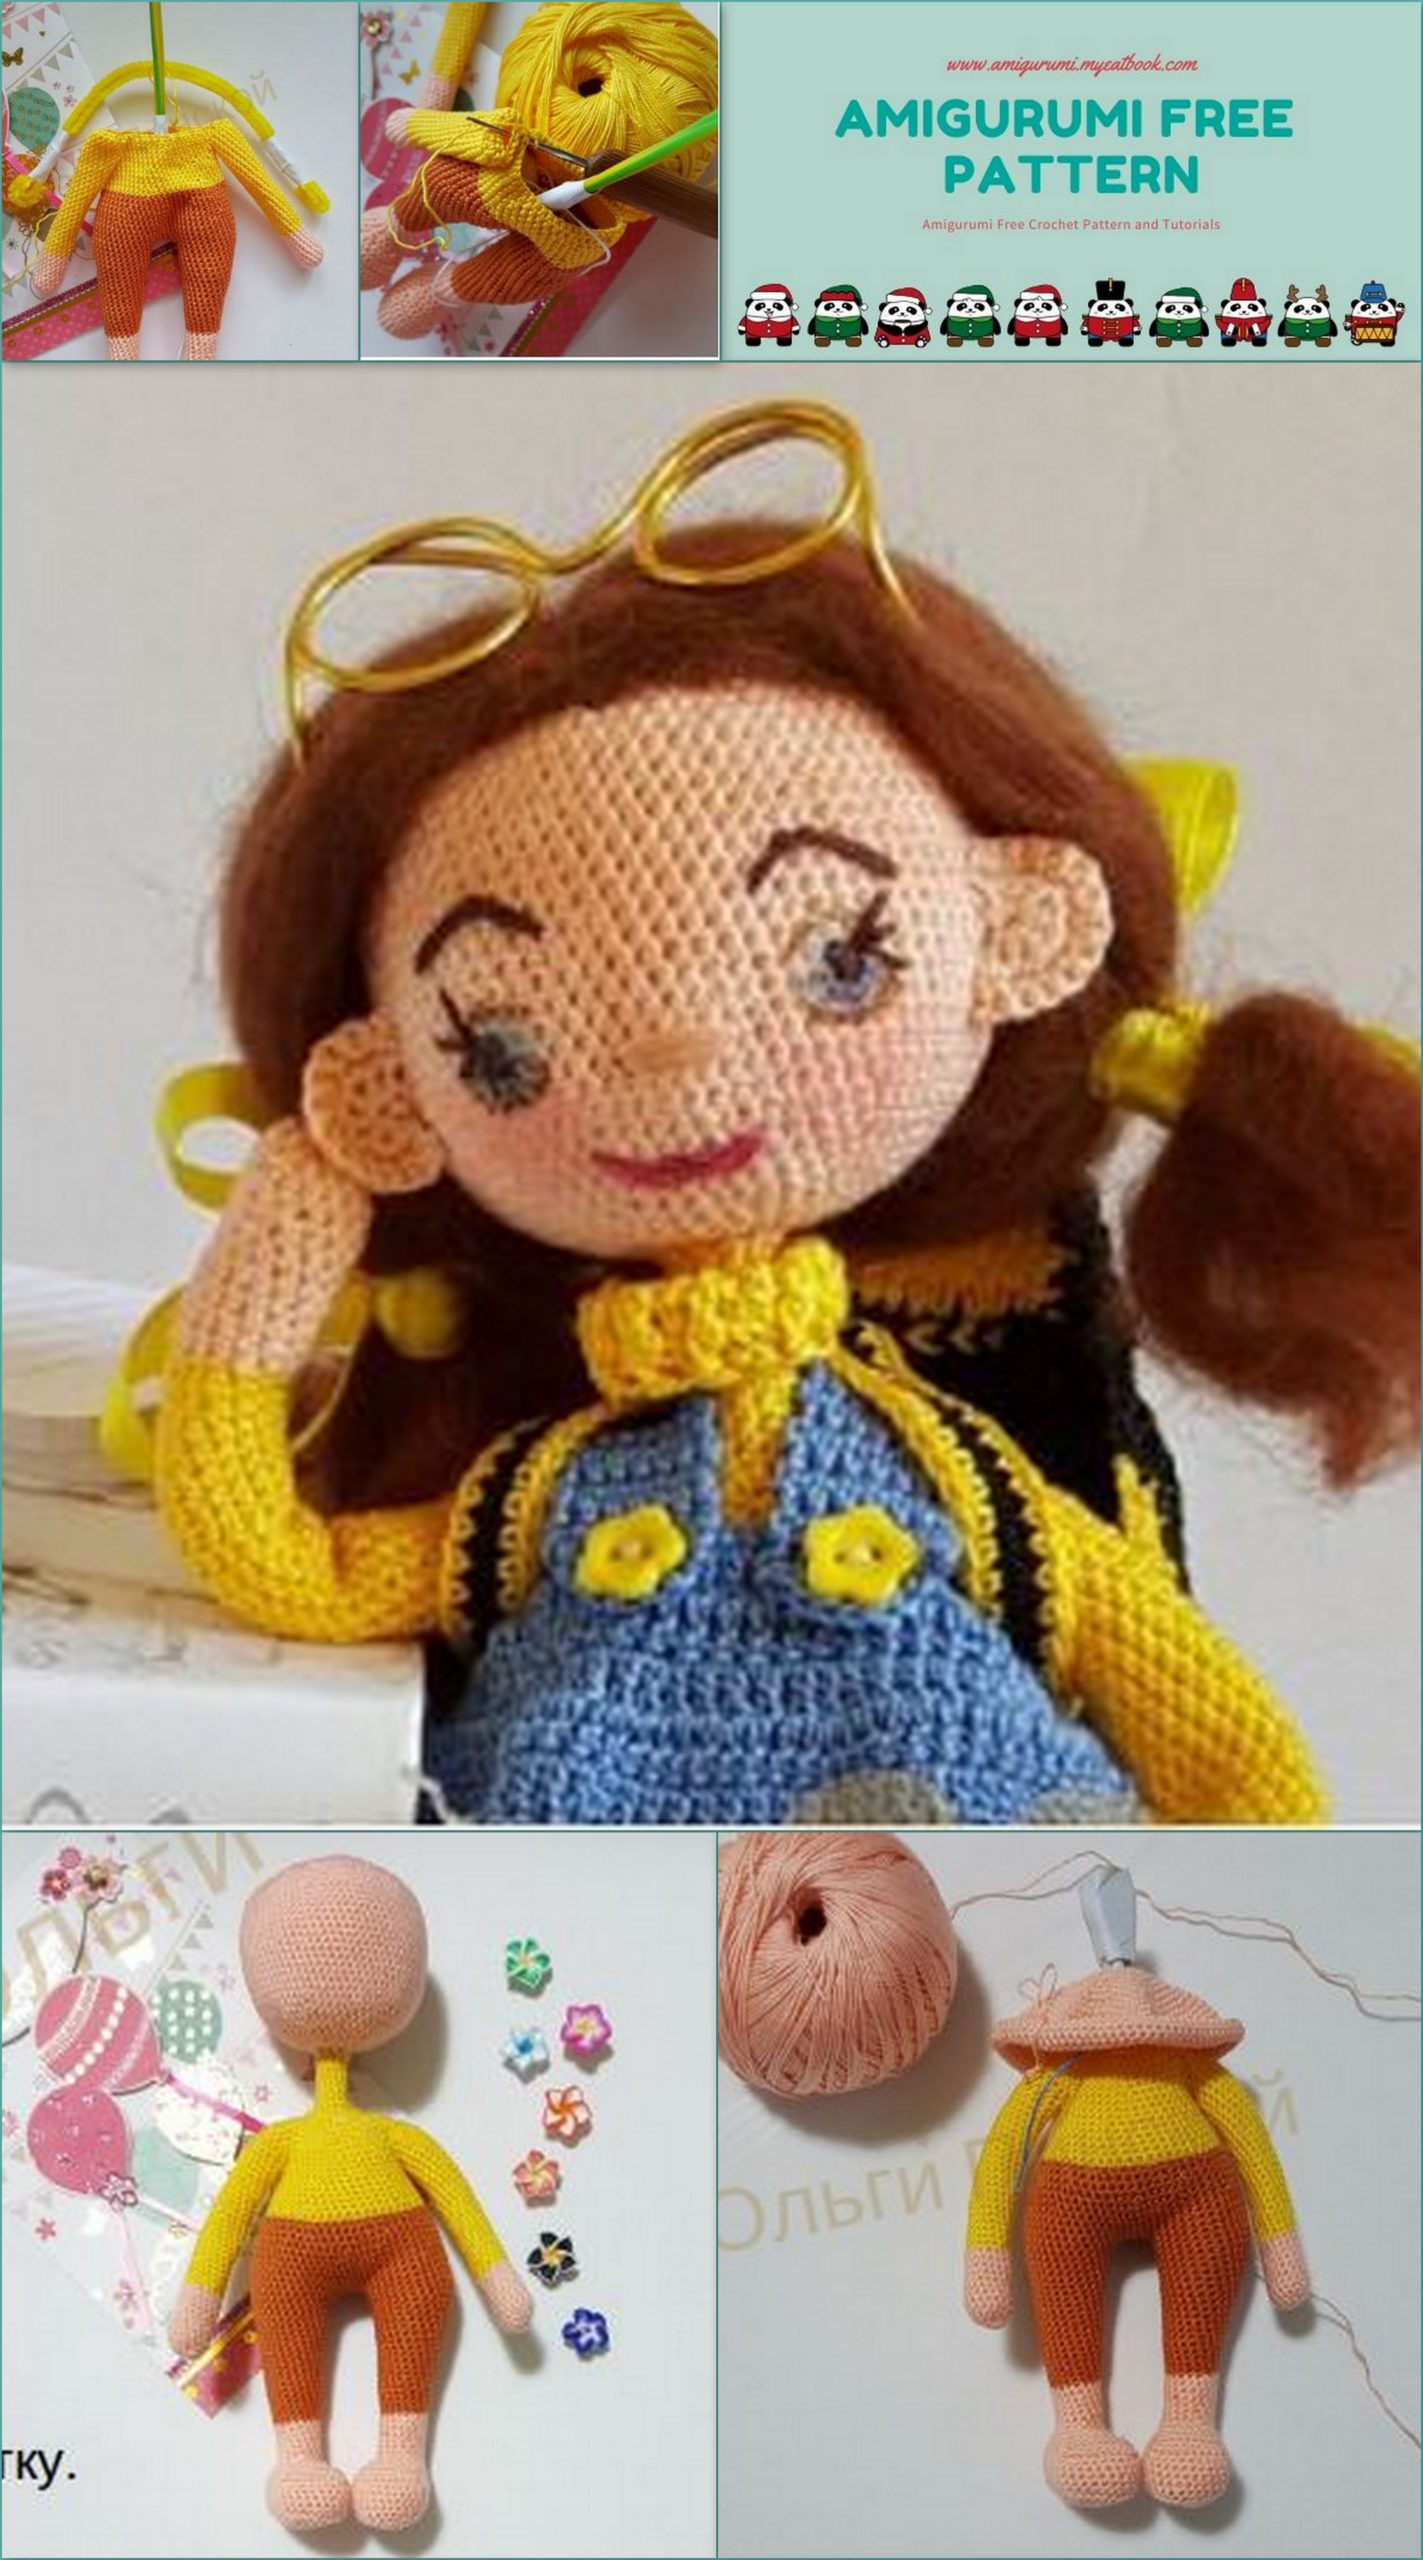
Hook 1.0.
The color of the yarn is flesh. 6Sc in the amigurumi ring.
1st row – 6İnc (12)
2 row – (3Sc, 1İnc) * 3 (15)
3-11 rows (9 rows) – 15Sc (15)
Change the color to yellow.
12-25 rows (14 rows) 15Sc (15)
26 row – 1İnc, 14Sc (16)
27 – 33 rows – 16Sc (16)
Fasten and cut the thread. Tie two handles.
Hands:
We collect a chain of 5 air loops, start knitting with the second
hinges from the hook. Hook 1.0, İncia of flesh-colored.
1 row – 3Sc, 4Sc in 1 loop, 2Sc, 1İnc (11)
2nd row – 2İnc, 2Sc, 1İnc, 1Sc, 1İnc, 3Sc, 1İnc (16)
3rd row – 1İnc, 1Sc, 1İnc, 3Sc, (1İnc, 1Sc) * 2, 1İnc, 3Sc, 1İnc, 1Sc (22)
4th row – (1İnc, 1Sc) * 2, 1İnc, 5Sc, (1İnc, 1Sc) * 2, 1İnc, 5Sc, 1İnc, 1Sc (29)
5th row – (1İnc, 1Sc) * 2, 1İnc, 9Sc, (1İnc, 1Sc) * 2, 1İnc, 9Sc, 1İnc (36)
Cut two insoles from felt or plastic to fit the foot.
Legs:
We knit the next row for the front half-loop (do not forget
that we knit the doll on the inside), if you knit on the front
side, then we knit a row for the back half loop.
6th row – 36Sc for the front half loop (36)
7-9 rows (3 rows) – 36Sc (36)
In the 9th row, still knit 5 alignment loops to the middle
heels. Here we will put a marker.
Put the insole inside the foot, try on the size, with
trim if necessary. Now apply some gel or
glue for reliability and glue the insole.
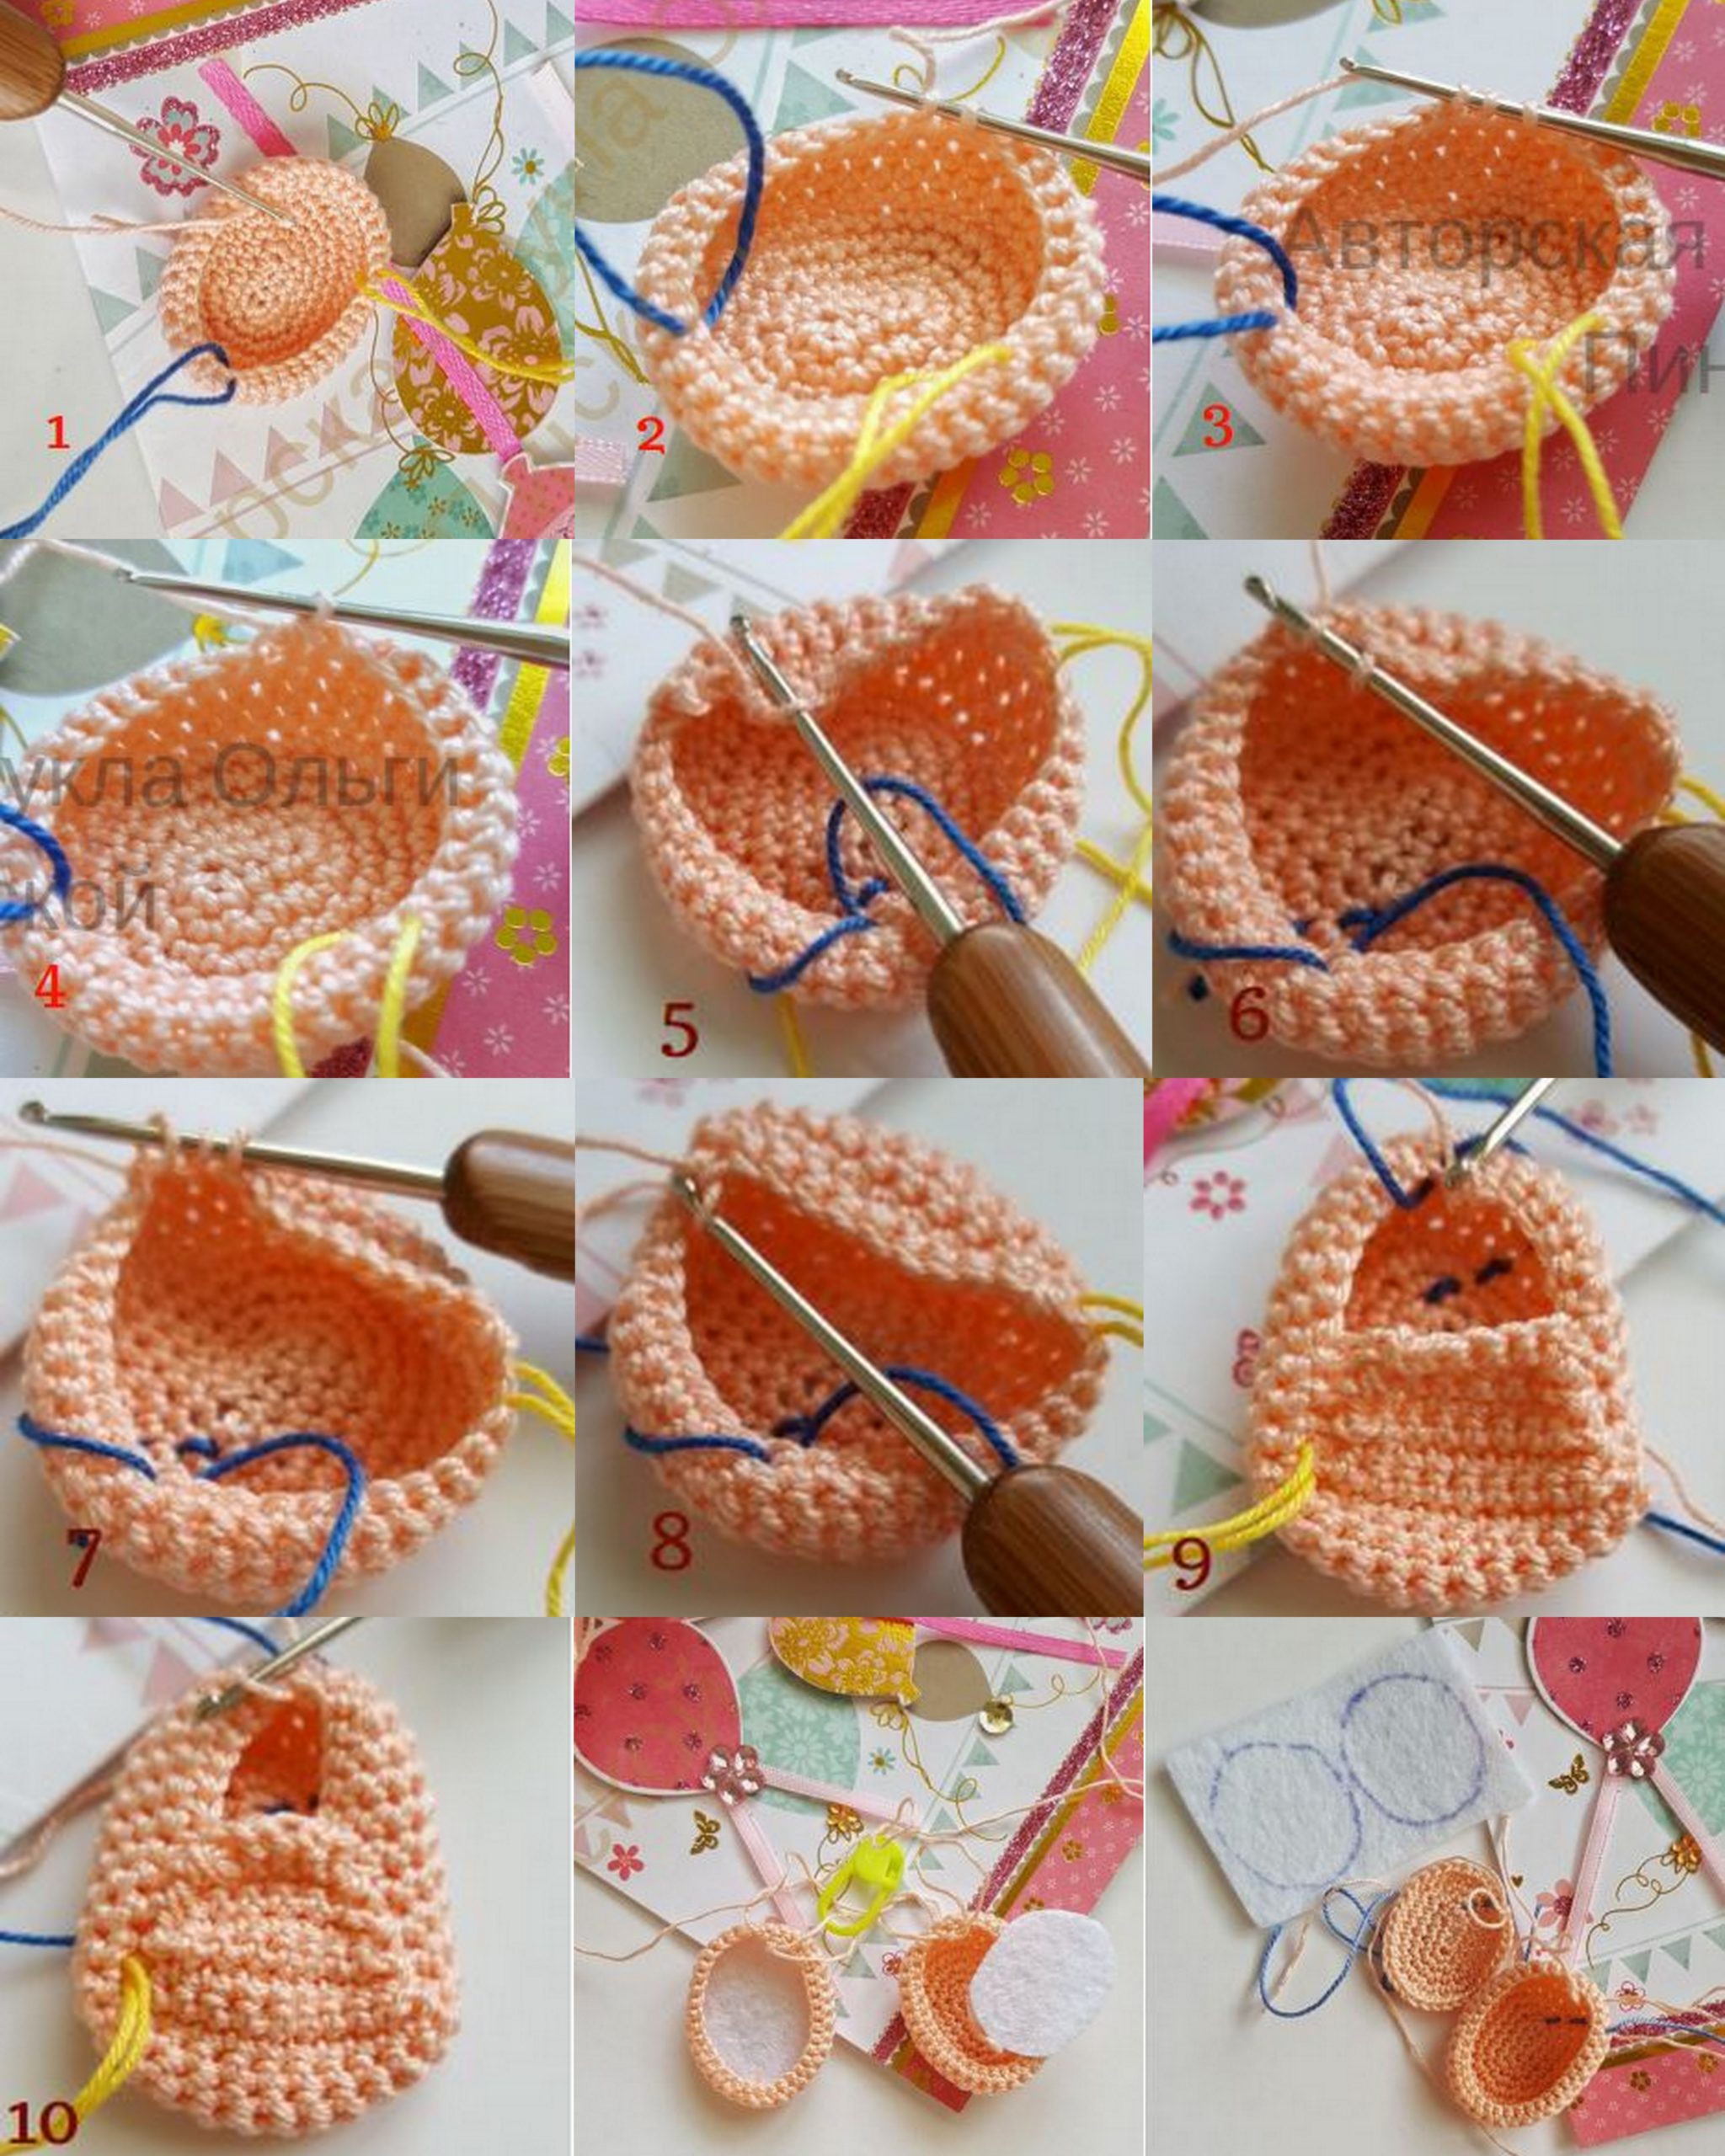
We begin to knit the foot. The marker (blue in the photo) must be strictly
in the middle of the heel.
10 row – 12Sc (side) and put a yellow marker for convenience
photo 1 (blue marker – mid-heel, yellow – through 12Sc start
forefoot), 11 Sc, 1Dec
behind the back half, turn without a loop
lifting
Legs (continued):
Photos 2, 3, 4 show how I am doing a decrease, in the 12th and 13th Sc I do
loop, then all three loops (11th, 12th and 13th) together. This is needed for
that the seam looked beautiful and not pulled together. Next turned
without lifting loop.
11 row – In the 2nd loop from the beginning (1Sc skip) 10Sc, 11th and
1Sc from the side to knit together for the front half loop
(decrease), rotation without lifting loop, (photo 5, 6, 7, 8)
12 row – into the 2nd loop (1Sc skipped) 9Sc, 10th and 1Sc with
side part together behind the back half-loop (decrease), turn
without lifting loop.
I hope that you understand the principle, we knit further.
13th row – into the 2nd loop (1Sc skipped) 8Sc, 9th and 1Sc from the side
together for the front half-loop (decrease), turn without Flo
Legs (continued):
14th row – into the 2nd loop (1Sc skipped) 7Sc, 8th and 1Sc from the side
behind the back half-loop together (decrease), turn without Flo,
15 row – into the 2nd loop (1Sc skipped) 6Sc, 7th with 1Sc from the side
together for the front half-loop (decrease), turn without Flo,
16th row – into the 2nd loop (1Sc skipped) 5Sc, 6th and 1Sc from the side
behind the back half-loop together (decrease), turn without Flo,
17th row – into the 2nd loop (1Sc skipped) 4Sc, 5th and 1Sc from the side
for the front half loop together (decrease,) turn without Flo,
18 row – into the 2nd loop (1Sc skipped) 4Sc on the toe, 8Sc on the side
parts to the back marker, photo 9.
19 row – 8Sc, 2Dec on the toe, 8Sc (18) photo 10.
We finished knitting the foot.
20 row – 18Sc (18)
21 row – 8Sc, 1Dec, 8Sc (17)
22, 23 rows – 17Sc (17)
Next, the marker is exactly in the middle of the back,
make alignment loops if necessary !!
We knit the right leg.
24 row – 3Sc, 1İnc, 13Sc (18)
25 row – 18Sc, 1 alignment loop, set marker (18)
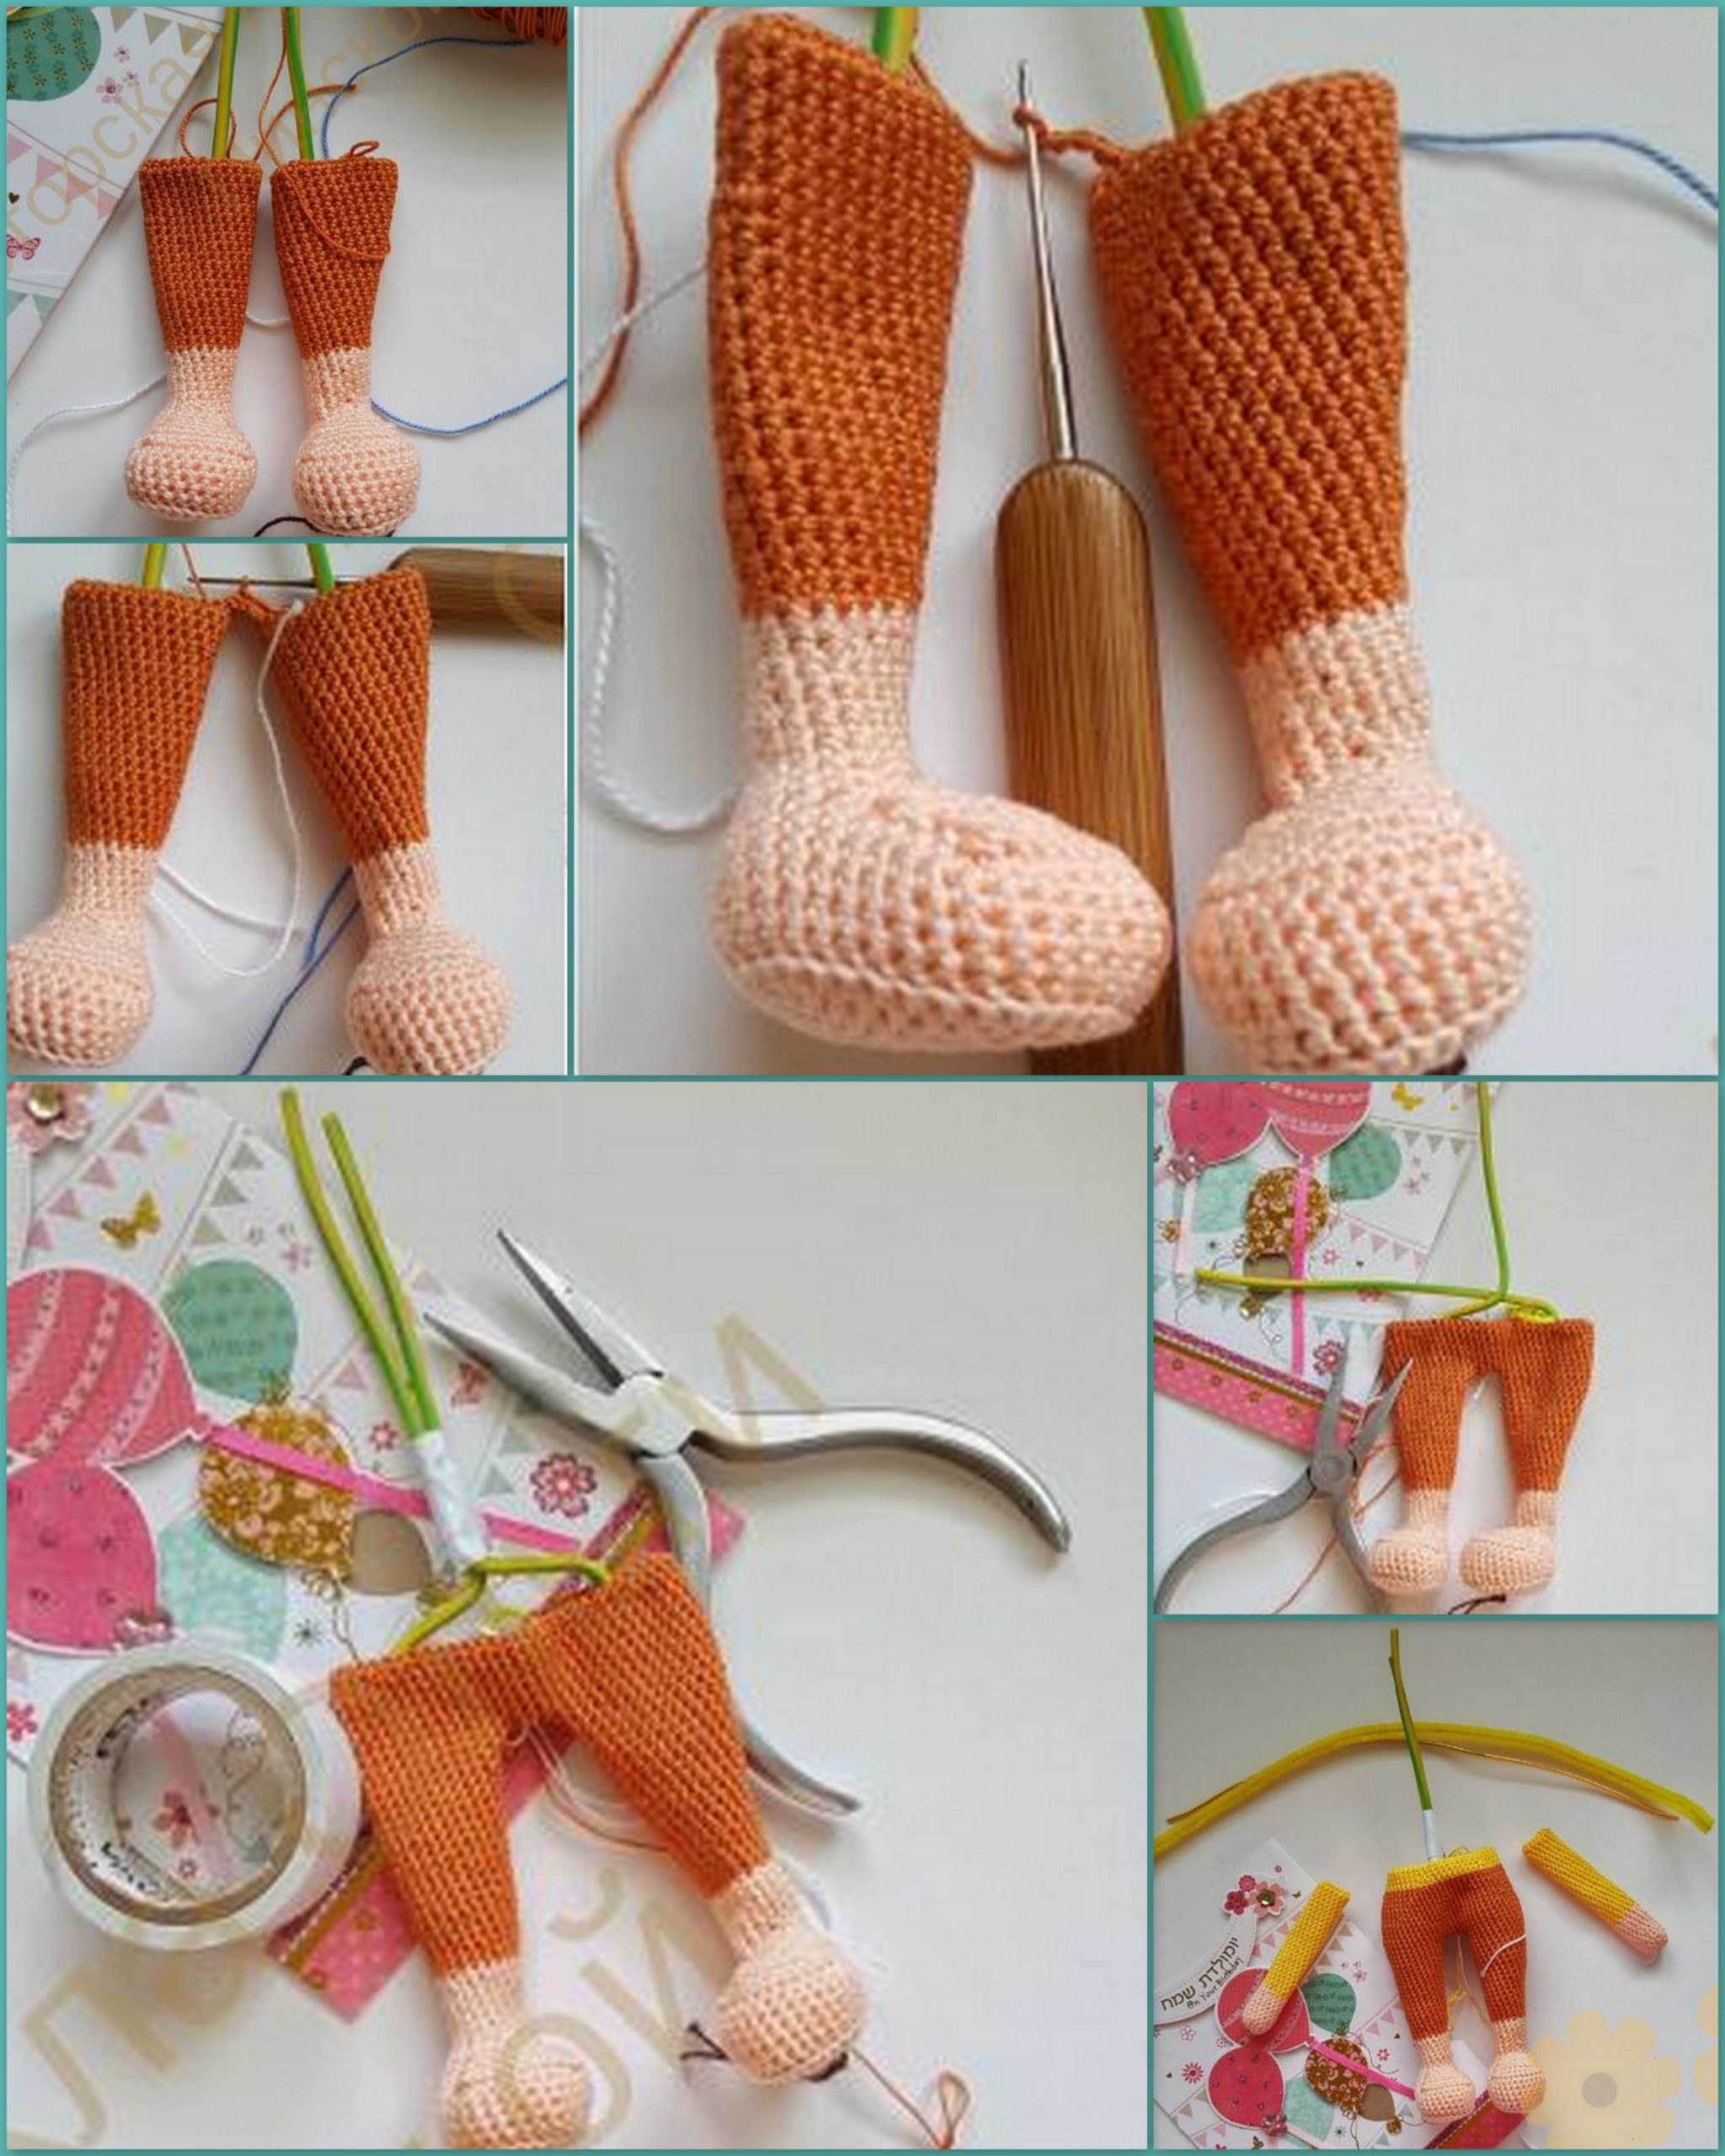
It’s time to insert the frame. Cut 2 pieces of wire with a diameter of 2-2.5 mm
about 30cm, bend at the ends in the shape of the foot (not very
wide loops), shape the legs, wrap with tape or
white adhesive at the bend, see photo 11. Insert
frame in the leg, very carefully and densely fill the feet with filler
26 row – 1İnc, 17Sc (19)
27, 28 rows (2 rows) – 19Sc (19)
Change the color of yarn to brown.
29, 30 rows (2 rows) – 19Sc (19)
31 row – 1İnc, 18Sc (20)
32 row – 20Sc (20)
33 row – 1İnc, 19Sc (21)
34 row – 21Sc (21)
35 row – 3Sc, 1İnc, 17Sc (22)
36 row – 22Sc (36)
37 row – 4Sc, 1İnc, 17Sc (23)
38, 39 row (2 rows) – 23Sc (23)
40 row – 5Sc, 1İnc, 17Sc (24)
41, 42 rows (2 rows) – 24Sc (24)
43 row – 6Sc, 1İnc, 17Sc (25)
44 row – 25Sc (25)
45 row – 6Sc, 1İnc, 18Sc (26)
46 row – 1İnc, 25Sc (27)
47 row – 20Sc, do not tie 7Sc, stop in the middle
inner thigh, thread fasten and trim.
We knit the left leg, from 1 to 23 rows, like the right leg.
24 row -13Sc, 1İnc, 3Sc (18)
25 row – 25 row – 18Sc, 1 alignment loop, put the marker (18),
insert the wire and fill the foot with filler.
26 row – 1İnc, 17Sc, (19)
27, 28 rows (2 rows) – 19Sc (19)
Change the color to brown.
29 row – 19Sc (19)
30 row – 19Sc (19)
31 row – 1İnc, 18Sc (20)
32 row – 20Sc (20)
33 row – 1İnc, 19Sc (21)
34 row -21Sc (21)
35 row – 17Sc, 1İnc, 3Sc (22)
36 row – 22Sc (22)
37 row – 17Sc, 1İnc, 4Sc (23)
38, 39 rows (2 rows) – 23Sc (23)
40 – 17Sc, 1İnc, 5Sc (24)
41, 42 row (2 rows) – 24Sc (24)
43 row – 17Sc, 1İnc, 6Sc (25)
44 row – 25Sc (25)
45 row – 18Sc, 1İnc, 6Sc (26)
46 row – 1İnc, 25Sc (27)
47 row -27Sc, knit another 7Sc to the middle of the inner part (where
the legs will connect). We do not cut the thread, we will continue to knit
body.
Lay the legs in front of you with your socks towards you and determine the middle
the inside. See if we did that right at the left
the legs were not tied up with 7 loops, but at the right they were tied up with 7 loops. If
you see that you’re not completely correct.
Legs (continued):
We have determined where the connection points of the legs will be.
1 row – from the middle of the inner part of the thigh of the left leg we type 3
air loops, then go along the right leg towards the priests
27Sc, 3Sc in the chain, 27Sc in the left leg, 3Sc in the chain,
set marker (60)
2nd row – 5İnc, 47Sc, 6İnc, 1Sc, 1İnc (72)
3rd row – 70Sc, set the marker, it will be the middle of the back (72)
4, 5 row (2 rows) – 72Sc (72)
6th row – 15Sc, 1Dec, 38Sc, 1Dec, 15Sc (70)
7 row – 23Sc, 1Dec, 20Sc, 1Dec, 21Sc 1Dec (67)

Body:
Somewhere after the 6-7th row, you need to arrange the frame. The wire of each leg
bend as shown in the photo above
and wrap with electrical tape.
8 row – 1Dec, 65Sc (66)
9 row – 32Sc, 1De
c, 32Sc (65)
10 row – (11Sc, 1Dec) * 5 (60)
11 row – 60Sc, 2 alignment loops (you yourself see how many loops
for alignment, the main thing is that the marker remains in the middle
backs), add filler to the legs.
12 row – (1Dec, 10Sc) * 5 (55)
13 row – change the color to yellow 55Sc (55)
Body (continued):
14th row – (9Sc, 1 Dec) * 5 (50)
15-17 row (3 rows) – 50Sc (50)
18 row – (8Sc, 1Dec) * 5 (45)
19, 20 row (2 rows) – 45Sc (45)
Now before knitting further you need to tightly fill the bottom
body. Add filler and seal. Particularly tight in the area
thigh-butt-belly. But add in small portions to the doll
“cellulite” did not appear.
We begin to tie our hands. Check that the marker is strictly
in the middle of the back. If necessary, make an alignment loop.
21 rows – 10Sc, 3Sc we knit together with the loops of the right handle, as
shown in the photo above, 19Sc, 3Sc along with the loops left
Pens, 10Sc (45)
22 row – 10Sc (on the back), 13Sc (on the right handle), 8Sc, 1 Dec,
9Sc, 13Sc (on the left handle), 10Sc (on the back) (64)
23 row – (14Sc, 1Dec) * 4 (60)
24 row – (1Dec, 8Sc) * 6 (54)
25 row – (7Sc, 1Dec) * 6 (48)
Body (continued):
Now you need to insert the wire. Cut the wire with a diameter of 1.0 or
1,5mm segment about 25-30cm, the same segment is made from chenille
wire with villi. Make loops at the ends, try on
the length of the arms, fold together and wrap around the wrist
electrical tape, as in the photo above. If there is no chenille wire, then the handle
add slag to the filler.
Now insert the wire into the handles, as shown in the photo below. It’s better,
so that the wire gets between the wires of the frame, but how it goes.
26 row – (4Sc, 1Dec) * 8 (40)
27 row – (1Dec, 3Sc) * 8 (32), we stuff the body tightly, especially the back-chest.
28 row – (2Sc, 1Dec) * 8 (24)
29 row – 12 Dec (12)
We knit a neck.
1-8 row (8 rows) – 12Sc (12)
Change the color to flesh.
9-12 row (4 rows) – 12Sc
We finished knitting the body. Now, knit a sweater collar.
Dial 24 air loops, start knitting with the 3rd loop from the hook.
1st row – 22Dc, connecting loop (close in a circle), 2 loops
lifting, knit further in a circle,
2 row – (1 front Dc, 1 inside Dc), fasten the thread, cut it.
We put a collar on the neck of the doll.
Body (continued):
Continue to knit head after neck. We bend the wire with a loop and
wrap with electrical tape.
1 row – (1Sc, 1İnc) * 6 (18)
2 row – (2Sc, 1İnc) * 6 (24)
3rd row – (3Sc, 1İnc) * 6 (30)
4th row – 2Sc, 1İnc, (4Sc, 1İnc) * 5, 2Sc (36)
5 row – (5Sc, 1İnc) * 6 (42)
6 row -3Sc, 1İnc, (6Sc, 1İnc) * 5, 3Sc (48)
7 row – (7Sc, 1İnc) * 6 (54)
8 row – 4Sc, 1İnc, (8Sc, 1İnc) * 5, 4Sc (60)
9 row – (9Sc, 1İnc) * 6 (66)
10 row – 5Sc, 1İnc, (10Sc, 1İnc) * 5, 5Sc (72)
11 – 27 rows (16 rows) – 72Sc (72)
28 row – 5Sc, 1Dec (10Sc, 1Dec) * 5, 5Sc (66)
29 row – (9Sc, 1Dec) * 6 (60)
30 row – 4Sc, 1Dec, (8Sc, 1b) * 5, 4Sc (54)
31 row – (7Sc, 1Dec) * 6 (48)
We begin to stuff our heads evenly.
Head:
32 row – 3Sc, 1Dec, (6Sc, 1Dec) * 5, 3Sc (42)
33 row – (5Sc, 1 Dec) * 6 (36)
34 row – 2Sc, 1Dec, (4Sc, 1Dec) * 6, 2Sc (30)
35 row – (3Sc, 1Dec) * 6 (24)
Stuff your head.
36 row – (2Sc, 1Dec) * 6 (18))
37 row – (1Sc, 1Dec) * 6 (12)
38 row –6Dec (6),
Pull the hole, fasten and cut the thread.
The figure of the doll is completely ready.
Head (continued):
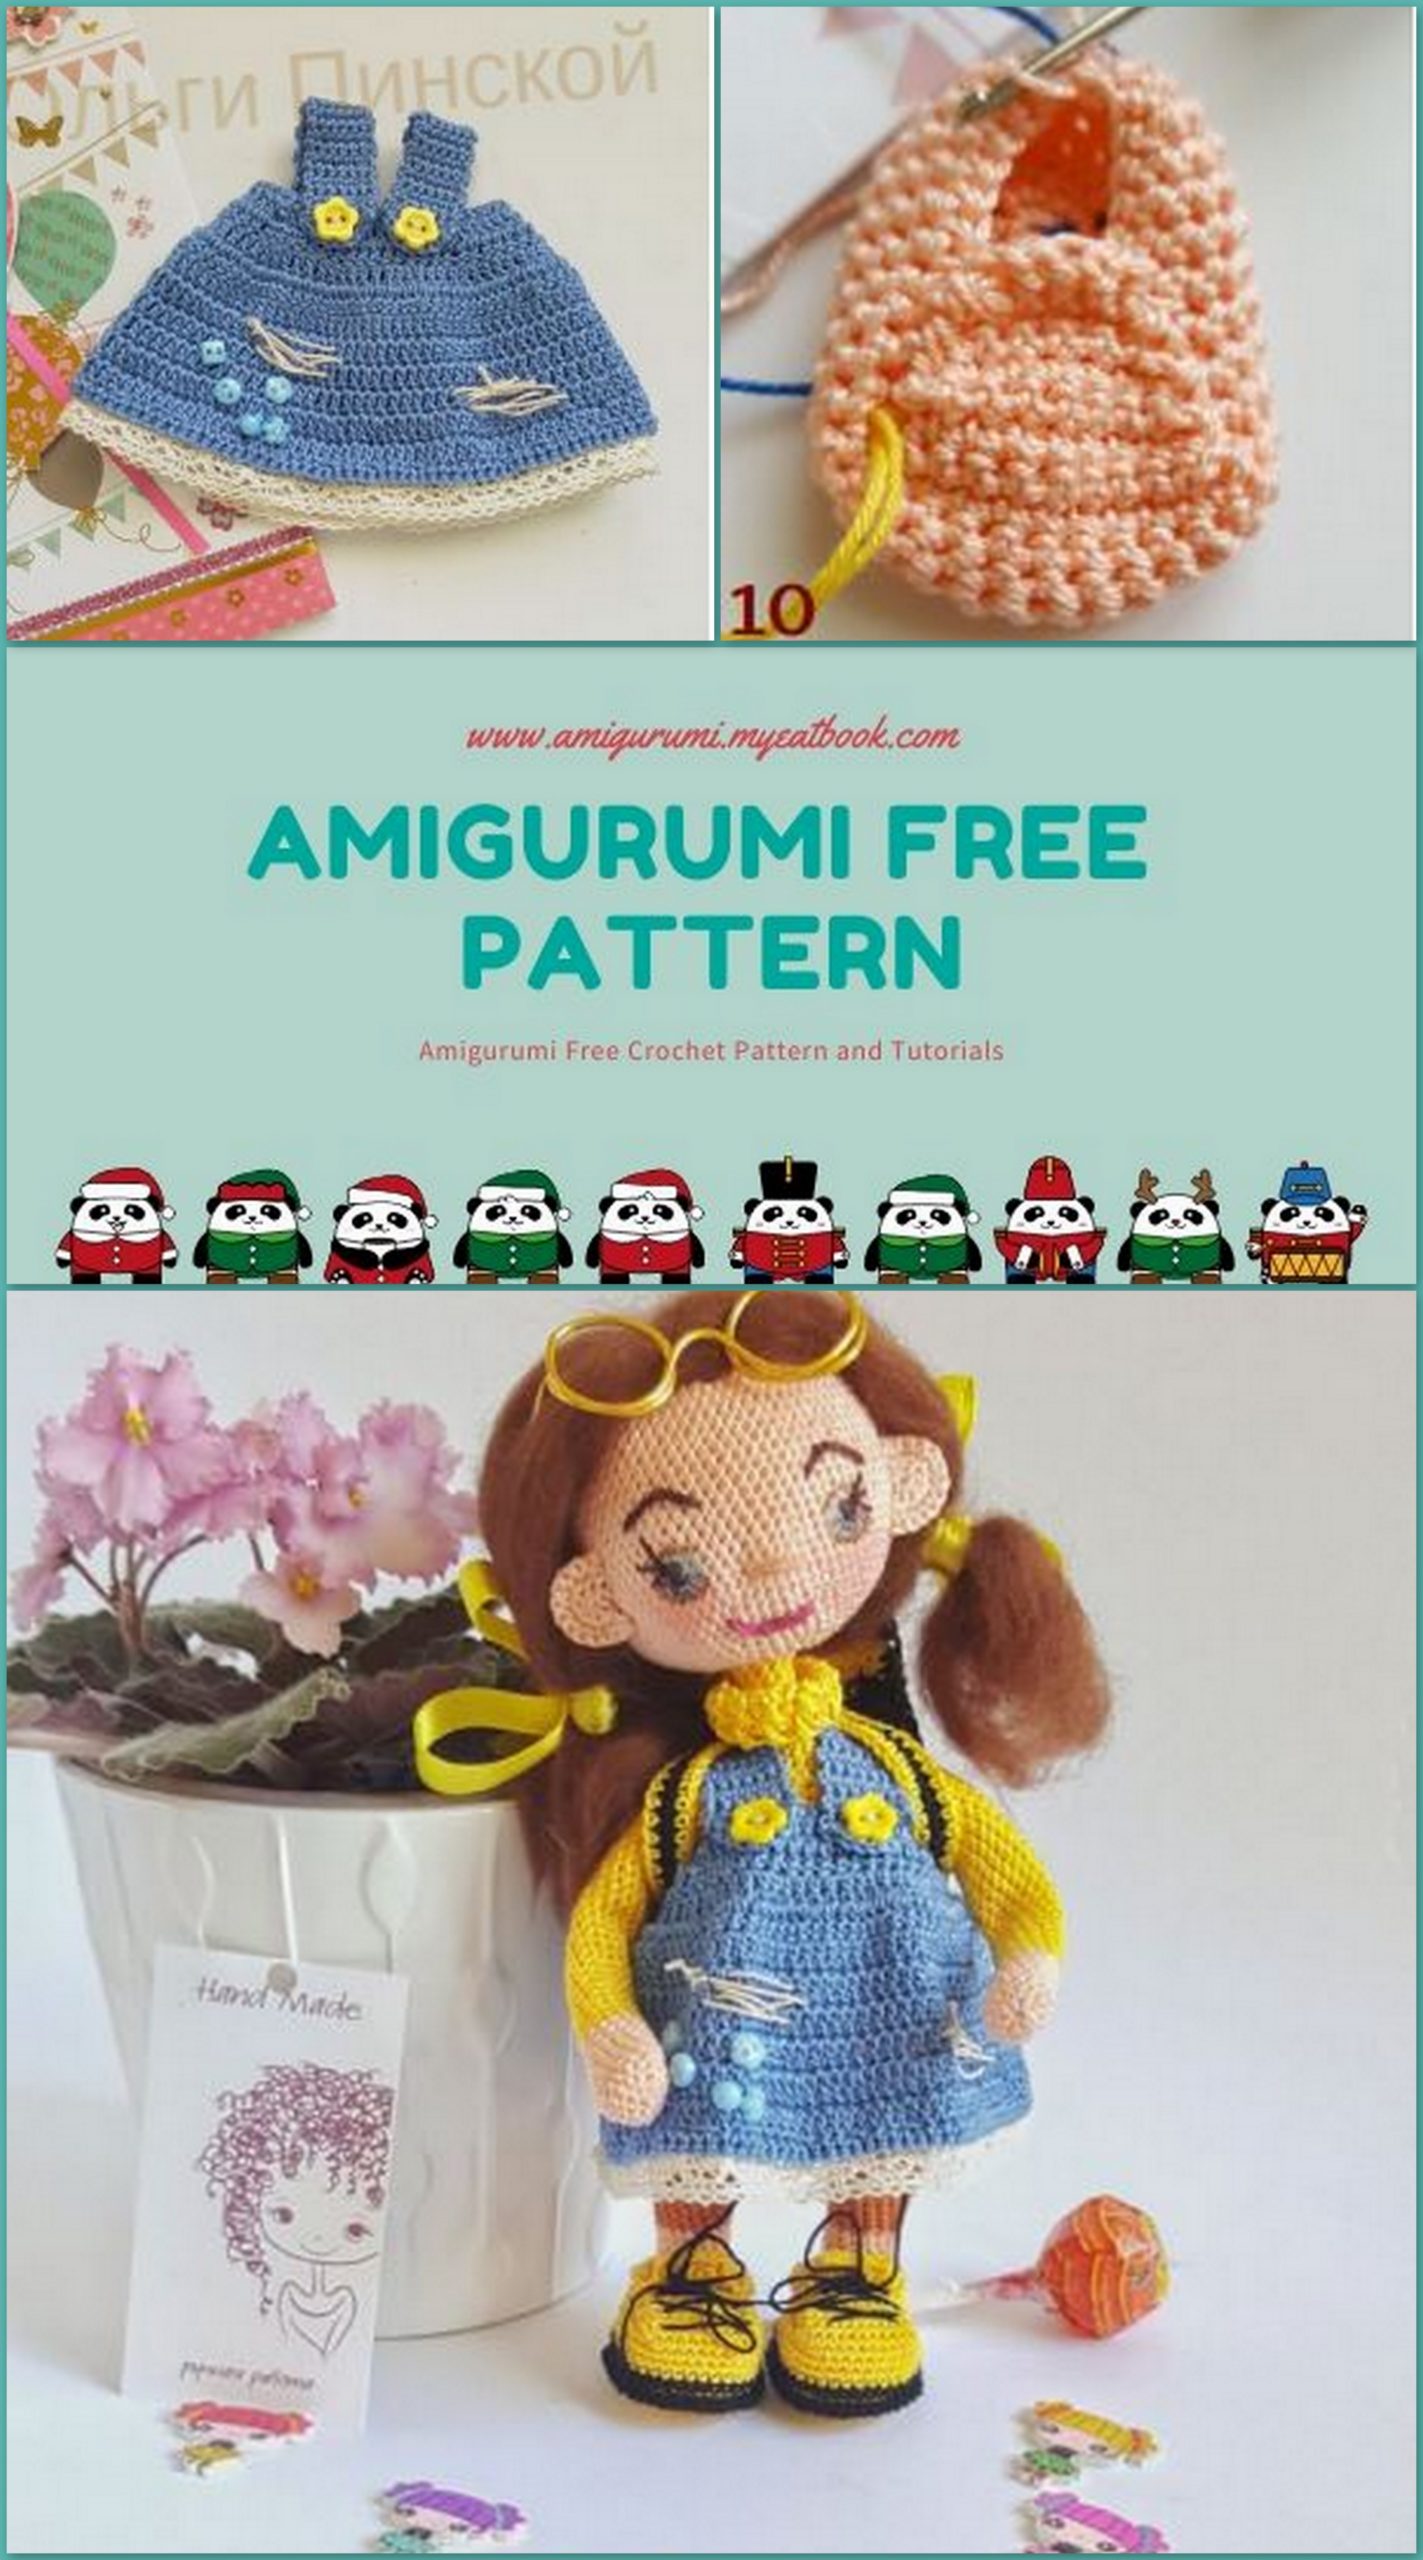
Sundress:
Knit with blue yarn, hook 1.25. We collect a chain of 46
air loops. We start to knit from the 2nd loop from the hook
in rotary rows, we do at the end of each row 2 lifting loops,
if we knit Dc. If we knit Sc (as in 1 row), then 1 lifting loop.
1st row – 45Sc (45)
2 row – (1İnc, 4Dc) * 8, 1İnc, 3Dc, 1İnc (55)
3rd row – 55Dc (55)
4th row – (1İnc, 4Dc) * 11 (66)
5 row – (1İnc, 2Dc) * 22, 1Sl-st (88), close the knitting round and knit further
round
6-8 row (3 rows) – 88Dc (88)
9 row – (1İnc, 2Dc) * 29, 1İnc (118)
10, 11 row (2 rows) – 118Dc (118)
Sundress (continued):
Fasten and cut the thread.
Lay the skirt to you with a slit. We knit from the left edge of the hem
1 – 20 rows (20 rows) – 6Sc (6)
21 row – 2Sc, 5Ch, 2 loops to skip, 2Sc (made a loop)
22 row – 9Sc (9), fasten and cut the thread.
Now on the right edge of the edge, starting on the wrong side, tie
the second strap sundress. Fasten and cut the thread.
Again, lay the sundress with the cut to you, we will tie the cut.
Fasten the thread on the right side at the waist, go to
bottom: 1Sc, 5
air loops (buttonhole), 12Sc, 1Sc in the middle
between sides of the cut, 13Sc. Fasten and cut the thread.
Sew on buttons. Make gray threads look like sewn holes
hem.
The back straps should be crosswise. You can sew on the hem
narrow lace x /. Sundress is ready!
We start knitting in yellow. Hook 1.25. We collect 5 air
loops, knit from the 2nd loop from the hook. We knit moccasins on the front
side.
1 row – 3Sc, 4Sc in 1 loop, 2Sc, 1İnc (11)
2nd row – 2İnc, 2Sc, 1İnc, 1Sc, 1İnc, 3Sc, 1İnc (16)
3rd row – 1İnc, 1Sc, 1İnc, 3Sc, (1İnc, 1Sc) * 2, 1İnc, 3Sc, 1İnc, 1Sc (22)
4th row – (1İnc, 1Sc) * 2, 1İnc, 5Sc, (1İnc, 1Sc) * 2, 1İnc, 5Sc, 1İnc, 1Sc (29)
5th row – (1İnc, 1Sc) * 2, 1İnc, 9Sc, (1İnc, 1Sc) * 2, 1İnc, 9Sc, 1İnc (36)
6th row – (1İnc, 1Sc) * 3, 11Sc, (1İnc, 1Sc) * 3, 13Sc, knit another 6Sc to
mid heel (42)
We put a marker.
Loafers moccasins (continued):
7 row – 42Sc for the back half-loop (42)
Change the color to black. We leave the yellow thread as if inside
boot.
8th row – 42Sc (42)
9 row – change the color to yellow (do not cut the black thread, leave as
would be inside 42Sc (42)
10, 11 rows (2 rows) – 42Sc (42)
Now we will make the soles of the sole. At the black thread we leave the tip
about 1 m long, cut and pull out at the beginning of the 7th row, where
started to knit for the back Flo. Flip the moccasin sole
up, as in the photo and we knit (1Sl-st (connecting column), 1 Ch) * 42. A thread
fasten and trim.
The result was such a beautiful and even edging.
We begin to knit the foot. The principle is the same as on the leg. Marker (at
me blue) strictly in the middle of the heel.
12 row – 15Sc (side) we put a black marker for control,
11Sc, 12 and 13 Sc for the front half-loop together (decrease),
rotation without Flo photo 1
13 row – into the 2nd loop (1Sc skipped) 10Sc, 11 and 1Sc from the side
together (decrease) for the back half-loop, turn without Flo
Loafers moccasins (continued):
My Instagram My website-store My group in contact
14th row – into the 2nd loop (1Sc skipped) 9Sc, 10th and 1Sc with side
parts together (decrease) for the front half-loop, turn without Flo
15 row – into the 2nd loop (1Sc skipped) 8Sc, 9th and 1Sc with side
parts together (decrease) for the back half-loop, turn without Flo
16th row – into the 2nd loop (1Sc skipped) 7Sc, 8th and 1Sc with side
parts together (decrease) for the front half-loop, turn without Flo
17th row – into the 2nd loop (1Sc skipped) 6Sc, 7th and 1Sc with side
parts together (decrease) for the back half-loop, turn without Flo
18 row – into the 2nd loop (1Sc skipped) 5Sc, 6th and 1Sc with side
parts together (decrease) for the front half-loop, 11Sc
19 row – 11Sc, 1Dec (12th takbik and 1Sc from the tongue), 5Sc
We knit further the tongue.
20-24 rows (5 rows) – 5Sc rotary rows (at the end of each row
lifting loop) if 5 rows for your moccasin
too much, do 3 or 4, but do the strapping on the front side!
Next, we make a beautiful strapping moccasin. We do the binding
front side !!!
25 row – make an air loop, knit on the side of the tongue
(1Sl-st, 1Ch) * 4, in the interval between the tongue and the side of the moccasin 1Sl-st, 1Ch,
further along the top of the moccasin (1Sl-st, 1Ch) * 22, in the interval between the side and
tongue 1Sl-st, 1Ch, on the side of the tongue (1Sl-st, 1Ch) * 4, in the corner loop of the tongue
(1Sl-st, 1Ch) * 2, by tongue (1Sl-st, Ch) * 5. We fix the thread and cut it.
Photos 2 and 3 show a decrease in the same way as we knitted legs (without
binding to a row).
Loafers moccasins (continued):
Loafers loafers are ready. You can make laces or leave it like that.
Hair and ears:
We will do the hairstyle for the chrysalis. I used this kind of wool for
felting, ordered for a long time on Aliexpress.
Hair (continued):
The wool is rolled up. Expand, put on the head and try on
what length do you want to leave. Cut the excess.
Now holding your hand firmly, define the parting line. Along
insert and remove the needle for felting with reciprocating lines. Do it slowly first, as if
lay the part. Then walk through the parting several times until
hair will not be fixed.
I forgot about the ears, so I sewed them in the process of felting hair.
Therefore, I show here.
We knit the ears like that.
In the amigurumi ring, dial 6Sc, knit
rotary rows. At the end of each row
make a lifting loop.
1st row – 6İnc (12)
2 row – 12Sc (12), fasten the thread,
leave the tip for sewing.
Try on the ears and sew.
Hair (continued):
When parting is firmly held, divide the hair into
top and
the lower part, as in the photo. First on one side of the parting
roll the needle in place
th border. Then do the same
on the other hand.
Then lay the doll in front of you and slowly lower the top layer
to the bottom. Tie the ponytails. Many hairstyles. Imagine!
Eyes:
We embroider eyes with an iris of dark brown color (it is possible black) or
floss floss.
Put the doll in front of you! Count from the last row of the neck
(beginning of head) about 17-18 rows up. Find the center of the face and
pin with a pin. From the center of the face, count 7 bars to the left and
Right, pin the pins to these points.
Now we introduce a needle with a long thread, as shown in photo 1 in the right
upper corner of the pupil. We embroider a square 1 * 1 stoblik.
Outline eyebrows and embroider. Then we make cilia in the form of a trefoil from
upper outer corner of the eye.
Eyes (continued):
Showing the process on a doll is very inconvenient. So I drew you
a diagram of how I retouched my eyes.
Photo 1 is what is embroidered with threads of iris or floss.
Photo 2 painted on the top and bottom of the eyelids with a felt-tip pen on fabric (color
took brown)
Photo 3 shaded the iris with a pastel blue pencil.
Photo 4 with a blue felt-tip pen seemed to shade the iris from below.
Felt-tip pen must be drawn by pressing lightly and very carefully. Paint
Only felt-tip pens for fabric. Ordinary will spread and that’s it
spoil. We will do the nose at the level of the lower eyelid. The mouth can be embroidered
or draw with felt-tip pens too. Try on a hundred times first, then
draw! Make your cheeks brown, spout a little brown toned!
Author’s doll Olga
Pinskaya
Such eyes turned out. You can leave it like that. But I decided a little
retouch them using felt-tip pens on fabric and pastel
pencils.
Eyes (continued):
Here it is our Bilaniya-Milaniya)))
My dear, I wish everyone to enjoy the creation of this doll!
Knit for yourself, your relatives and friends! Give, sell, just
keep this girl for yourself!
Thank you for knitting in my master classes)))